Want to know The Truth About CPM?
Showing posts with label Amazon EC2. Show all posts

01 February 2015

Taking 11.1.2.4 for a spin in the cloud

Giving thanks

As most of you know, or should know by now, yr. obt. svt. is a complete, full, and unreserved infrastructure idiot.  As most of you also know, or should know by now, that the 11.1.2.4 EPM suite has just been released.  And with this, I am faced with a conundrum:  I need (well, I want) to play with the latest release, but I will need about a month (yes, really, if I do it after hours) to get the !@#$ thing to install on my VM.  So here I am, between trapped between Scylla and Charybdis.  What to do, what to do, what to do?  I want to do a test drive, but I’ll get to it done in time for the first patch.  Ugh.

Metavero to the rescue in the cloud

John Booth has solved the problem – he has created another of his EPM Amazon Web Services AMIs (Amazon Machine Instance).  Get an AWS account and fire up John’s AMI  (see Tim German’s post on how to go through the steps on this), and off you go to EPM 11.1.2.4-land.

This blog post is not going to be much about connecting to the cloud as Tim German will be covering the mechanics (and quite a bit more) over on his blog; I’ll just note the highlights and the some of my stupid mistakes intrepid adventures in the new AMI.  This post will also cover an interesting thing I discovered about Planning 11.1.2.4 and Hybrid.

As an aside about the cloud – as you know, Oracle is making a huge push into that area with many of their products.  There’s Planning and Budgeting Cloud Service which has been a runaway success, surprising many in its popularity, and I expect there will be many more like services.  What is somewhat amusing is that John and I presented on EPM in the cloud at Kaleidoscope (as it was called then) 2010.  And we had…about 30 people in the room.  It’s not often I get to lead the market, but apparently when I do, no one cares.  :)  They do now.

Running the new Metavero image

What it looks like

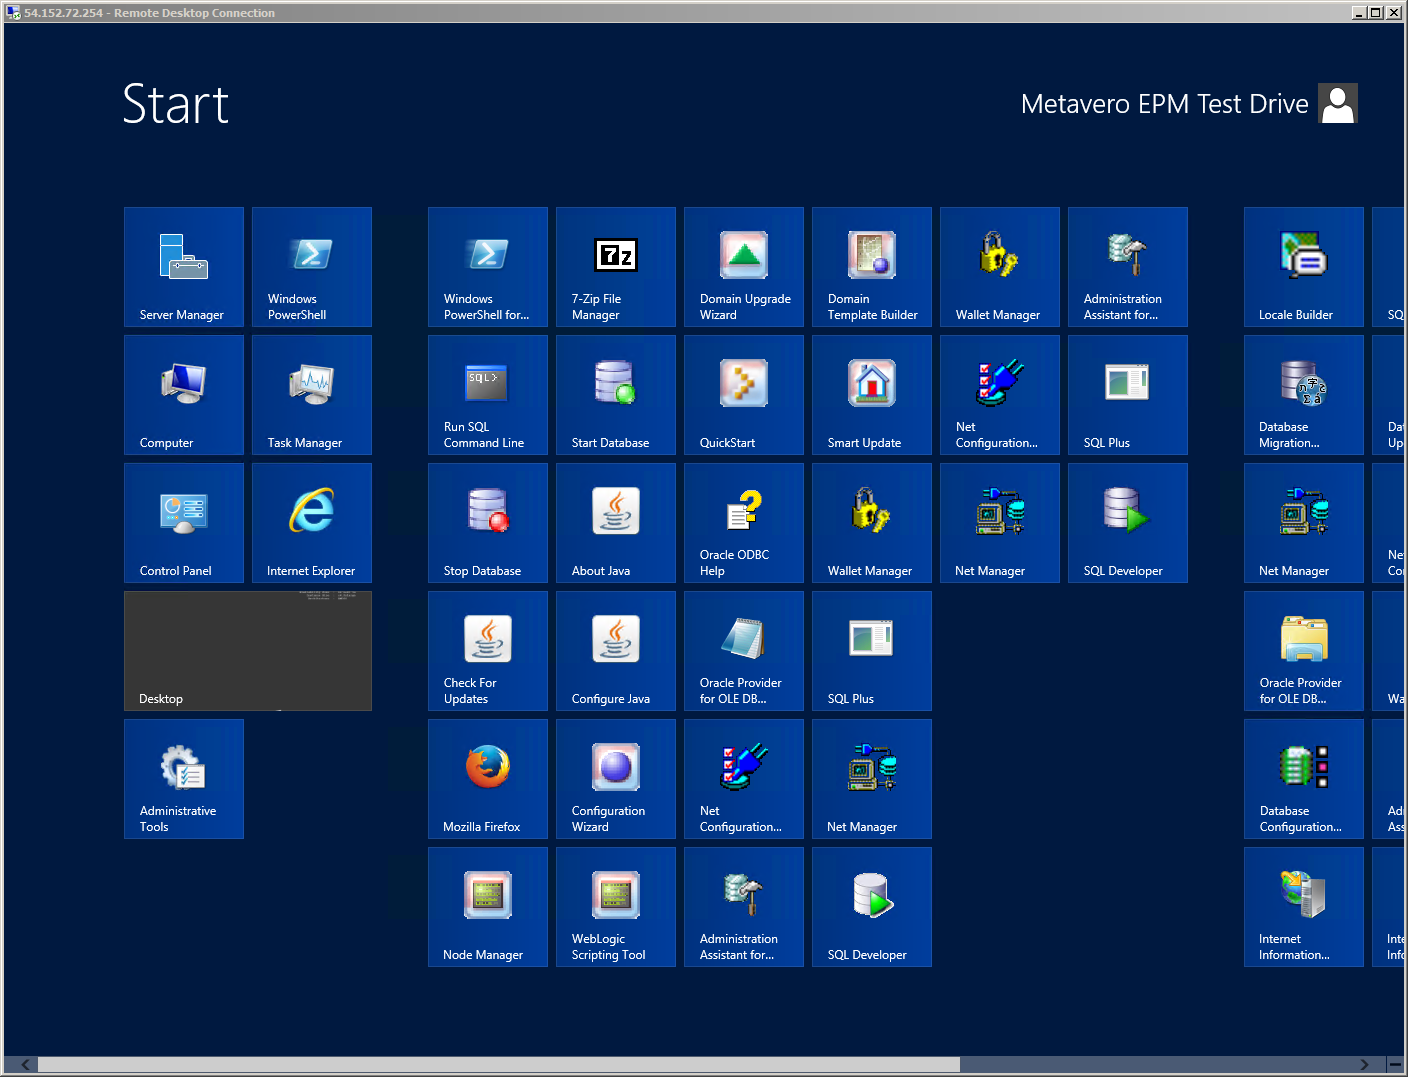
OMG, it is Windows 2012.  I cannot (well, I can and am) tell you how much I hate this interface.  And no, it is not because it is unfamiliar, it is because it sucks.  Hey, why not break 20-odd years of interface so a server can look like a tablet?  Sounds like an excellent idea.  Only not really.  Okay, rant out of the way and I’ll show you how John mitigated this less than stellar approach.  Here’s hoping that Microsoft update the UI to match the rumored not-completely-awful Windows 10.  Fingers crossed on this one.

Again, the whine is over and here it is:
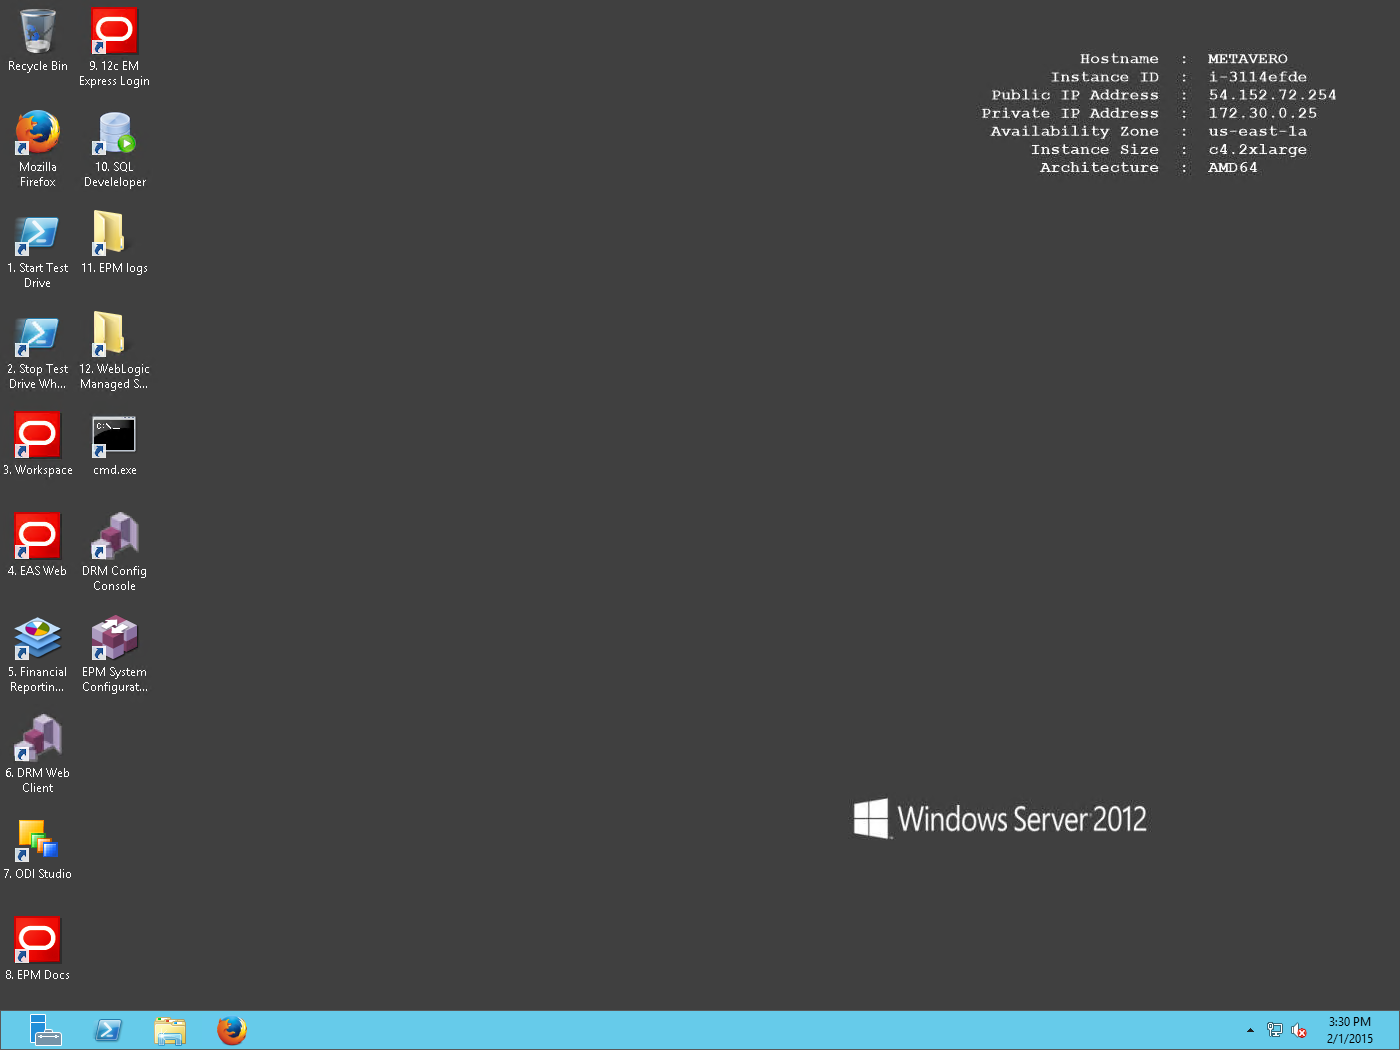
As you may note, John has put the most important icons onto the desktop so you can get going as quickly as possible.  If you hit what-passes-for-the-Start-menu on the 2012 instance, you will see all of the detailed shortcuts you need.  You have heard my rant about this subject so I willl spare you any more of my vitriol.
Actually running EPM

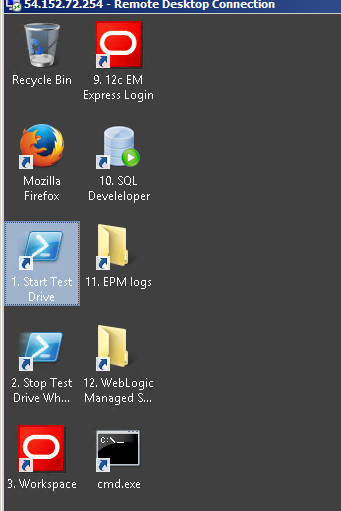
The AMI does not automatically start up the “compact” EPM service.  You must do so by clicking on the helpfully numbered 1. Start Test Drive icon.

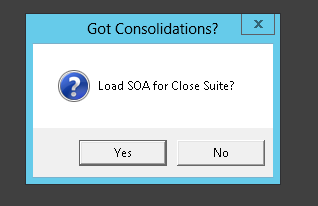
That will bring up a dialog box asking if you want to run some who-knows-what-but-I-don’t-care (I am an Essbase/Planning guy, not a bean counter – no offence intended towards those with a green eye shade) portion of the EPM 11.1.2.4 suite.
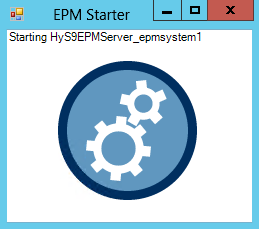
You will then see a cool graphic John created to let you know that the instance is Working, Working, Working.  It will not be overly fast, alas, but that’s hardly his fault..
Creating a new database for Planning

While that is slowly starting up, let’s create a new Oracle database (note that SQL Server is gone, gone, gone) user instance.  Navigate over to EM Express Login either on the desktop (I went to this because when the starting image is showing the desktop icon is blocked).
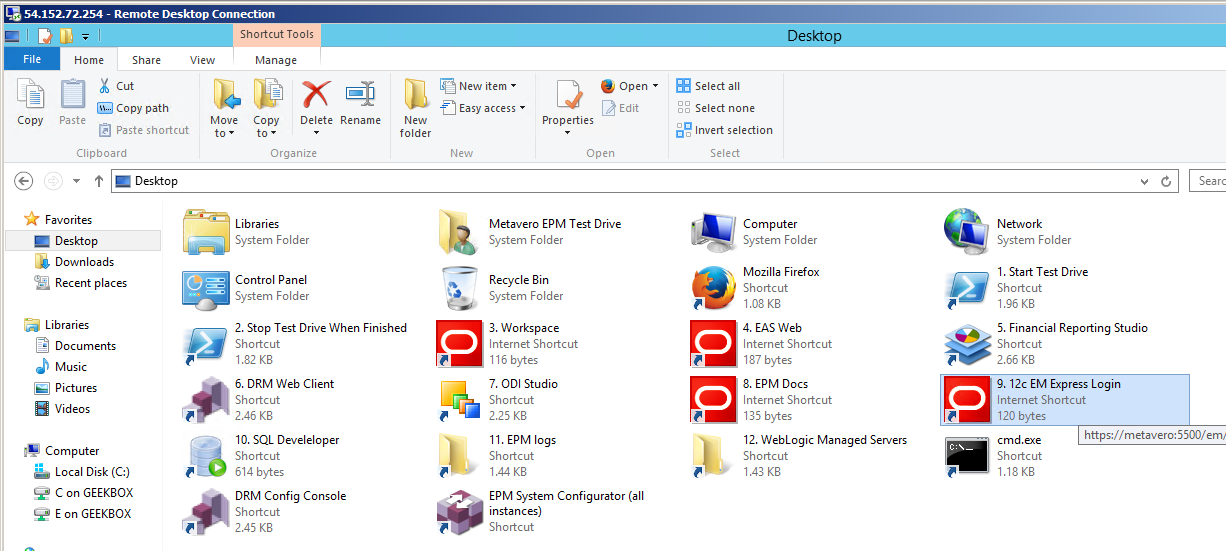

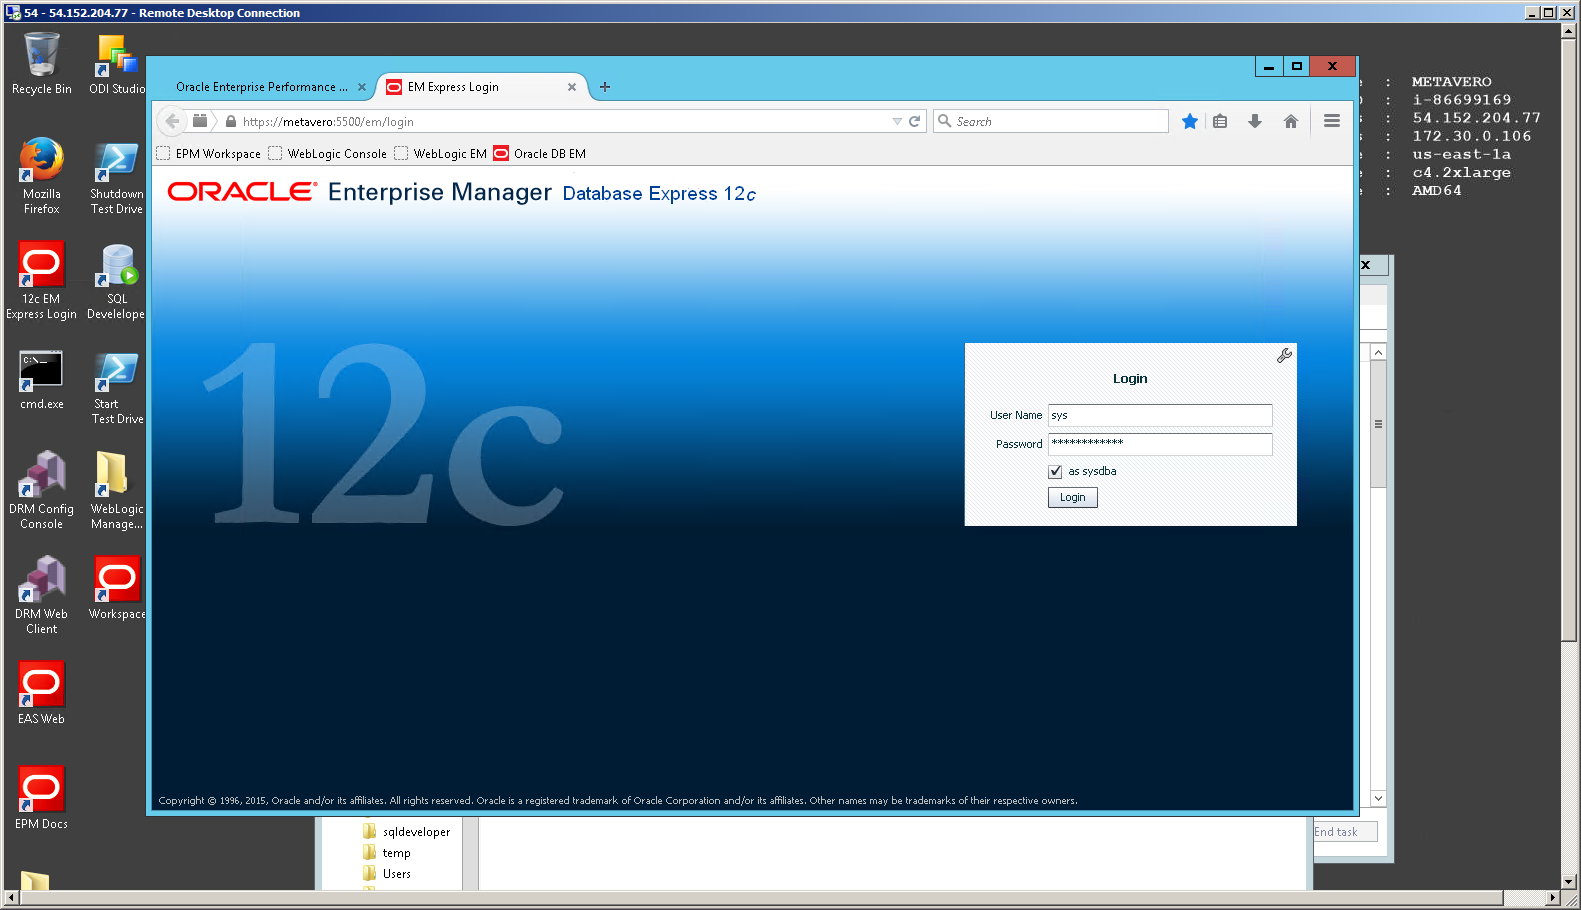
Lauch that, log in as sys using the common epmtestdrive123 password making sure you tick the
“as sysdba” box:
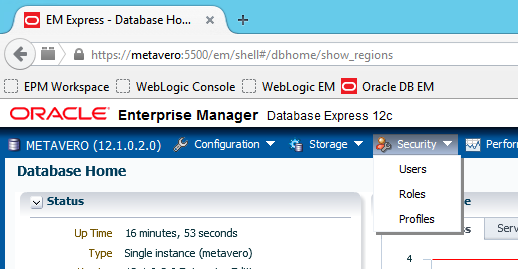
Go to Security:
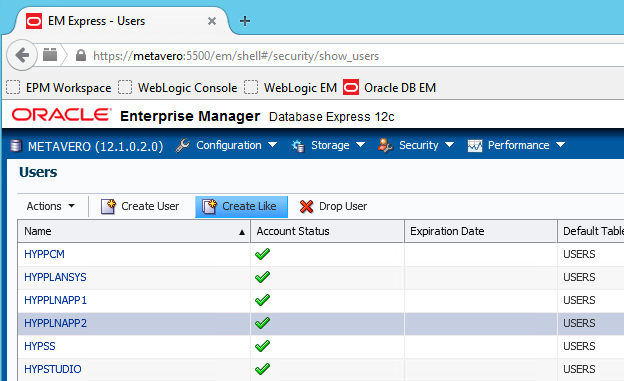
Click on the HYPPLANAPP2 user name (for us SQL Server types, this equates to, sort of, a database) and then click on Create Like.
Name your user and give it a password.  For sanity’s sake, I used the epmtestdrive123 password.
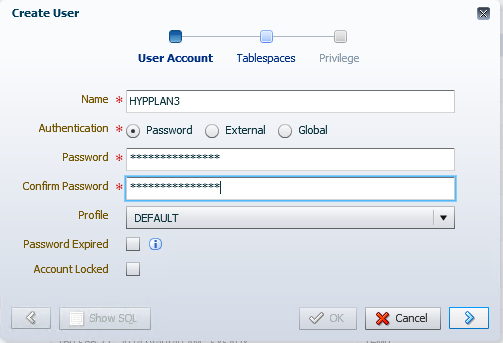
Follow the dialog box, taking the defaults each time.
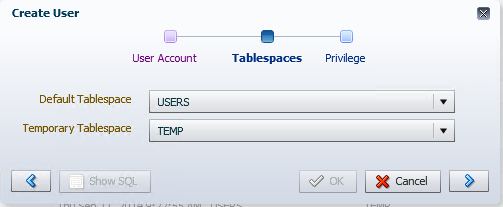
Again, the defaults:
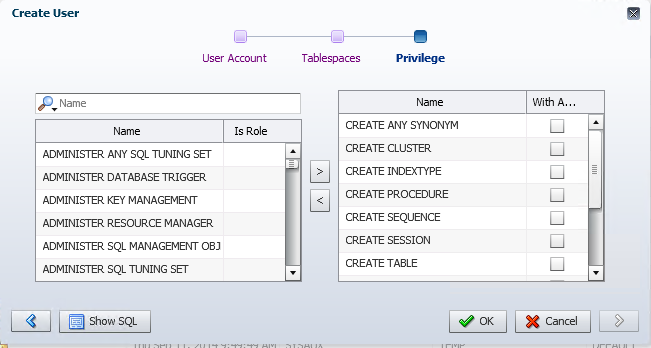
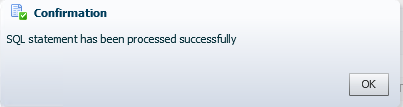
Ta da, you have just created a new user in Oracle.
Hello, Workspace and Essbase

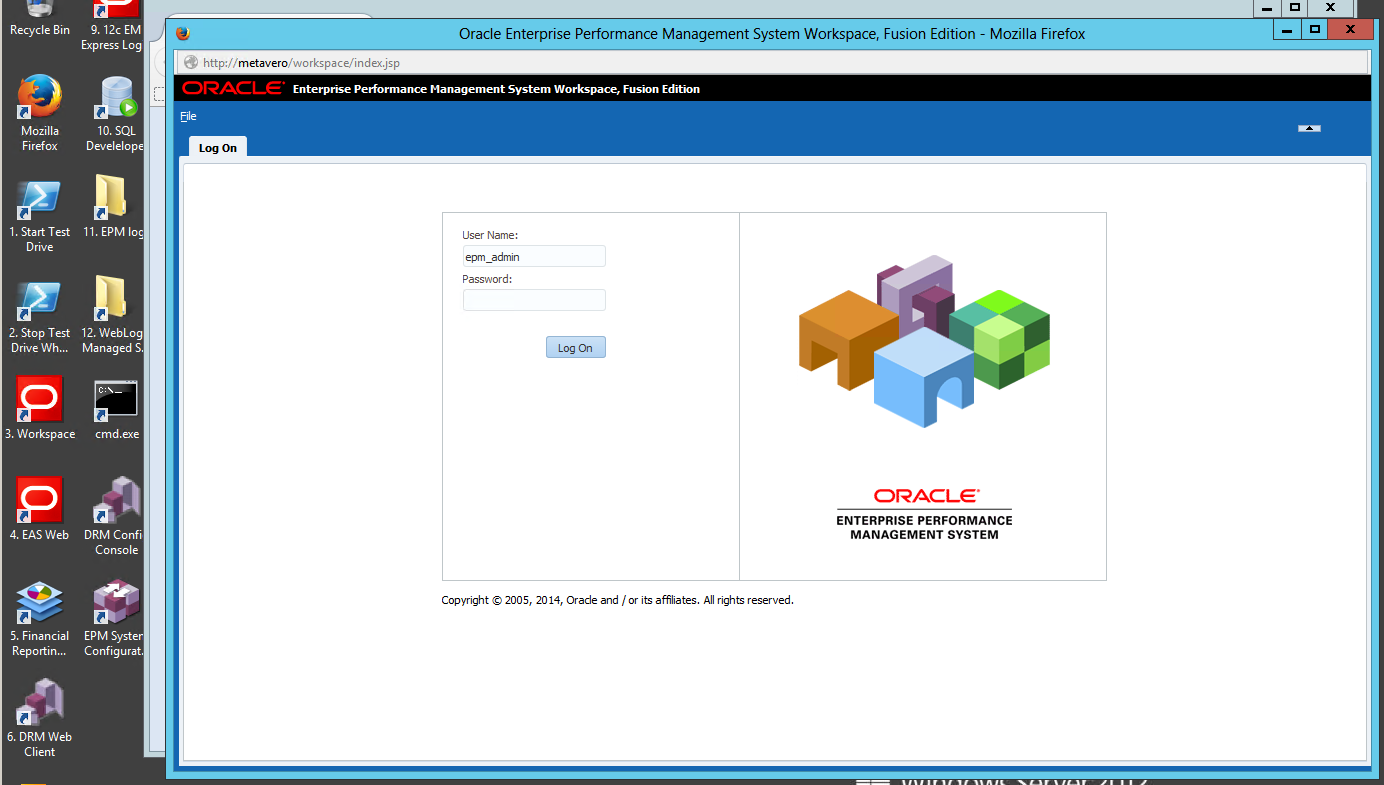
And now that you’ve done that, EPM 11.1.2.4 should be ready to go.  Go ahead and log in as epm_admin/epmtestdrive123.
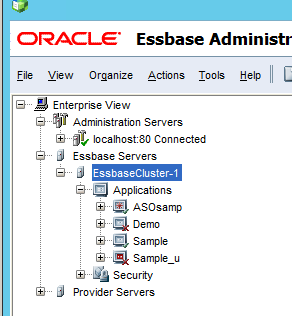
If you want to be wild and crazy, go ahead and launch EAS off the web as well:
Don’t do this

Do not use epmtestdrive, ‘coz that:
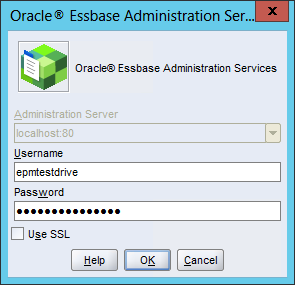
Will lead to this:
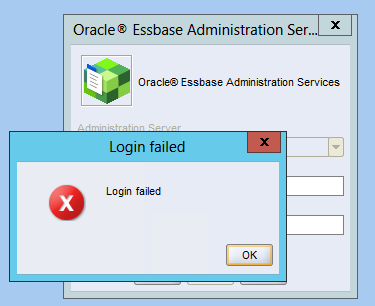
Oh agony.

Do this

Instead, use epm_admin/epmtestdrive123:
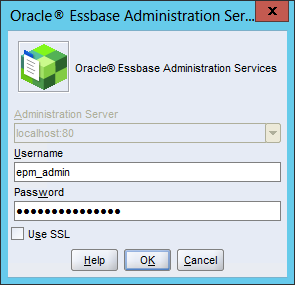
Success!  Boil in bag!
Back to Planning

Creating a Planning data source is no different than in 11.1.2.3.x.  I’m not going to bore you with any of it save the Oracle settings for us SQL Server types as it is a bit different:
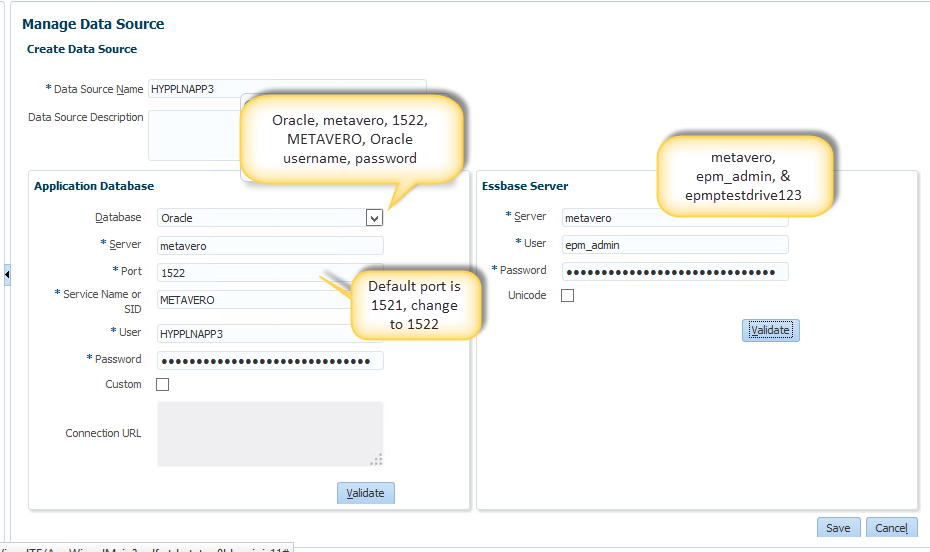
Make sure that you don’t use the default 1521 or you will spend a long time cursing and whining and moaning.  Not that I could possibly tell you what that is like from personal experience.

Once you have created the sample Planning application, go on and log into Workspace.  It looks pretty much the same as does the Vision app from 11.1.2.3.x:
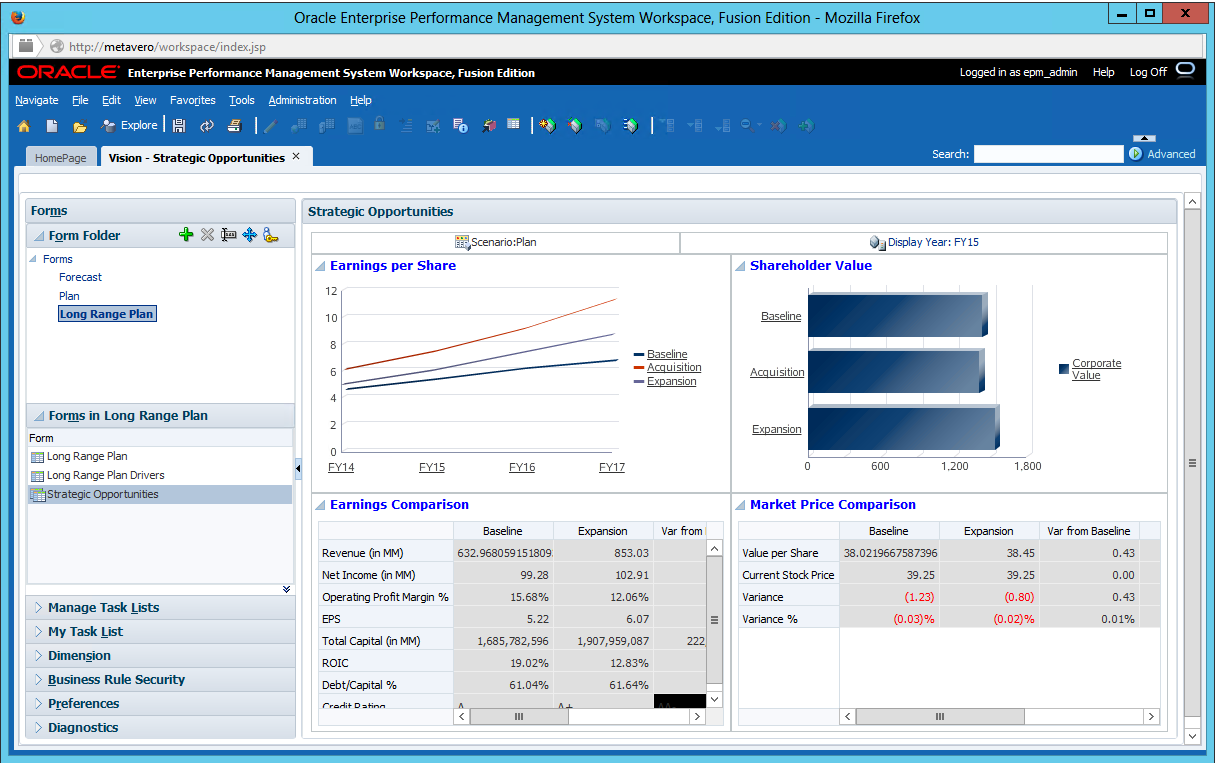
Playing in the Cloud, or at least looking like it

Of course, if you want to pretend you are on PBCS, simply go to http://metavero/HyperionPlanning and see the lovely new UI:
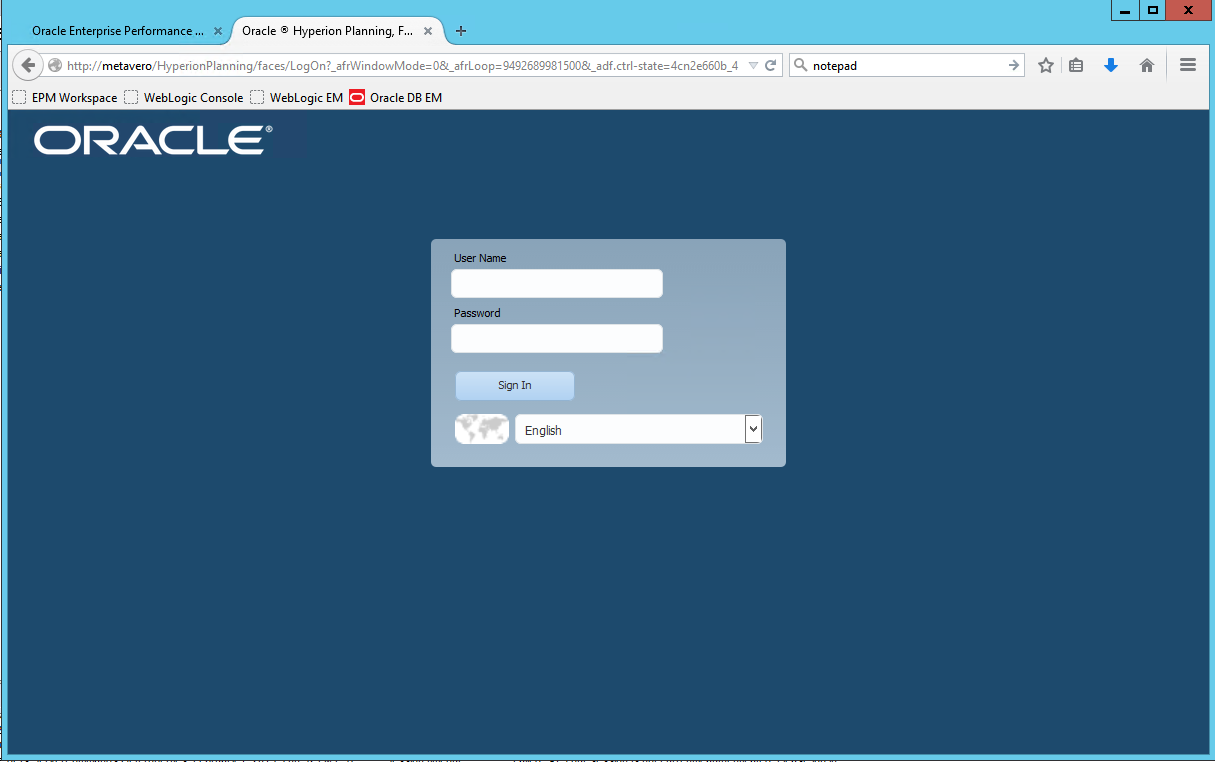
I couldn’t seem to view the Vision sample application, so I deleted it through the pretty UI and then created it again:
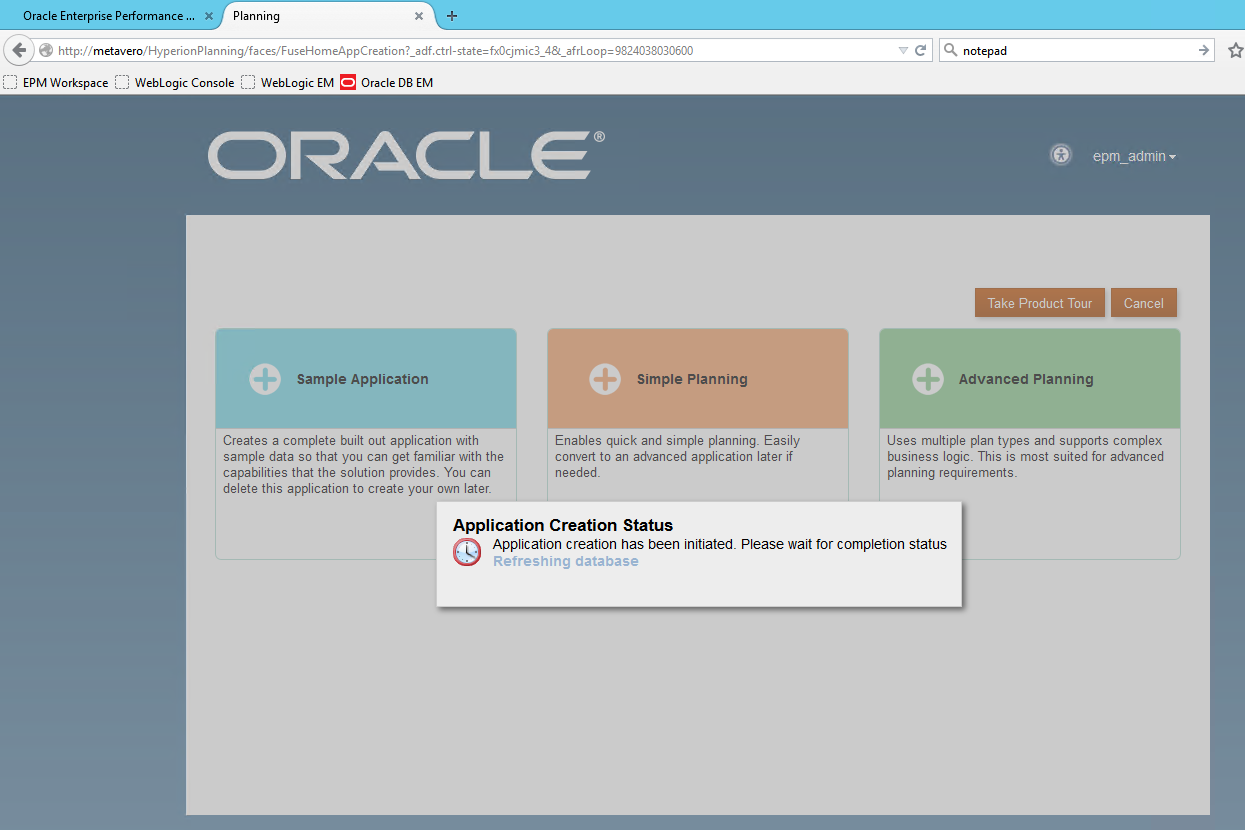
Where in the world…

And…I couldn’t see any forms:
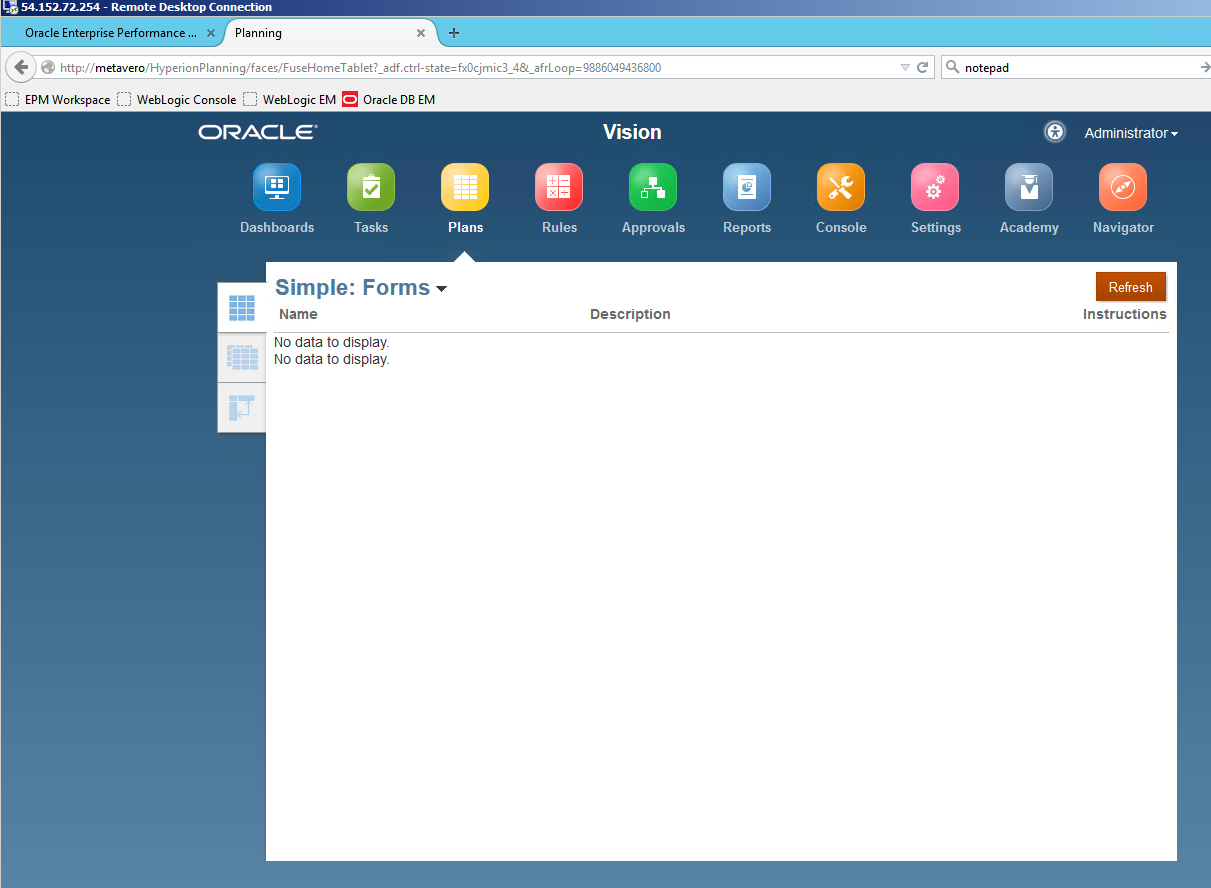
Nor could I see any Dashboards (I have to admit, I’m not totally sure what that equates to in Workspace):

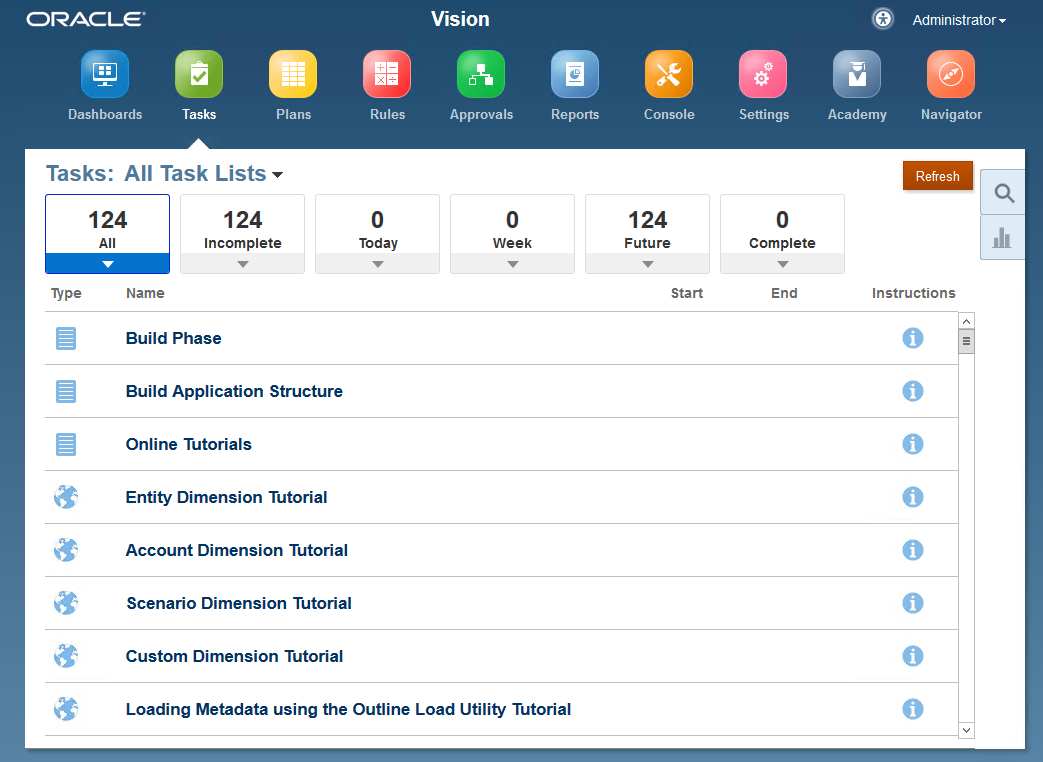
But I could see Tasks:

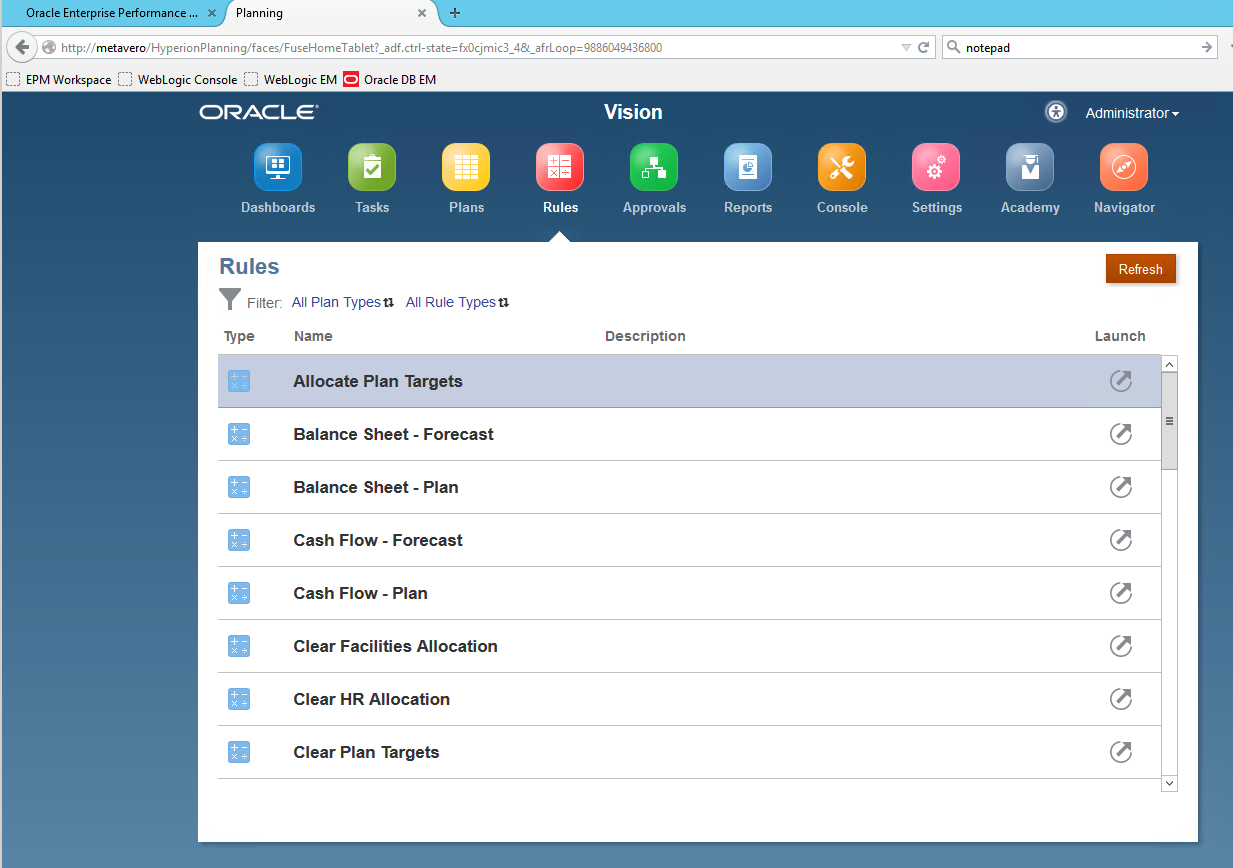
And Rules:
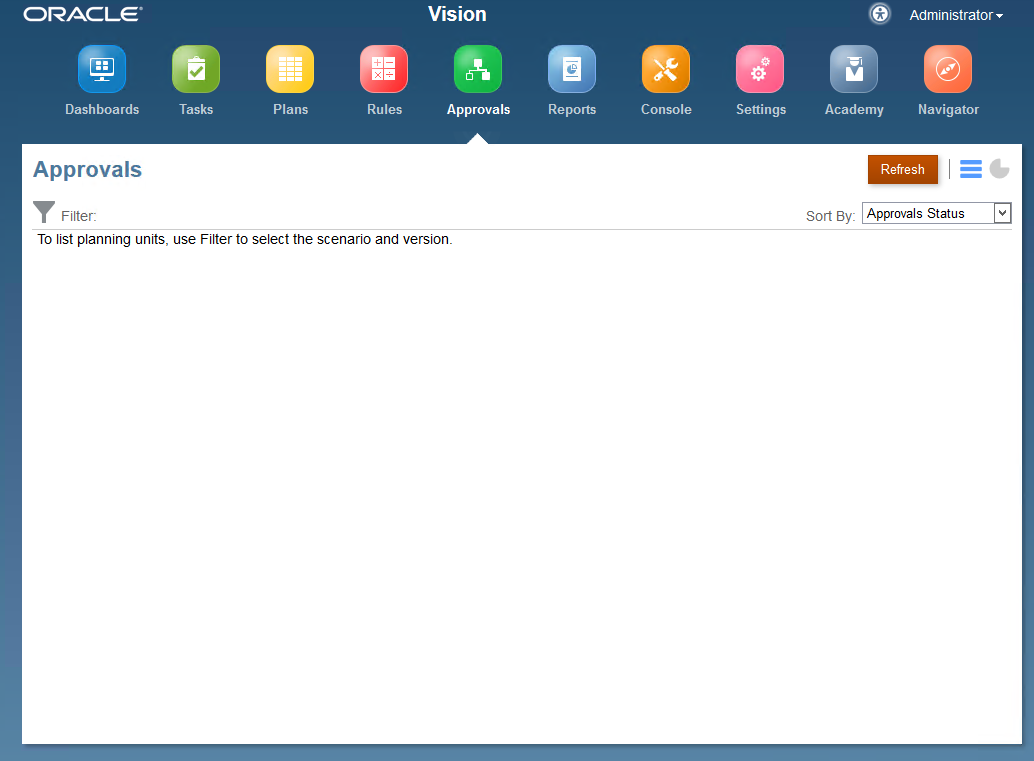
No Approvals:
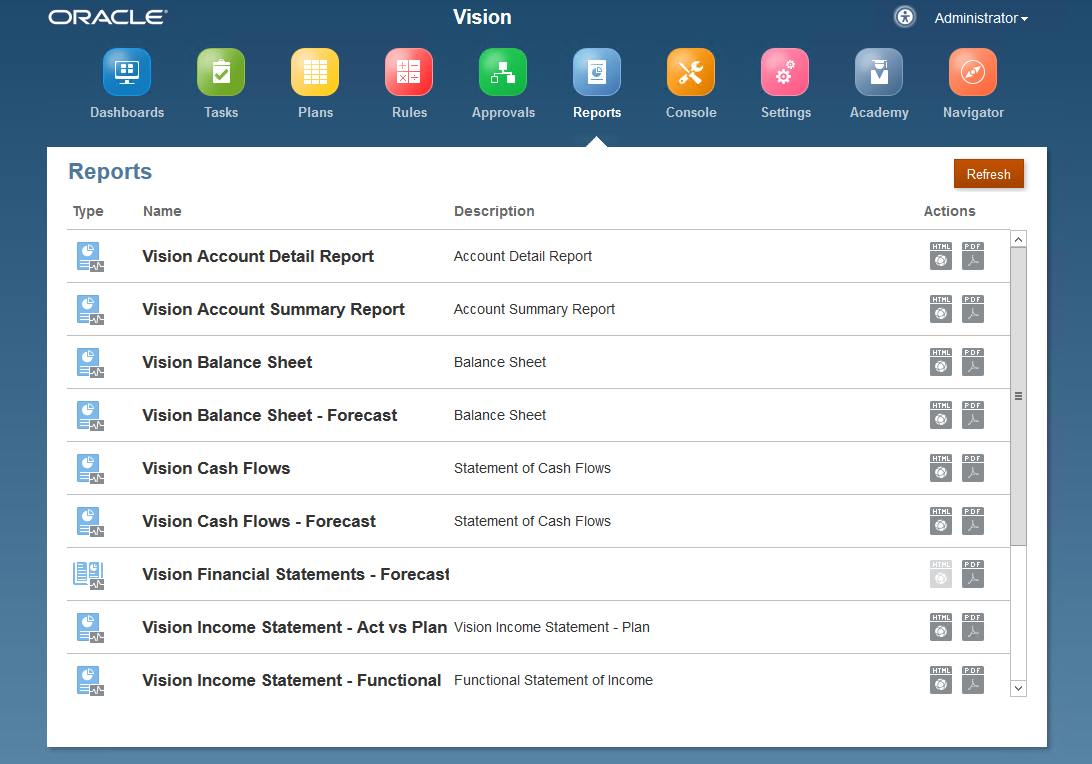
But Reports:
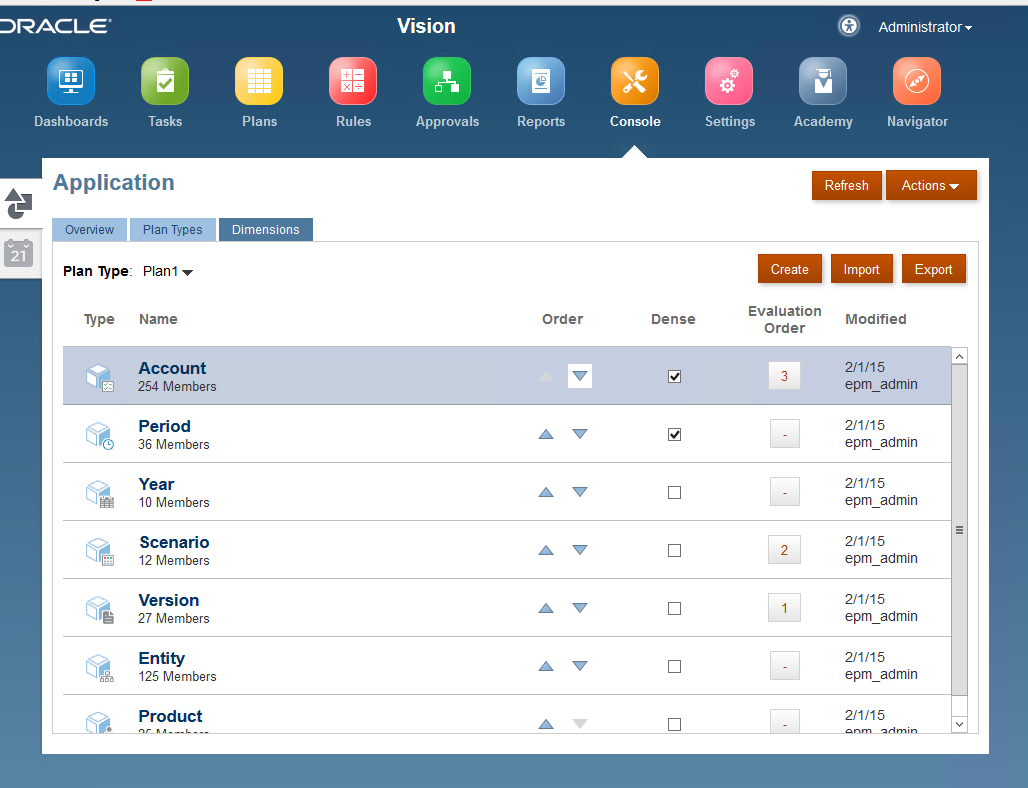
And the Console:
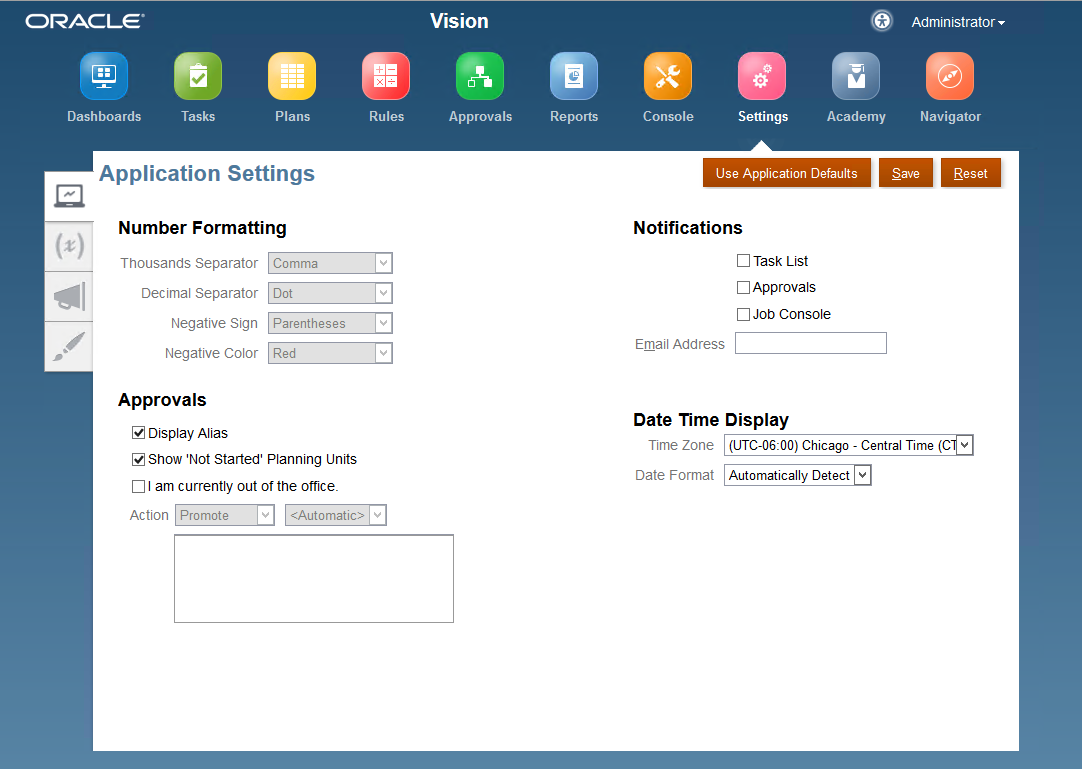
And Settings:
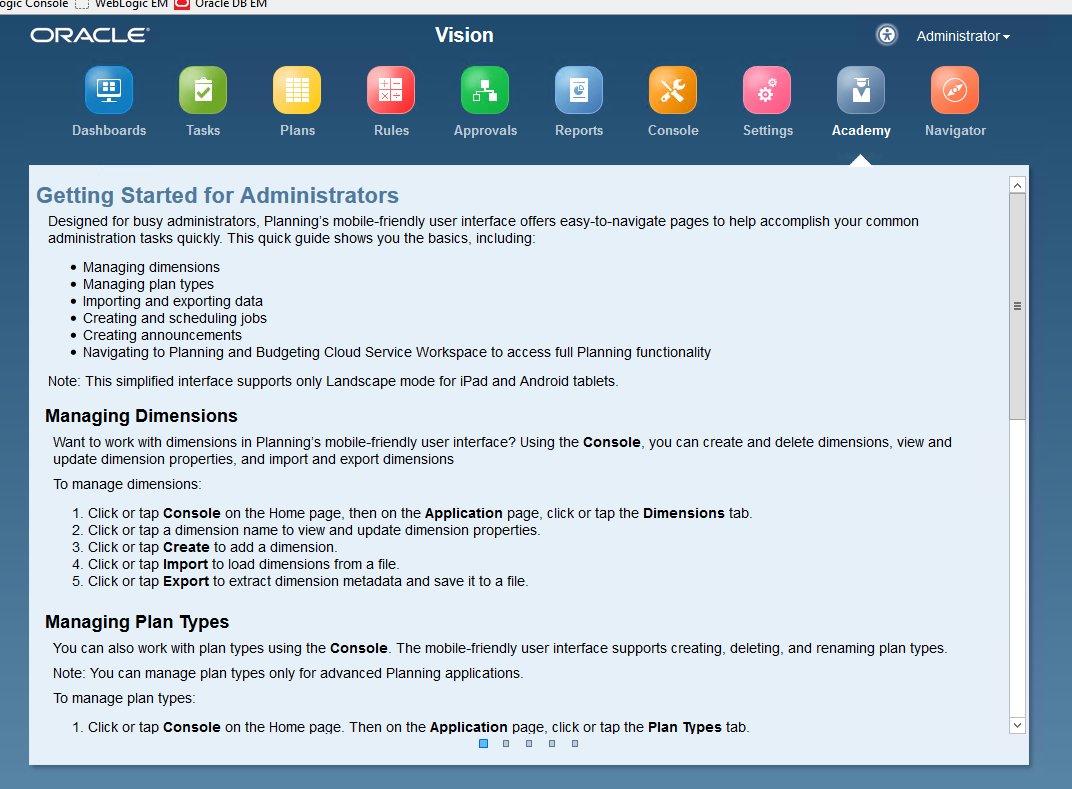
And Academy:
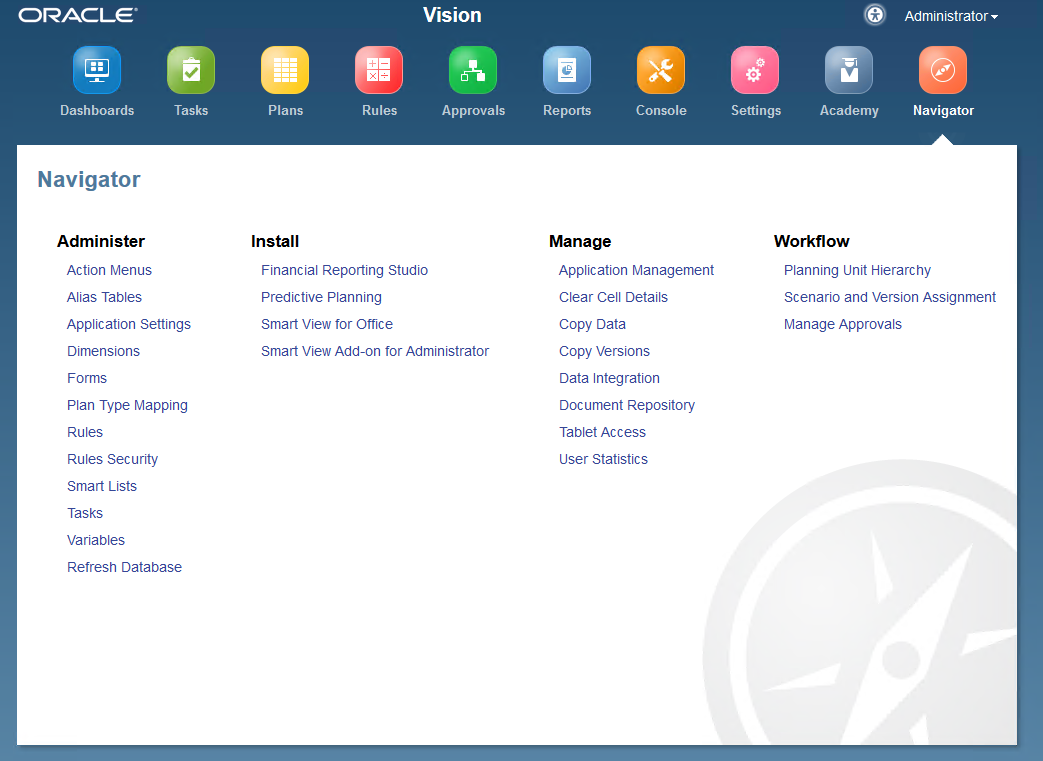
And Navigator:
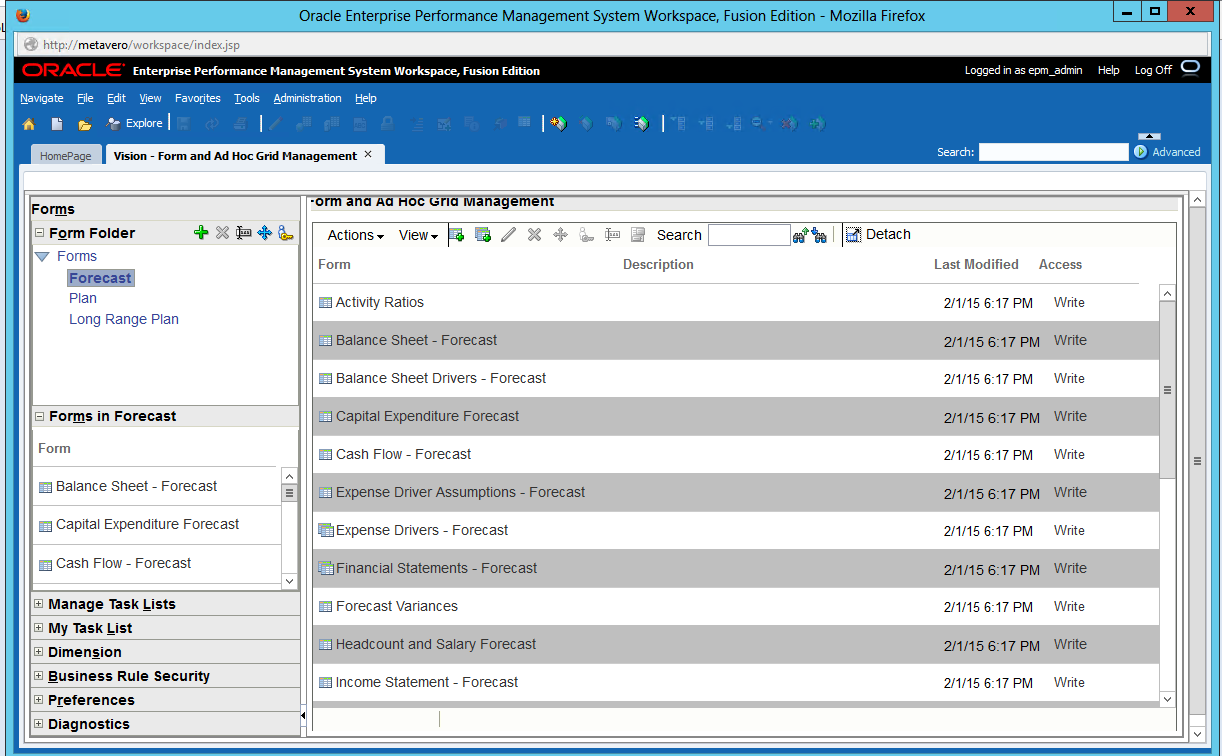
So what happens when I go back into Workspace?

I see Forms:
And Approvals:
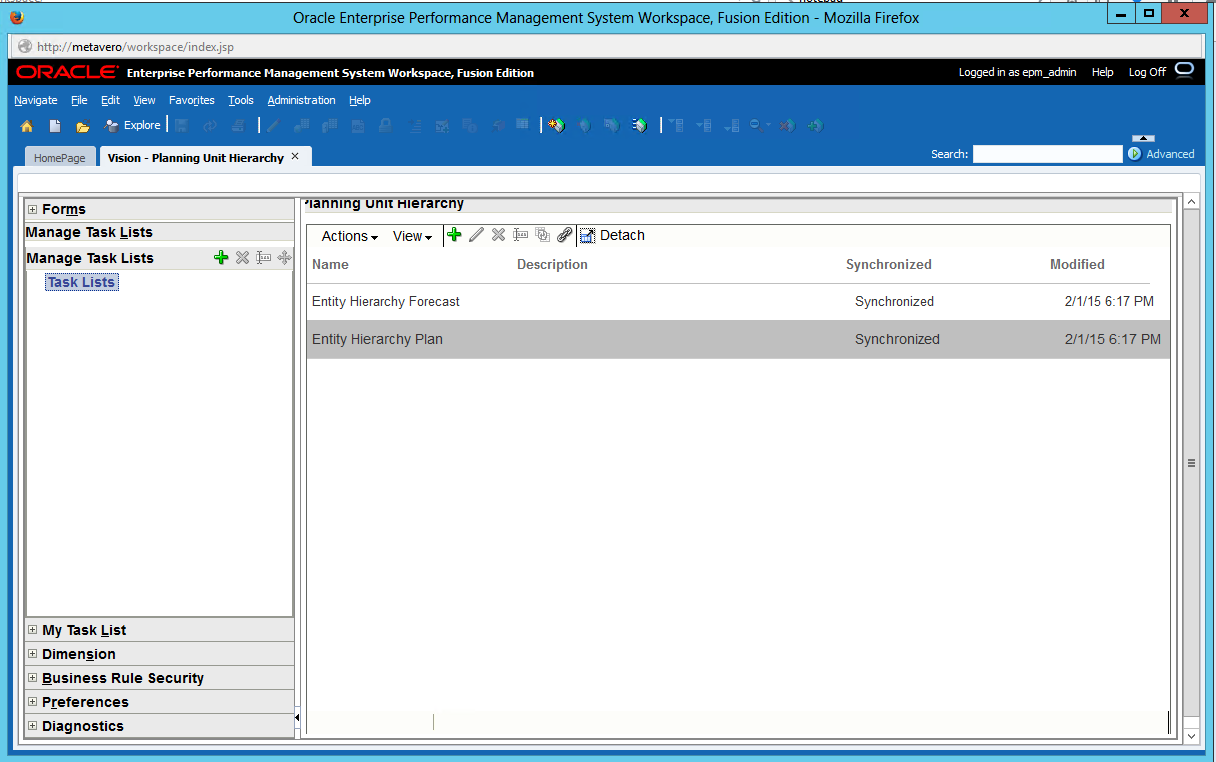
So that’s a weird one that I am putting down to some kind of bug or some kind of idiocy on my part.

The good news

Hybrid aggregations?  They’re there both in the web UI and Smart View:

Here’s my starting number.
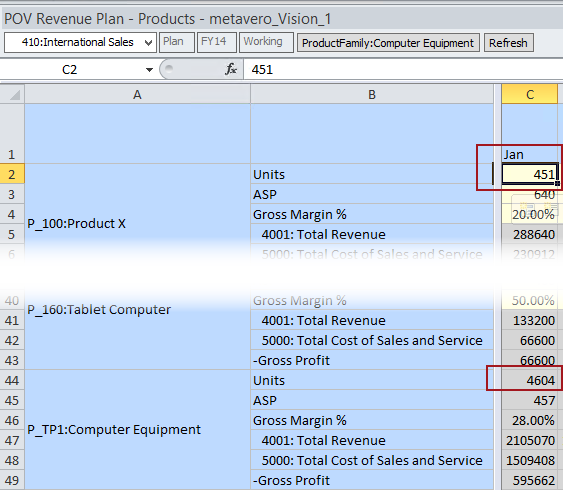
And a change in Product X’s Units to 999 from 451.
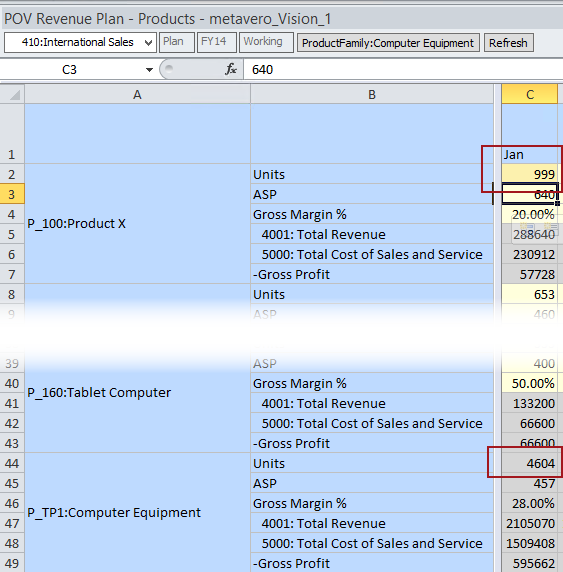
Do a submit and the Computer Equipment total is changed.
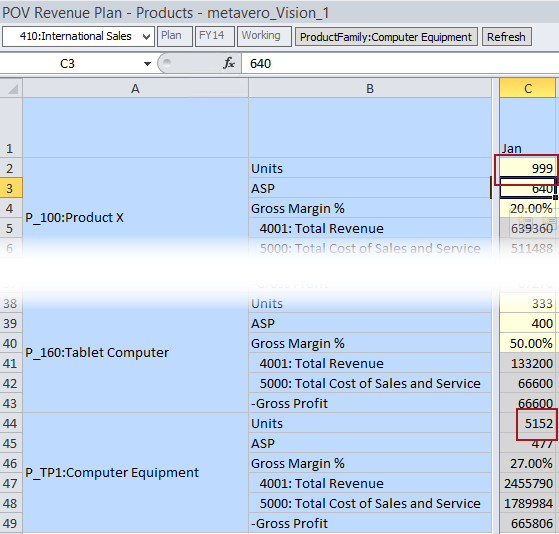
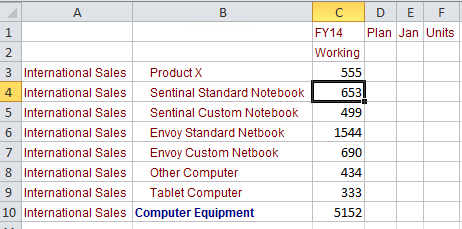
So what happens if I do it in Essbase?  Same change of data.
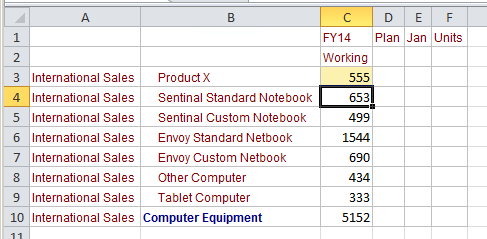
And…nothing.  Bummer.
And what gets more interesting is that the Essbase.cfg does not have the ASODYNAMICINBSO setting for the Vision application.
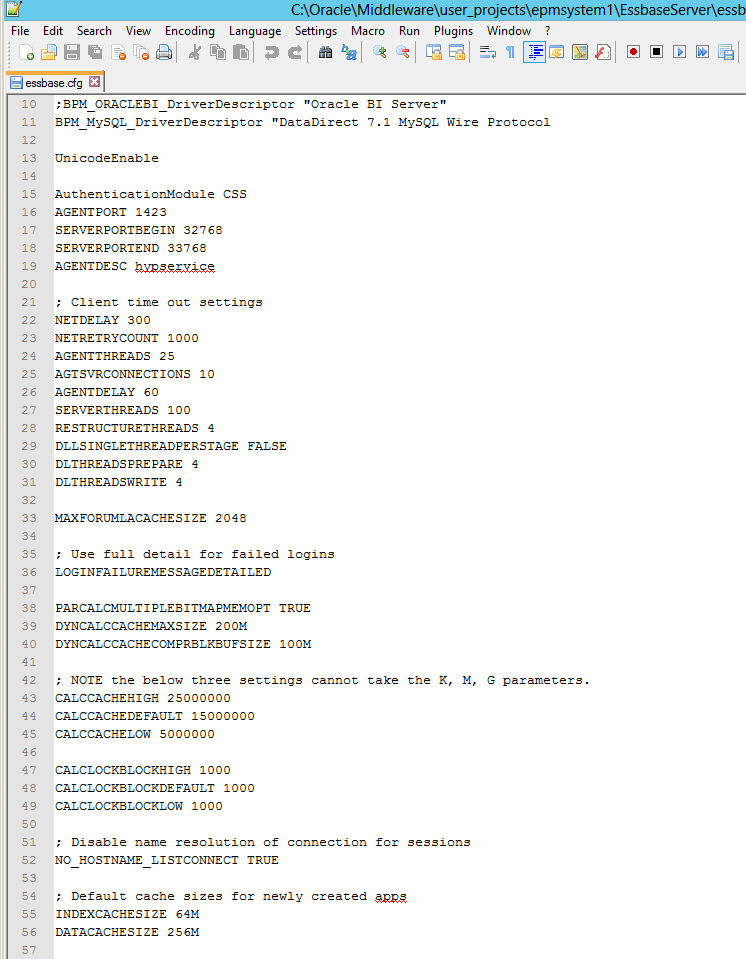
I can only surmise that this is because of the requirements of the cloud which do not allow manipulation of the Essbase.cfg.  I believe this means that all 11.1.2.4 Planning applications are Hybrid without any choice.  I have to read the documentation a bit to see if this is a correct guess or not.

Stop the World – I Want to Get Off

John tells me that it’s a really good idea to stop the Oracle database in a graceful manner.  Happily, there is an icon – 2. Stop Test Drive….  Go ahead and click on it.
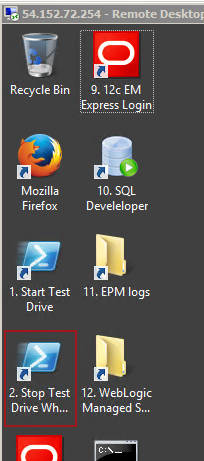

That will automatically shut down Windows:

Thankfully this takes care of Shut Down, as I couldn’t find the !@$%ing Shut Down link.  See, I am sparing you (most of) my Windows 8 and Windows 2012 Server rant.  You’re welcome.

Make sure you have no running instances in AWS:
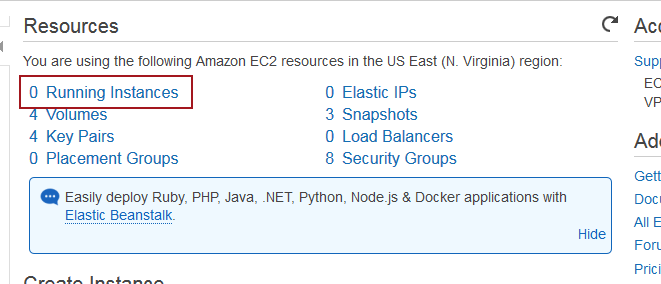
You will still get billed for storage, but not for running costs.  

NB – This instance shuts down at 3 am automatically.

The end for now

I strongly urge you to get your feet wet on John’s AMI.  There’s lots of stuff that I’ve just barely scratched the surface, especially as the whole Financial Close product suite is really terra incognita to me.

Personally, I will be installing 11.1.2.4 on a VM both to save costs and because I like wearing a cilice as penance for some kind of technological sin that I am not actually aware of.  I’m sure I’m guilty of whatever it is.

Putting aside my manifold neuroses and insecurities, John has give the EPM community round the globe something to really spend time on, and in, as we learn the intricacies of how 11.1.2.4 really and truly works.

Thanks again, John, for making this available.

Be seeing you.

28 August 2012

Bringing the Cloud down to the Ground and no, the result is not fog, part 2


Getting it onto your local machine

Still with me?  You must be else you wouldn't be reading this.  I think.  Anyway, you’ve dutifully read part 1 of this two part series and converted an AWS EC2 instance to a VMWare Workstation (in my case, at least) instance.  So now the question is – how oh how oh how do you get a BIG file off of the Cloud?  

This is not a hard step but it takes a long time because of the size of the files.  Note that if you get rid of those media files or if you have a faster connection than my DSL line it isn’t quite so painful.

Compress it to make it fast(er)

Although I suppose you could do this without using the installed 7-Zip compression program, I can’t see why you would.  

Dan did a bunch of experiments with getting the best performance out of 7-Zip, and found that the Lzma2 method with 24bit word and 256mb block and 8 threads was the fastest options settings.

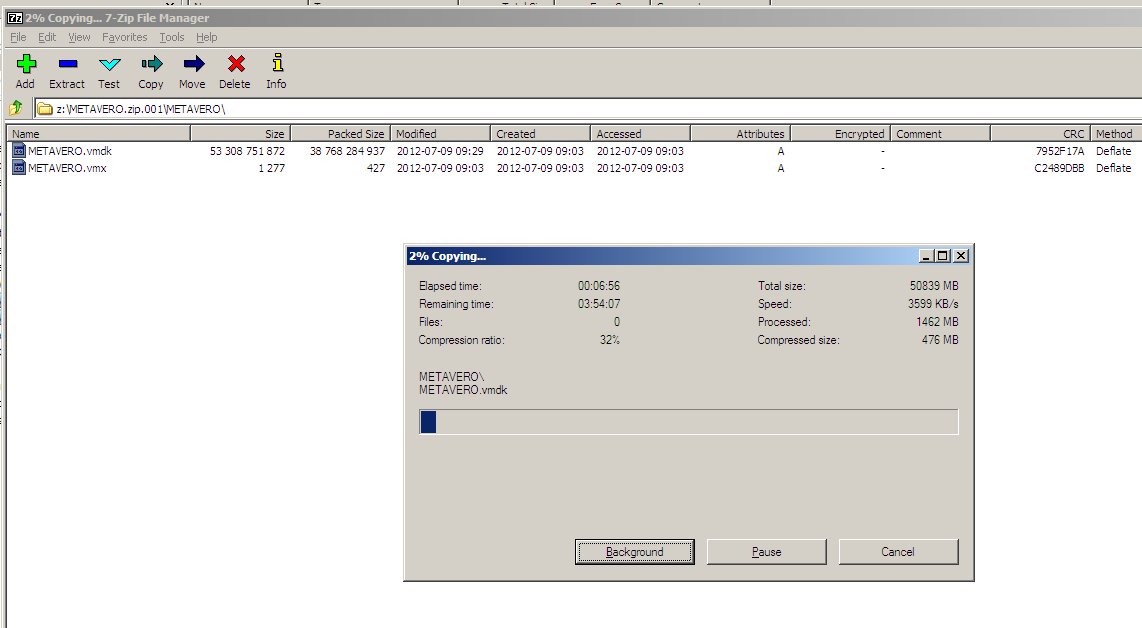
I am not going to show the individual steps for doing this – you can just take the defaults on the compression but it will take longer/be bigger/be slower on the download but I suggest trying Dan’s settings.

Downloading the compressed files

I’ve done this four different (What, you think I know all of this stuff before I write it down?  If only.  Nope, I have to blunder through the options until I get to the right answer.) ways:
  • Transferring the file(s) from the AWS instance to a FTP server and then download them (this got me a nastygram from my internet provider because of size and download threads which ate up the box for everyone – whoops, so firmly rejected on my part).
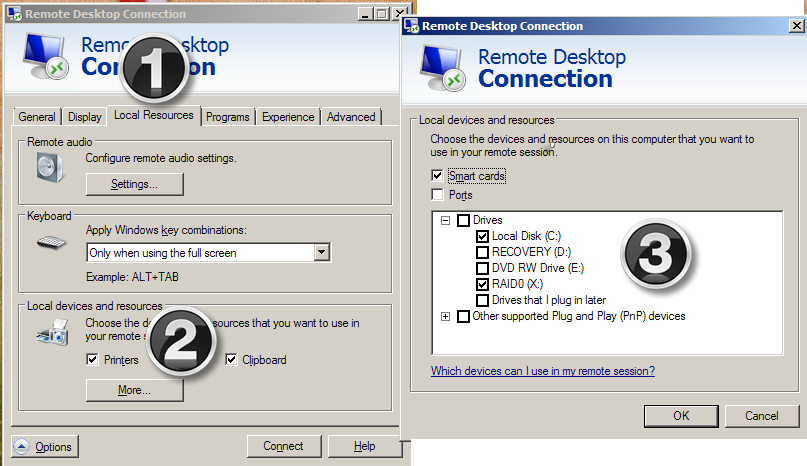
  • Use Terminal Services to transfer the files.  Just follow the three steps below in the TS client.  You must set this before you connect to your instance.  Your local drives will then look like mapped drives from AWS.
 
  • Setting up an FTP server on your AWS instance and downloading from there.  Note that you will need to open up the default port of 21 in your AWS Security Group/firewall.
  • Use AWS’ S3 – This is the way I did it.  It’s a little confusing at first, but Cloudberry Explorer makes it dead simple.

Using Simple Storage Service (S3)

Given the other three (two really, I would avoid the first approach of sending the file (or files if you split them up) to an external ftp source) approaches, why use S3?

I used 7-Zip to both compress the VMWare files and to split it up into DVD sized (4.7 gigabyte) files.  I have had (Oracle e-delivery is where I’ve experienced this before) issues with my wonderful (can you tell it annoys me?) DSL connection.  What happens is that the files get downloaded, look like they’re valid, but in fact are corrupt.  

S3 allows me to redownload parts of my VM that fail.  It’s a pain to do that, and slow, and it costs (S3 charges you for downloads – pray that you have a better internet connection than me) but it is better than downloading everything over and over again.  Also, it gives me (and you, too) a chance to learn a new technology.  I should mention that John Booth mentioned S3 as an approach – as always, he has some really great ideas and I am at least smart enough to listen to them.  :)

I am not going to provide a detailed tutorial on S3 but suggest that you read here.  I essentially treat S3 as a super easy to set up FTP Cloud server that does not require me to configure the AWS instance’s IIS settings.  Note that most Cloud-based services such as OpenDrive or Box limit the size of uploaded files.  My provider, OpenDrive, has a file limit of 100 megabytes per file, so with my 4.7 gigabyte files, I really had to come up with another approach.

If you are interested in other tools other than Cloudberry, have a read of this thread.

If you are interested in using Cloudberry, read this very nice tutorial.

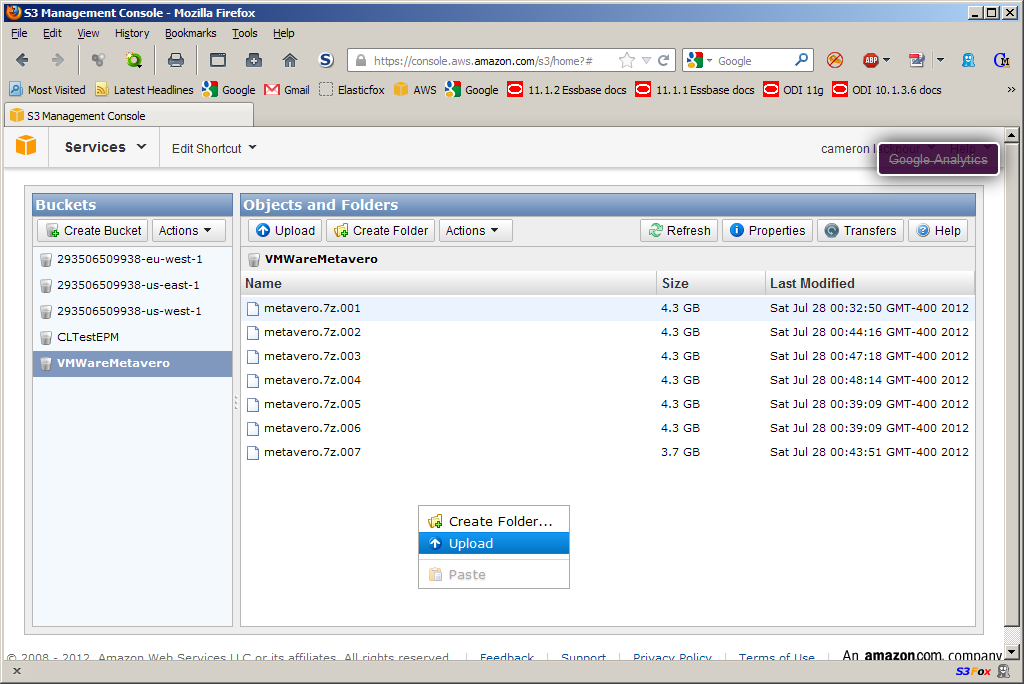
NB – You can also use the AWS console’s S3 component to move the data around – that’s what Dan did.  It is as simple as opening up the AWS console on your AWS instance (sort of like a mirror facing a mirror) and then right clicking inside your bucket like the below:

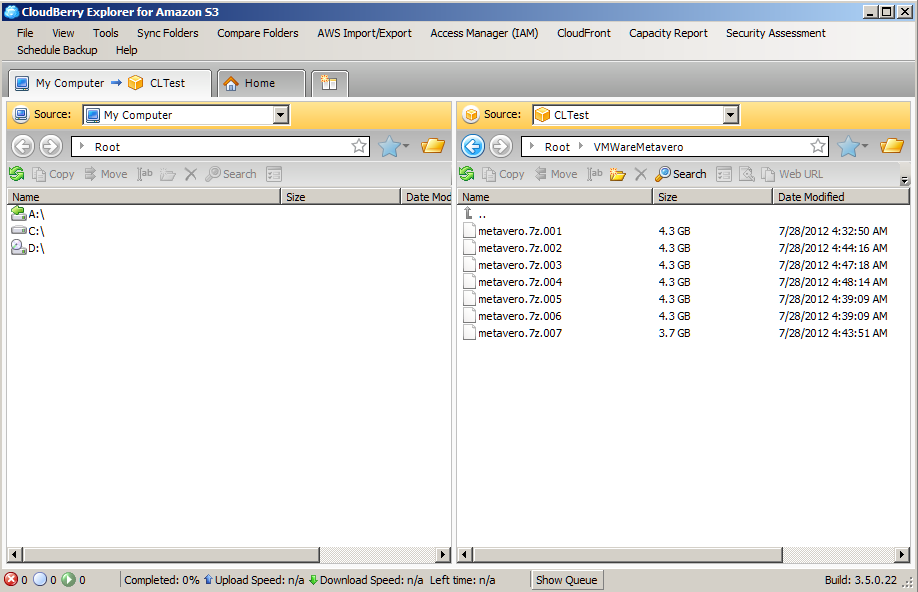
I did the same thing via Cloudberry to a S3 bucket I called VMWareMetavero.

To get it onto my laptop, I installed Cloudberry again and then downloaded it to my external hard drive.  

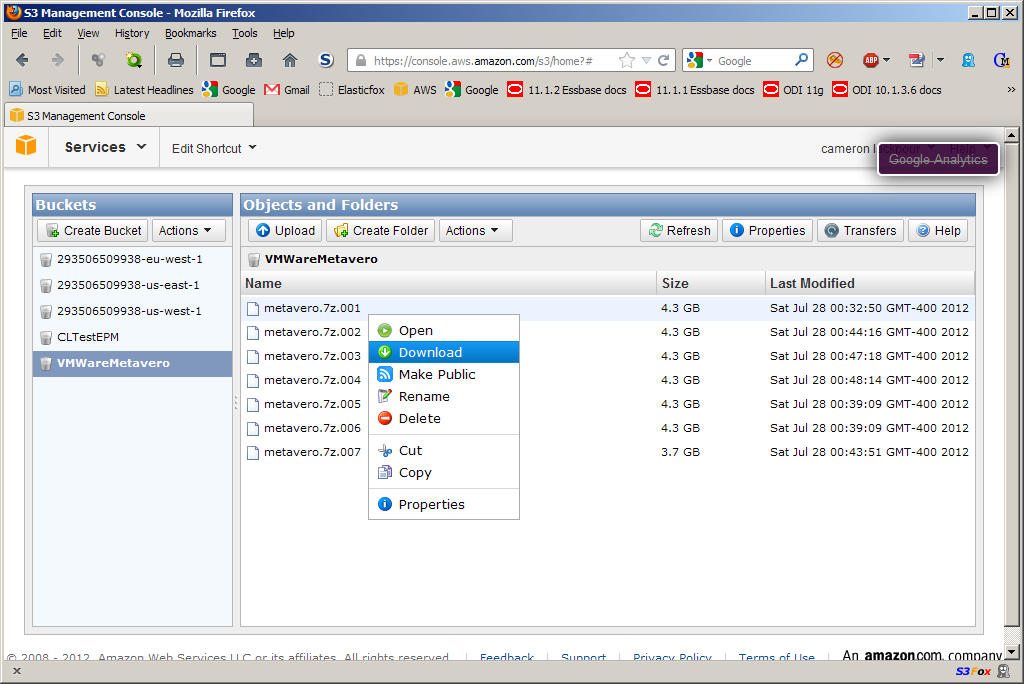
Alternatively, I could have just gone into S3 via the AWS console and done this:

Cloudberry made it a little less painful so I went that way.

That’s it.  

Unzipping the files (or even combining them)

Once you have the download to the Ground completed, 7-Zip needs to be installed on your laptop if not already done.  And once that is done, decompress.  Again, this takes a while.


Avoiding the Blue Screen of Death (BSOD)

At this point you have:
  1. Removed the media files from c:\media unless you really, really, really want them.  You might, but probably not.
  2. Converted the 11.1.2.2 AMI to a VM Workstation VM
  3. Compressed that VM on a using 7-Zip’s Lzma2 method with 24bit word and 256mb block and 8 threads.
  4. Downloaded that through S3 (or whatever method you prefer but that’s the easiest) to your laptop

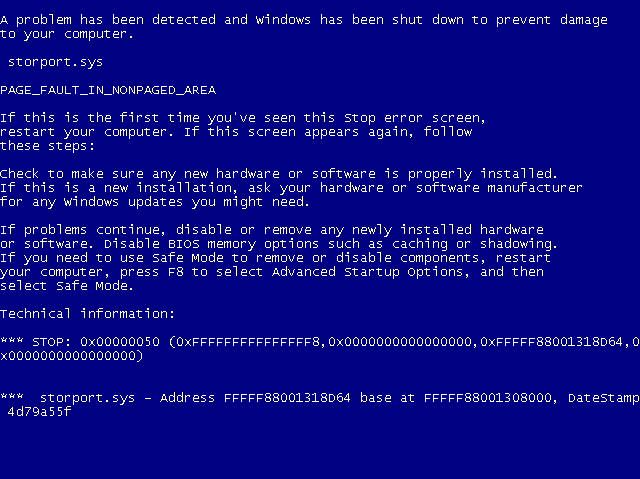
So you’re all ready to go, right?  Uh, no, because here’s what happens when you try to fire up that VM in Workstation.  Auuuuuuuuugggggggghhhhhhhh!!!!!!!!!!   It’s the Blue Screen of Death!!!!!!!!!!!

And not just the BSOD, but a BSOD that will immediately reboot Windows so that you have a lovely endless loop of BSODs.  Fun times, fun times.

At least it’s fast – it took me about five tries (so we are talking 30 minutes of reboots) to get that screenshot with Snagit.  It will flash very, very, very quickly on your screen.  Is there a cure?  You betcha.

The cure for the Blues

If you want it all in one succinct (but not terribly well explained or at least I couldn’t follow the directions until I did it three times) thread, read this on the VMware support forum.  I’m going to show it to you step by step and will make it a tiny bit less painful.

Just to be completely up front, I am taking everything I read in that thread and putting pictures to it – the brains behind figuring this out belong solely to ivivanov and leonardw who figured all of this out.

The issue is the RedHat SCSI Bus Driver (really all of the Red Hat services, all of which start with “rhel”) despite the storport.sys message in the BSOD.  Who would believe that an error message is misleading or doesn’t give all of the information you need?  Why I would, and so should you.  The RedHat services are part of the EC2 Amazon offering and simply don’t work (why I know not as I am no hardware expert, but I can certainly attest to their super-duper not working).  It blows up Windows 2008 R2 on VMWare real good.
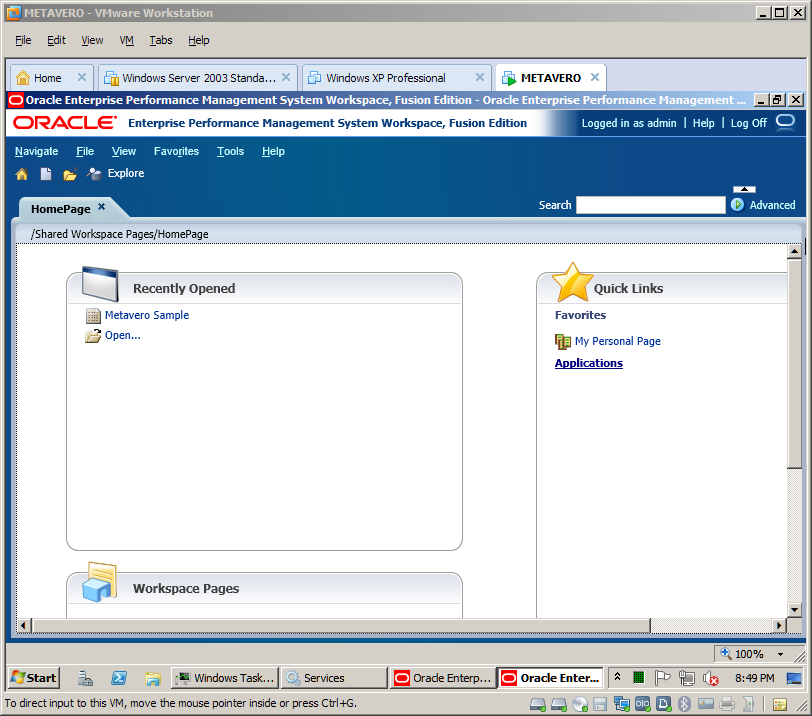
Richard Philipson tried out part 1 and pointed out (yep, some people actually read this blog, thankfully otherwise this is the most involved echo chamber ever) that the ec2config service is superfluous (and causes a wallpaper error on startup) and that those RedHat services are “a set of drivers to permit access to the Xen virtualized hardware presented by Amazon EC2 to the guest operating system.”  It makes sense that without Xen under the covers, there is no Xen virtualized hardware.

NB -- There is a separate intermittent error in VMWare if you have more than two cores to your laptop.  If you are on a machine with more than two cores, you may get a multiple processor error (a different BSOD).  If that is the case, you should set the number of processors to 1 and the number of cores to 2 in VMWare.

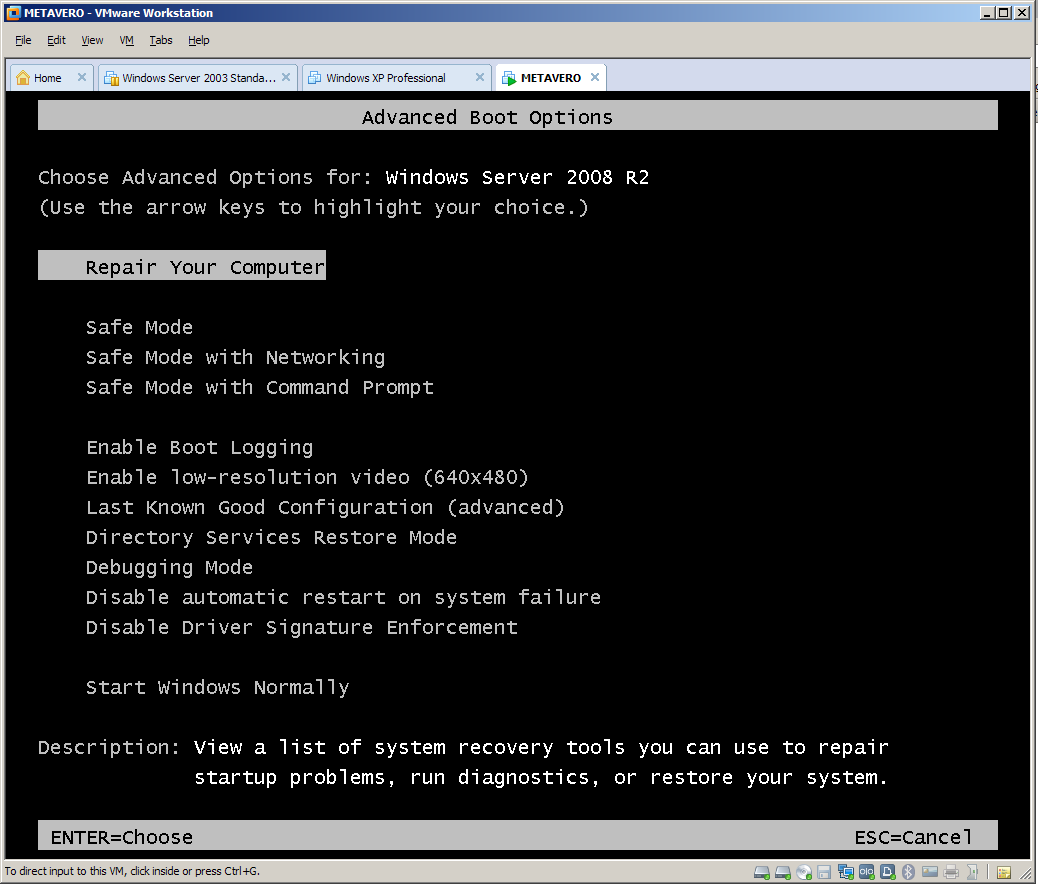
Step 1 – Getting into Boot Options

Open up your nifty new VM in VMWorkstation and start it.

As it starts up hover your mouse over the VMWorkstation window and press Ctrl+G.  You need the VM to get control of the keyboard/mouse as you are going to be holding down the F8 key.  If your Windows host has control, F8 will toggle a selector bar in the VMWorkstation application and you will not be able to get into Advanced Boot Options.  It’s a total Pain In The You Know What.

No worries if you don’t get it the first time as the Metavero VM will crash very quickly indeed.  :)

A VMWorkstation bar will pop up telling you to install VMWare Tools.  Ignore that for now but you will need to install this.

Step 2 – Go through the System Recover Options
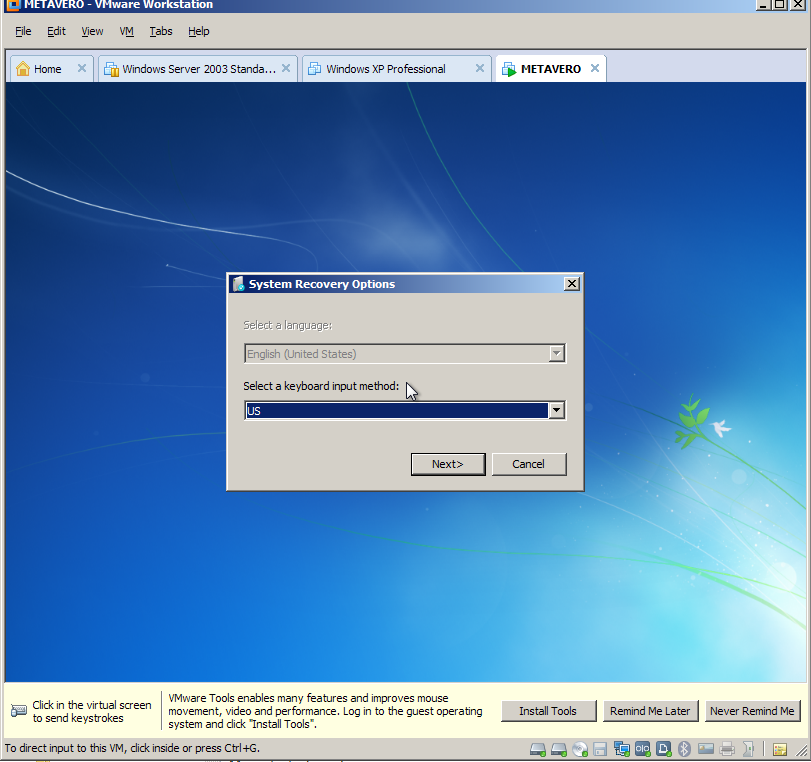
First select a keyboard.

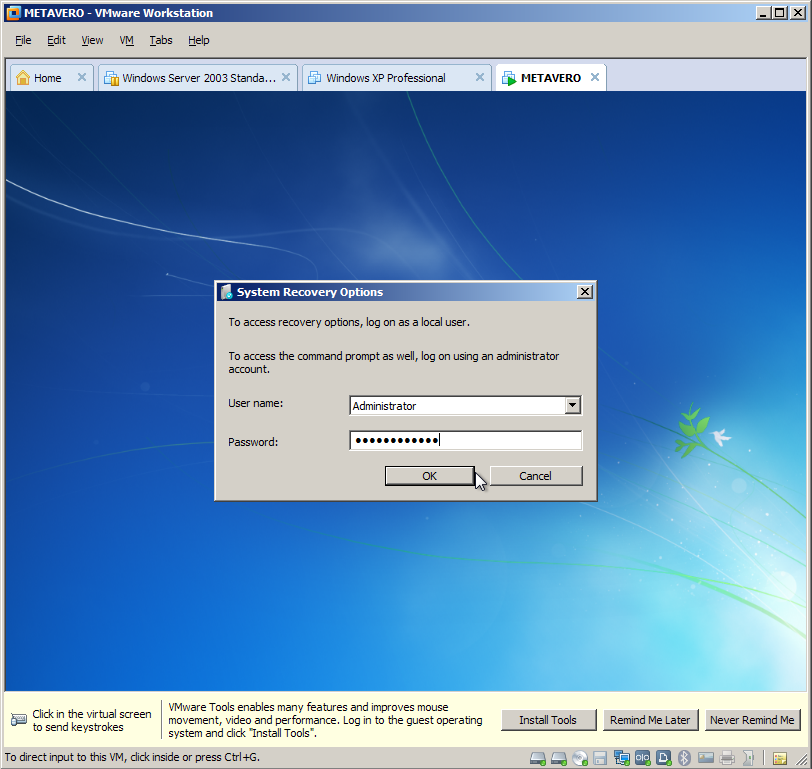
Then log in.  The cool thing is this is just like the AMI – username Administrator, password epmtestdrive.

Step 2 – Run a Command Prompt and then Regedit
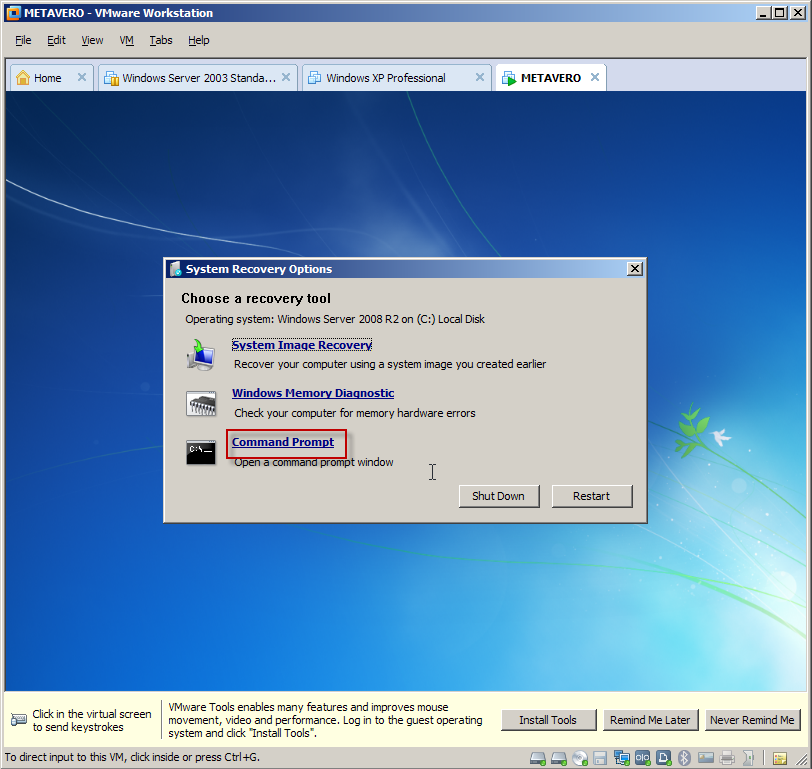
Select Command Prompt.  

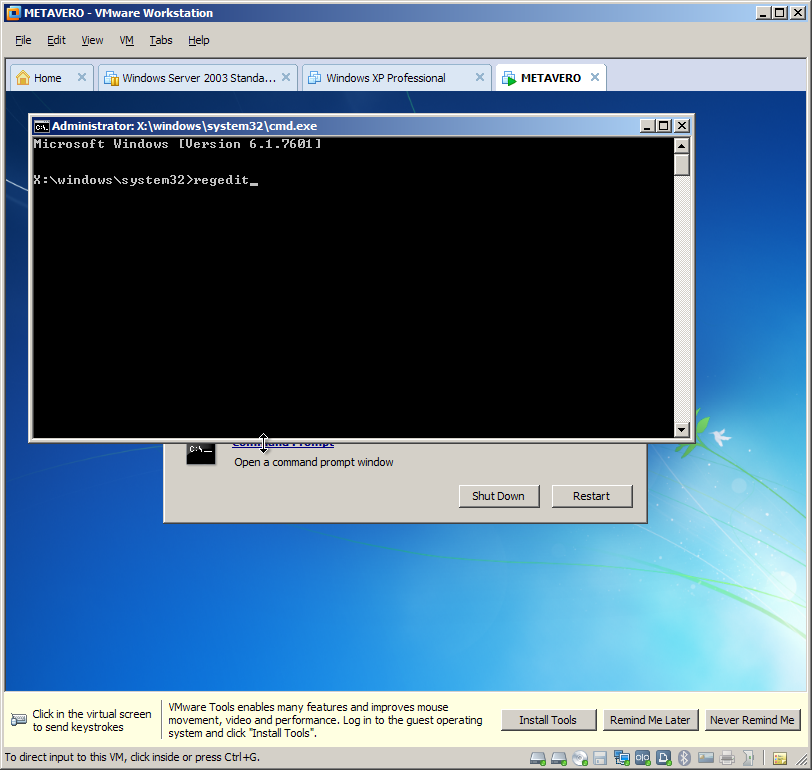
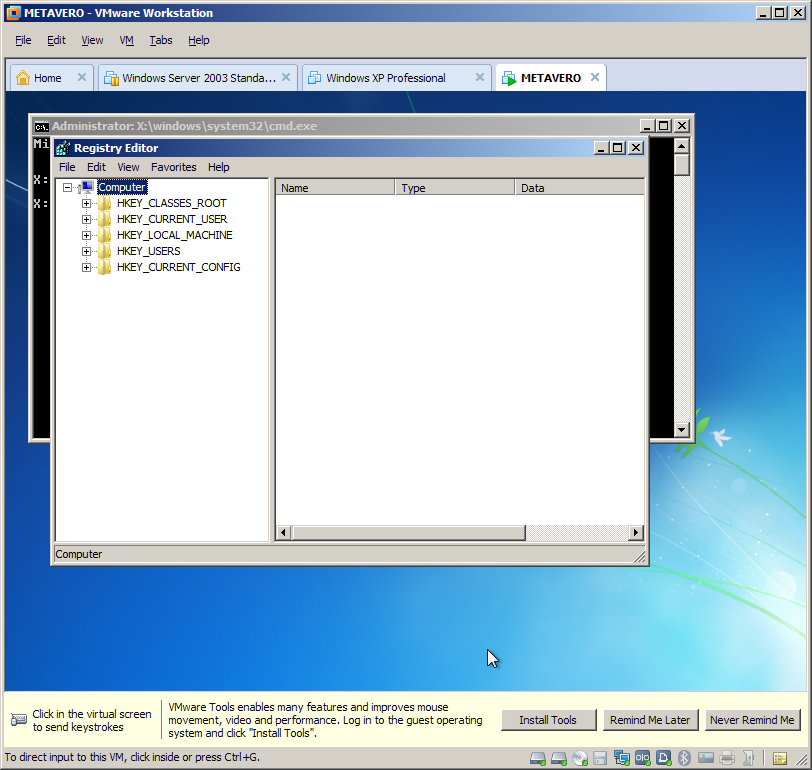
You will then run Regedit from x:\windows\system32.

Here it is:

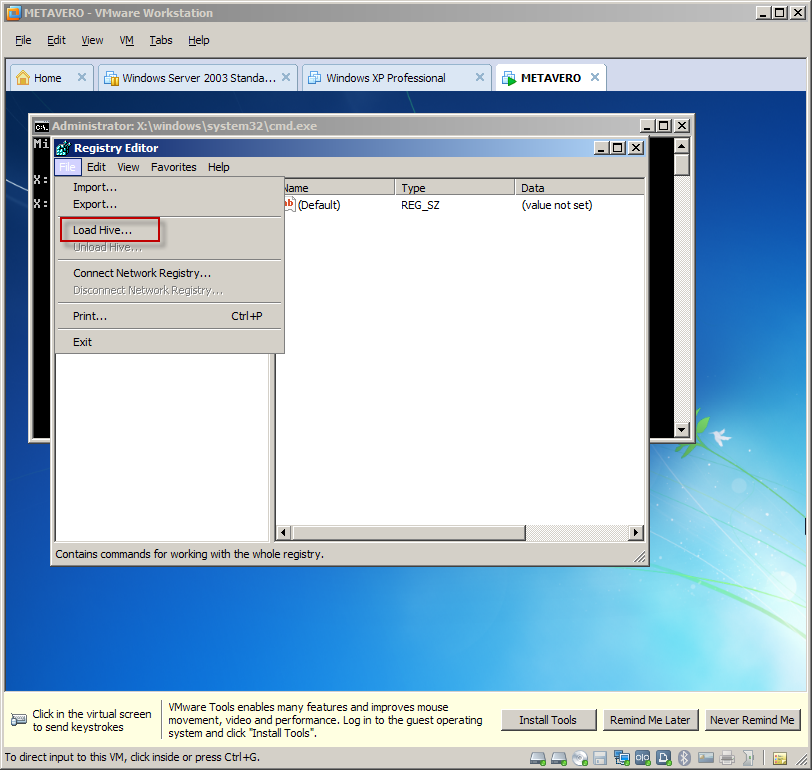
Click on HKEY_LOCAL_MACHINE and then File->Load Hive.

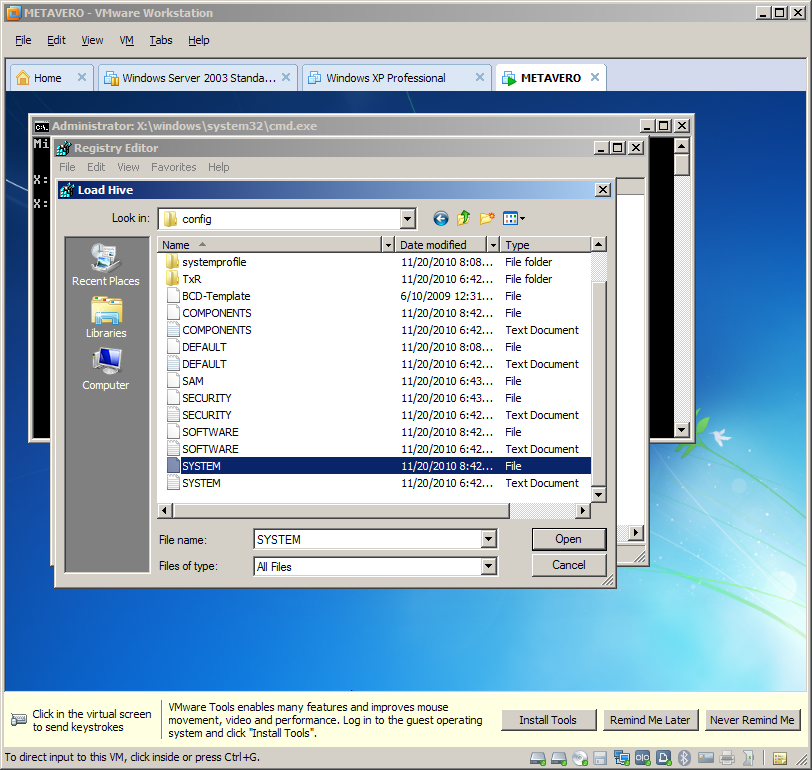
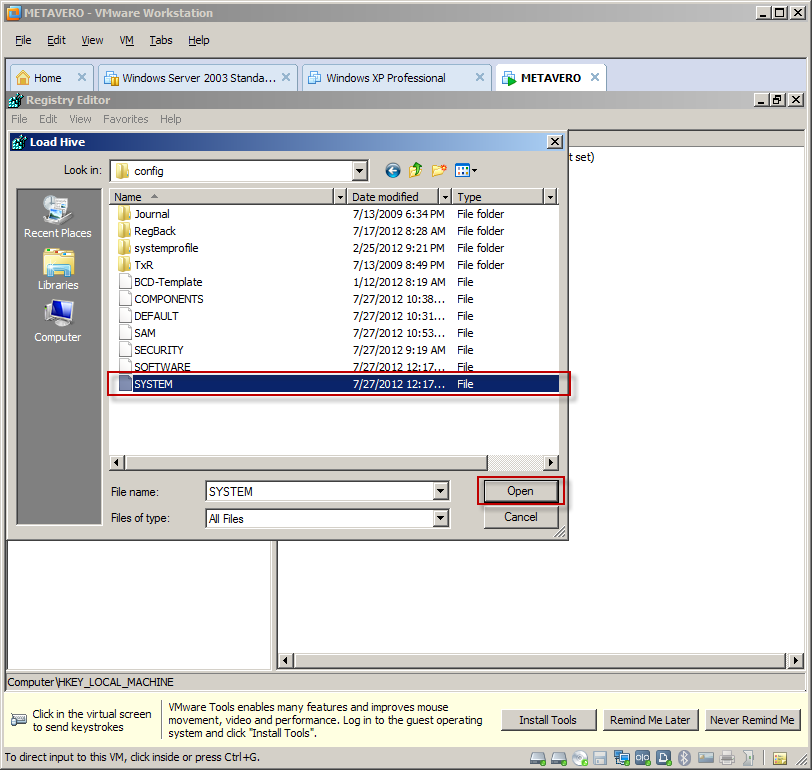
Navigate to c:\windows\system32\config and select the SYSTEM file and click on Open.

NB – This must be on the C: drive, not the X (that’s the repair drive).  Here’s what x:\windows\system32\config looks like.  Note the two SYSTEM files.  You do NOT want this as it does not contain the services.

What you do want to see is this and it’s only available off of the C drive:

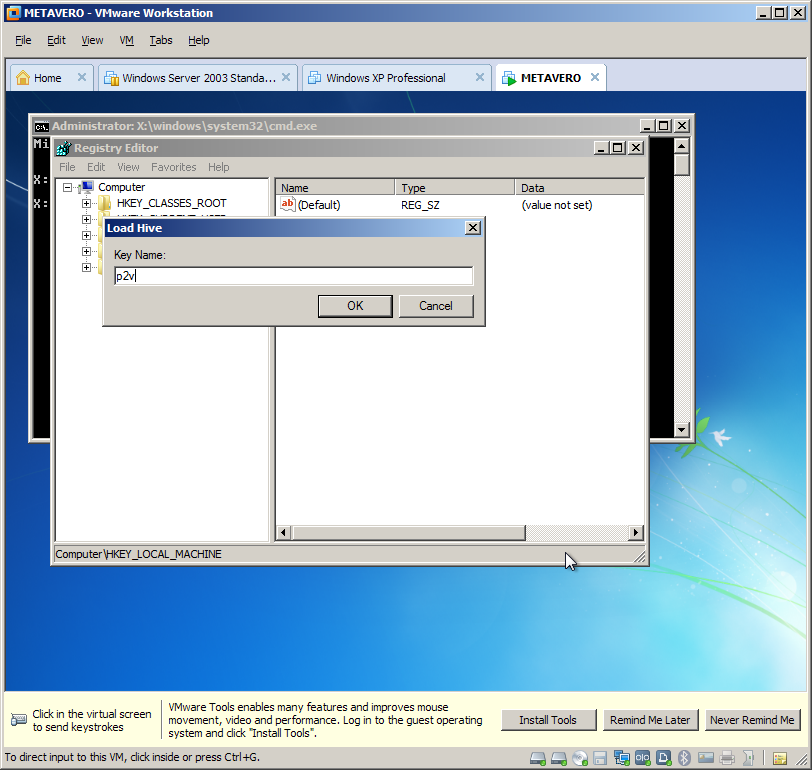
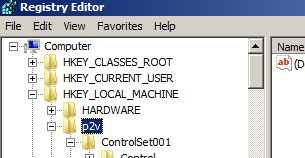
Type in “p2v” into the Key Name field and click OK.

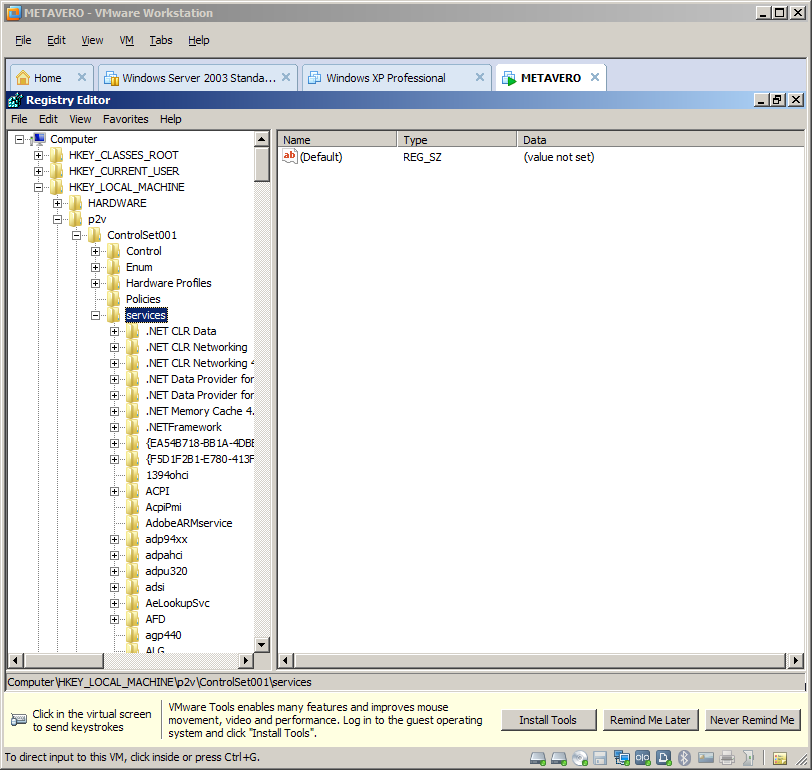
Navigate to HKEY_LOCAL_MACHINE\p2v\ControlSet001\services.

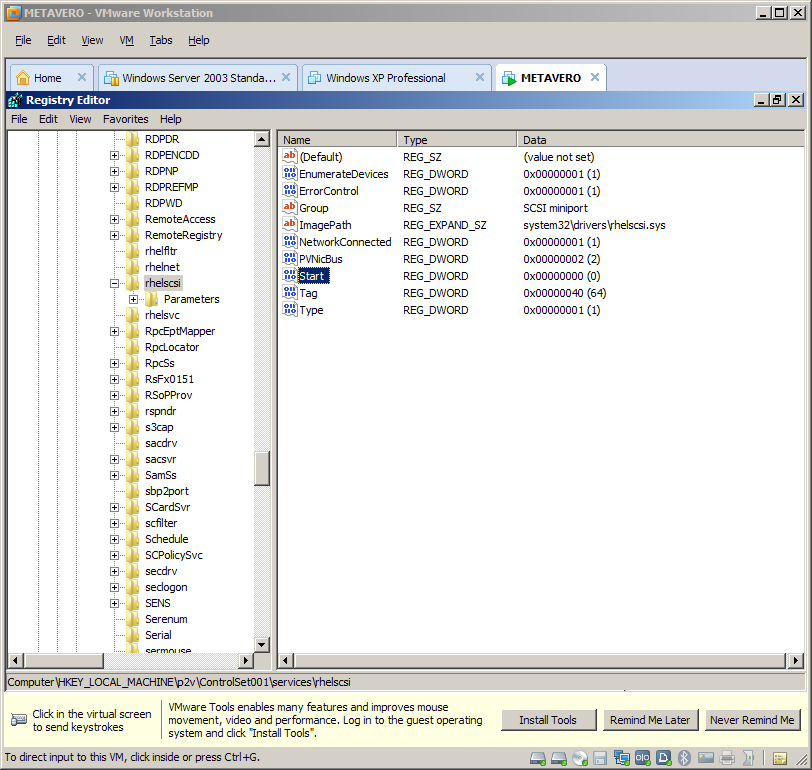
For each of the rhelfltr, rhelnet, rhelscsi, amd rhelsvc services, click on the service in question and select the Start parameter.


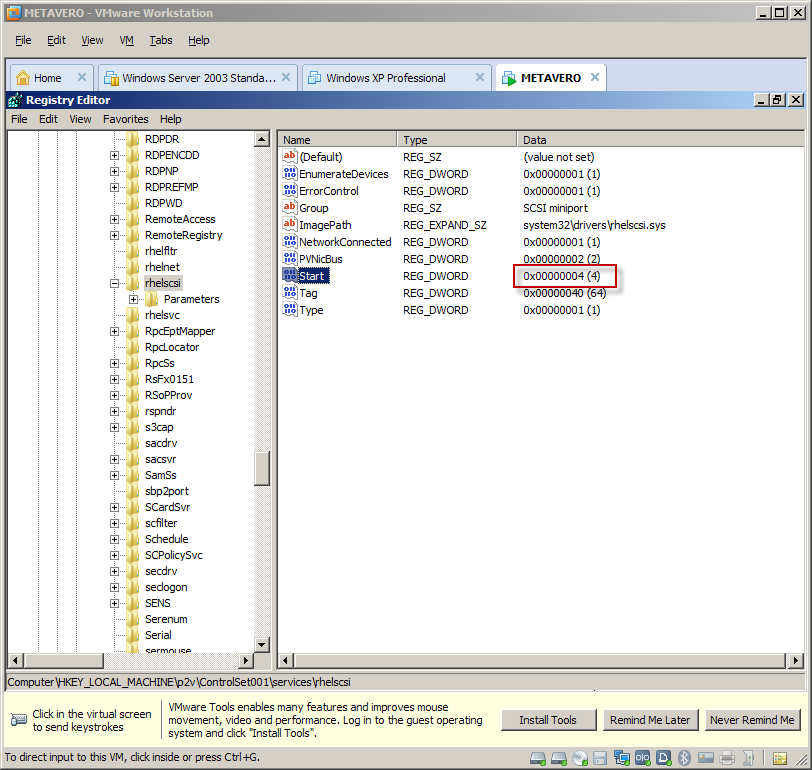
In the below screenshot I have selected rhelscsi.  Note that there is some discussion on that VMWare thread that only rhelscsi needs to be disabled.  I’ve tried that and sometimes it works and sometimes it doesn’t.  Mu suggestion is to disable all four.

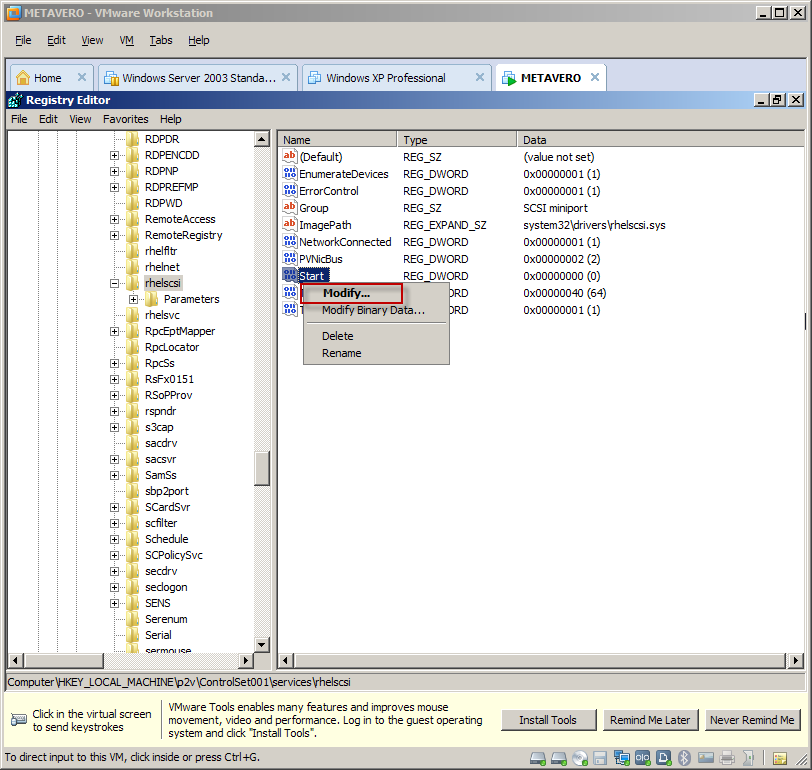
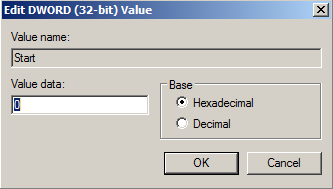
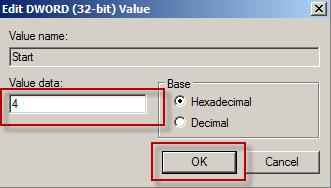
Right click on Start, select Modify, and change the value from 0 (or whatever) to 4 which disables the service.

From this:
 

To this and click OK:
 

Note the value of 4:

Do it again for rhelfltr, rhelnet, and rhelsvc.  All of these services need to be stopped.

With all four services disabled, select the key again.
 

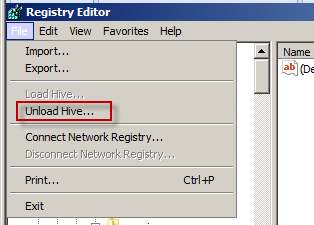
Then select Unload Hive.
 

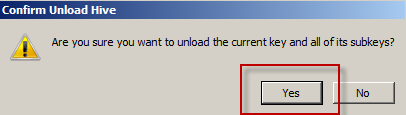
Select Yes in the confirmation dialog box.
 

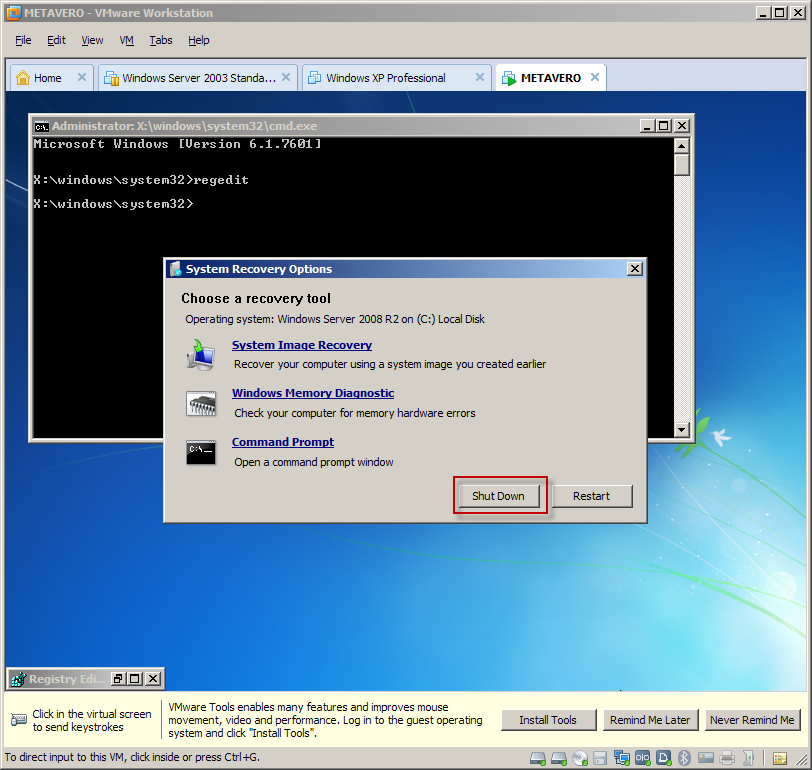
Minimize Regedit, and then select Shut Down.  You will then restart the VM.


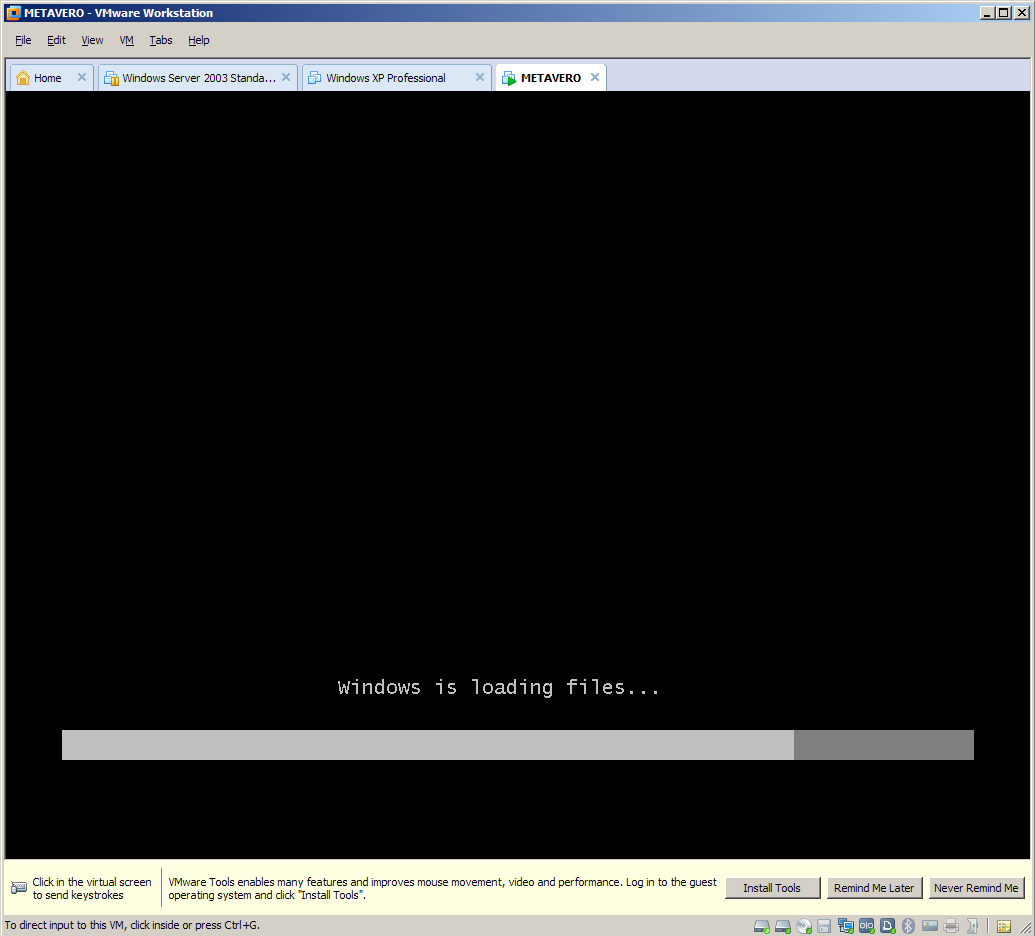
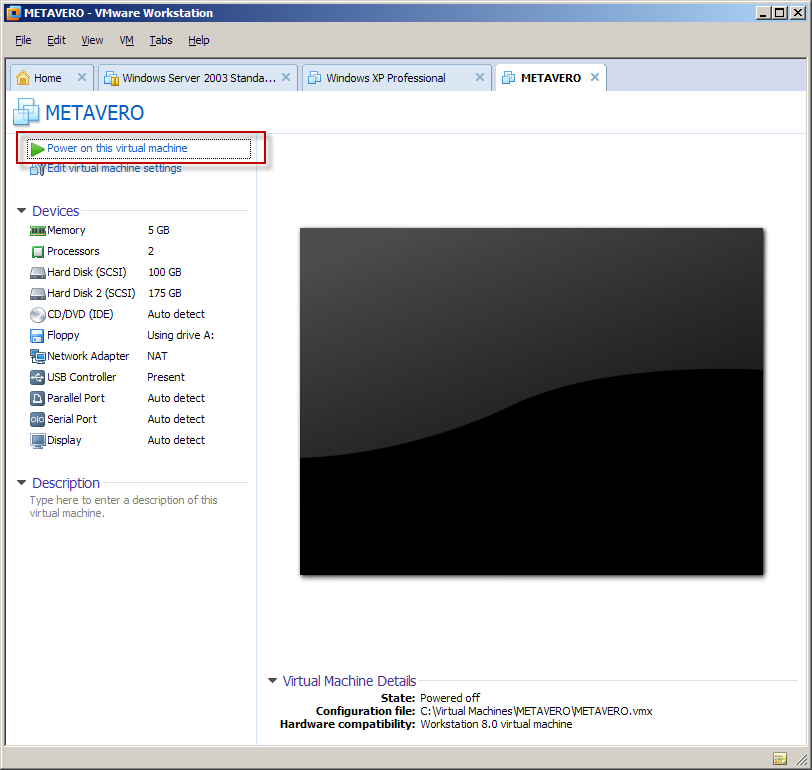
Start the Metavero (that’s what I named it) VM back up.

Ta da, you are now running (and not BSODing) Windows 2008 R2:

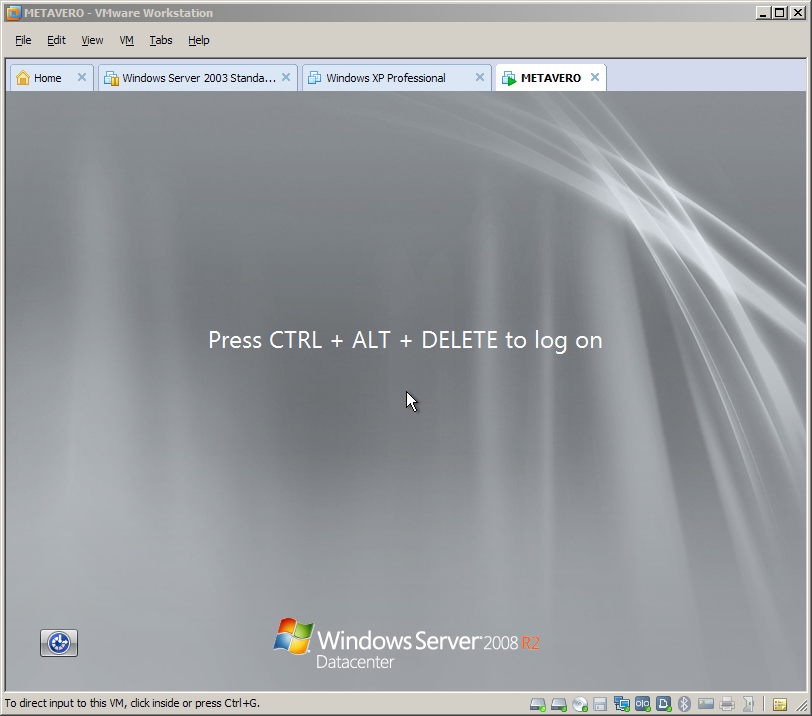
In VMWorkstation, VM->Send Ctrl+Alt+Del to get the login.  

NB – You can also hit Ctrl+Alt+Insert to get the same thing.

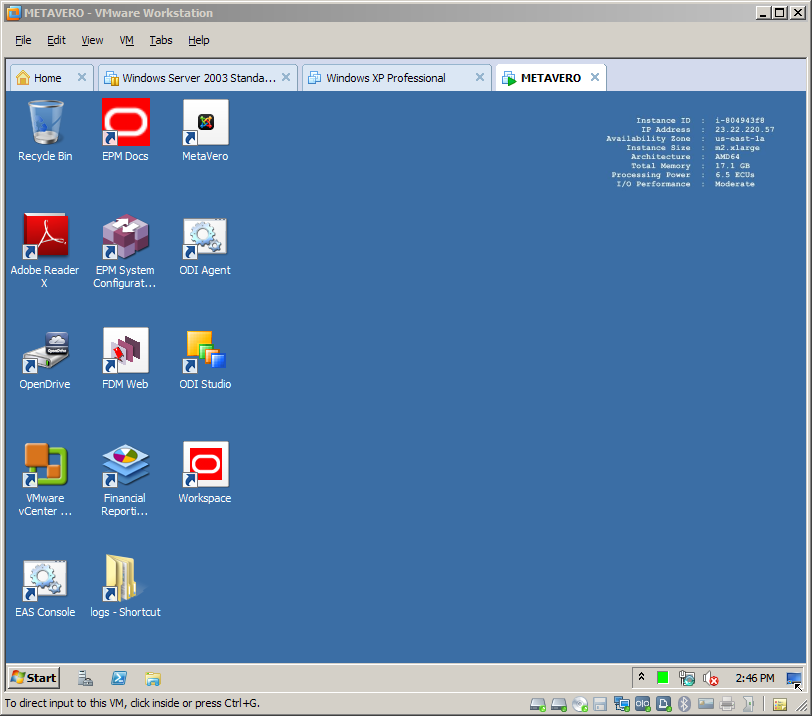
And there you are:

And finally (at least on my laptop, there is a fair amount of time before this all boots up):

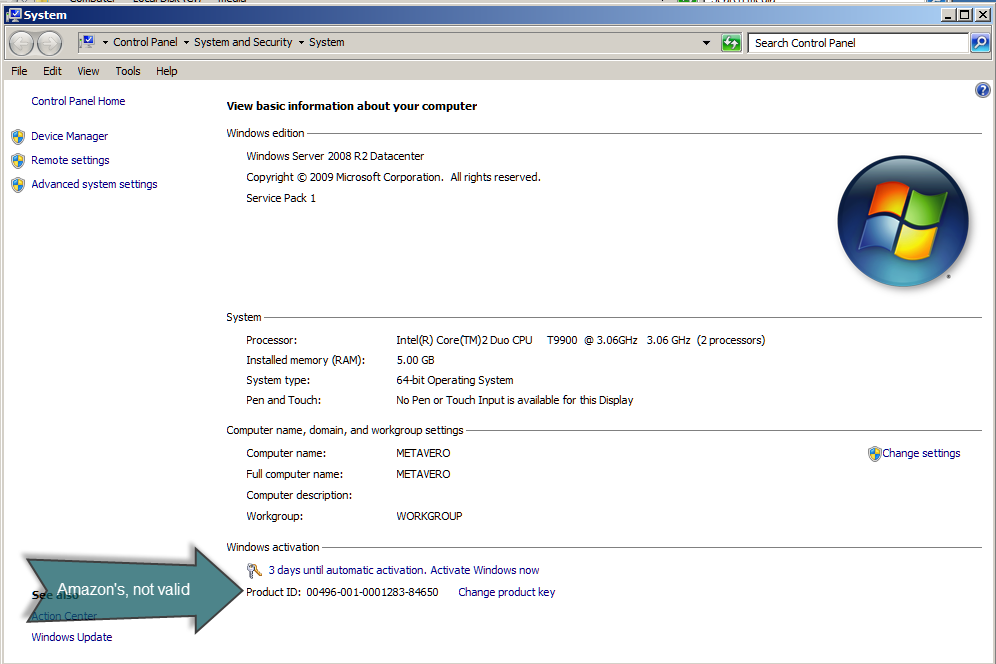
Don’t forget to activate Windows

You have three days to apply that valid key for Windows 2008 R2 Datacenter.

No, I am not going to give you a valid license key.  But I have given you a lot of ways to get one, all of them legal.

Interestingly, Microsoft Action Pack (to which both Dan and I belong) does not support 2008 R2 Datacenter (bummer for those of us with a MAPS subscription), but with MAPS you get TechNet (after signing up for it), which does allow you to sign up for Technet for free, and then one can get a valid 2008 R2 Datacenter key.  Whew.  Thanks to Dan for figuring this out as it was not exactly straightforward.  

If you are on the fence between MAPS and Technet, note that Technet Professional only costs $349 for the first year but MAPS (you do have to qualify as a partner) gives mulitple internal use licenses.  You decide.

So what do we have?

Well, in the case both the case of Dan and me, slightly different outcomes.

In Dan’s environment, running on a 24 gigabyte laptop, he has a pretty awesome EPM installation.

In my world, running on an 8 gigbyte laptop, I pretty much have an unusable EPM installation because my host laptop simply doesn’t have enough horsepower.  Although I do have a nice blog post.  :)

Based on our tests, you simply must have a 16 gigabyte laptop to make this work acceptably.

What’s the right choice – the Cloud or the Ground?

As I wrote above, if you don’t have a multiprocessor, 16+ gigabyte laptop, with plenty of disk space, you can pretty much forget this approach.  A valid Windows 2008 R2 Datacenter key would be nice as well.

Assuming that you do have the above, is the Ground worth it?  I think the answer, despite the pain, effort, and time (I’m pretty sure this must be a world record for me for the length of a single blog post) is, “Yes, absolutely!”

You get a professionally installed EPM instance that is right there on your laptop/PC without the AWS charges.  That’s pretty cool.  And you (and Dan and I) got to perform, and learn, a whole bunch of tools that are pretty darn useful.  All I can say is that I will be getting a Dell Precision 4600 or 4700 in the near future.  That’s putting money where my mouth is.

I hope you enjoyed the multiple hacks.

And a big thanks to Dan Pressman and Richard Philipson for helping out with this monster of a post.