Introduction to the guide
I was asked in in this thread over on the Network54 Essbase board to post a guide to Hyperion Financial Reports batch bursting I wrote a while back. I’m happy to share what I came up with but first a couple of caveats:- I have redacted identifying information from the screenshots. It’s usually pretty obvious where this has happened.
- If you have questions about this, go ahead and make comments but unfortunately, I can’t reproduce the environment I did this one because:
- I wrote this for EPM 11.1.2.0 (so an almost two year old release). I have no idea if the defects/bugs/weirdness/obvious-stuff-that-I-am-too-dense-to-see have been resolved or not in 11.1.2.1 and 11.1.2.2. Mercifully, I have not been called upon to do more with batches since writing this document.
- Some of the issues I encountered were, I think, caused by a less-than-perfect installation. I could rant on and on about how bad it was but it would bore everyone, even me. At the time, I asked someone I know in infrastructure what he thought it would take to resolve all of the issues (oh, I had a working issues list). The reply? “I wouldn’t touch that with a 40 foot barge pole. If I were to come in, I would insist on a complete reinstallation on a clean box.” In other words, nuke and pave. I mention this not to reflect the frustration we application developers encounter when an install is bad, but to note that some of the general weirdness may be because the software wasn’t “right”.
- I wrote this in the form of a step-by-step tutorial. I never did find one on the web – I thought for sure there would be one but my google-fu failed me. Maybe there’s one now, but I sort of doubt it.
- Contrary to what I wrote in that thread, doing all of this is not 23 steps, but instead:
- 24 steps (23 to create + 1 to view) to create that scheduled batch
- 6 steps to import a bursting file (and yes, I explain what a bursting file is) into Workspace
- 6 more steps to applying the bursting file into the batch scheduler
- Although I am somewhat math-challenged, that means this is a 36 step process. It's almost the 39 Steps.
And with that out of the way, enjoy.
Background
Briefly, there are six kinds of Financial Reports documents typically encountered in a Planning implementation:- Financial Reports – the base Essbase/Planning report
- FR Books – collections of FRs using, where applicable, a common POV to drive all reports within a book
- FR Batches – Objects that contain reports and books. A batch can contain a single report, multiple reports, a single book, multiple books, mixes of reports and books, etc.
- FR Scheduled Batches – Scheduler (Workspace has its own, reports-only scheduler) of FR Batches and their Books and reports. Scheduled objects can get written to Workspace folders, zip files, and emails.
- Burst batching – A way to parameterize scheduled batches and overload single dimension selections (only one dimension can be bursted and yes that is a strange word for it) with either manually selected members or members driven through imported burst files.
- Bursting files – These are comma-delimited files used to drive burst batching
How to create a Scheduled Batch in Workspace 11.1.2.0
It’s just a simple 23 step procedure to define a scheduled batch.Creating a book
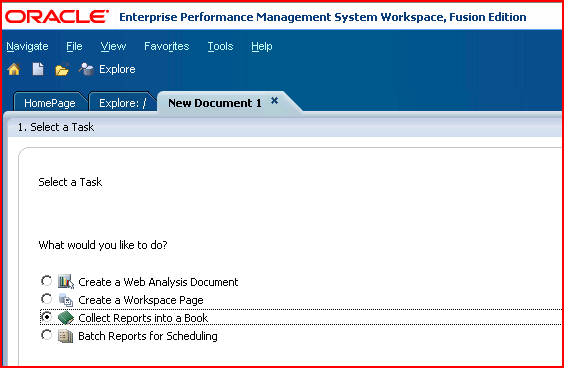
1) After creating a FR report, create a FR book by logging into Workspace and clicking on the Explore button. Then select File->New->Document,.

2) Select “Collect Reports into a book”
3) Pick the report you want to incorporate into the book. Books commonly contain more than one report but that is not a requirement.
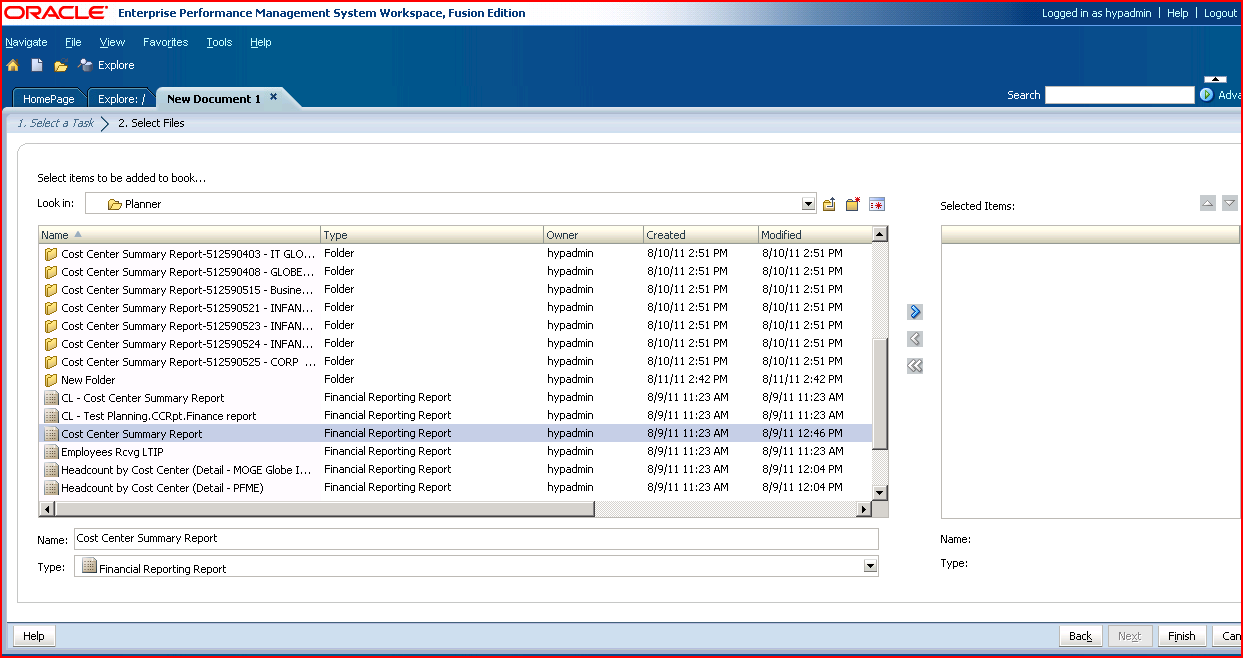
4) Move the report(s) over to the right hand list box and when complete, click “Finish”.

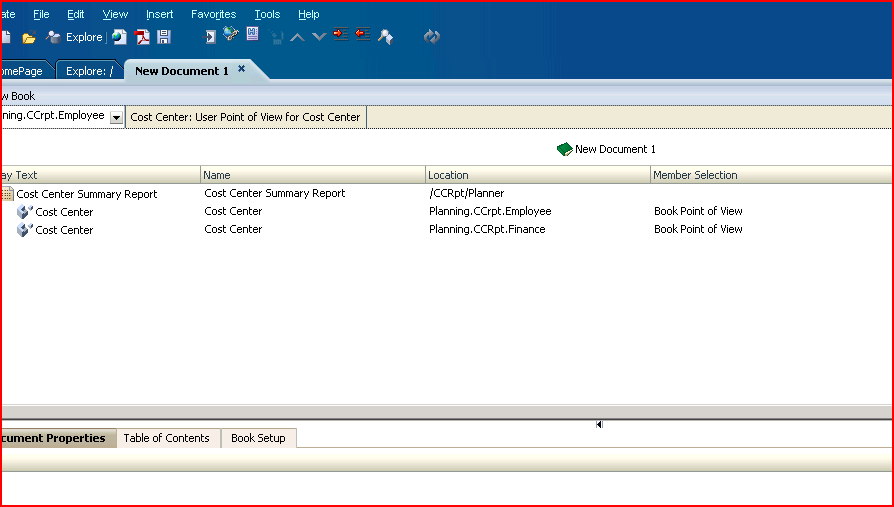
5) The data sources in the report(s) will show up in the book. These will be driven by the book’s POV.
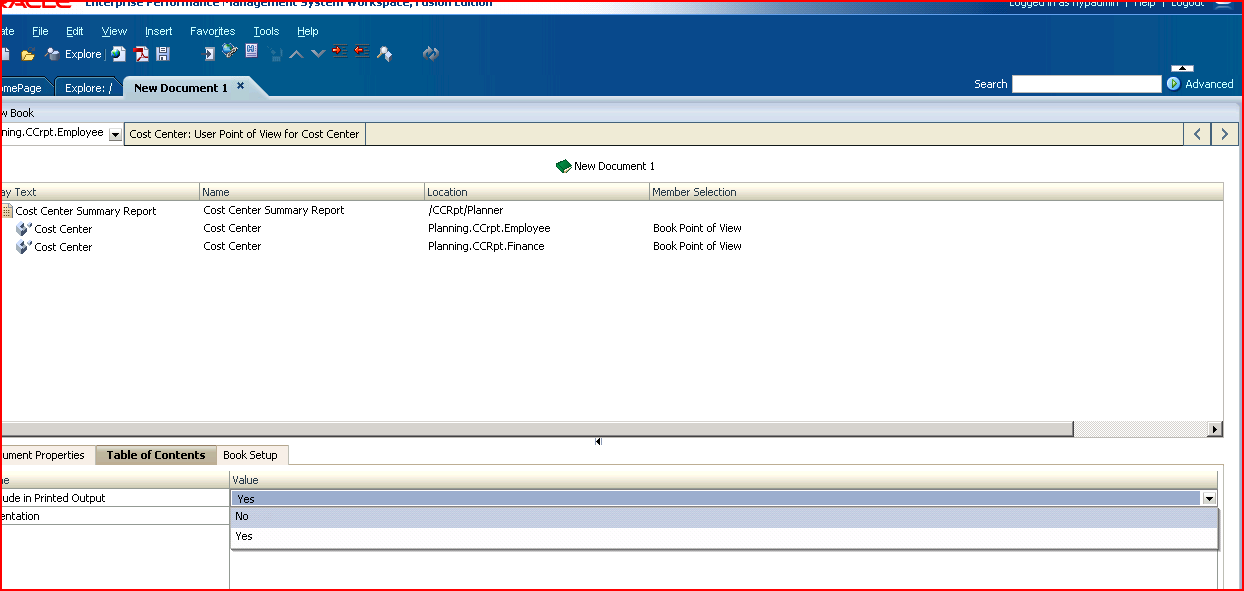
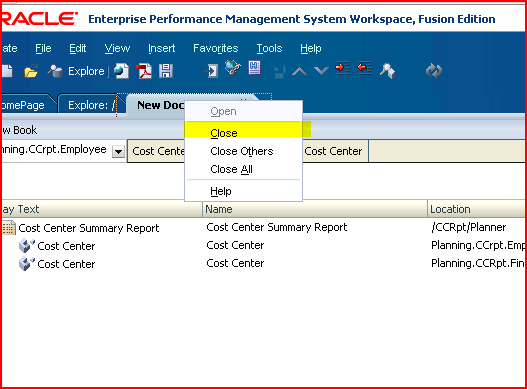
6) If you wish to get rid of the book’s table of contents, deselect it as shown below.
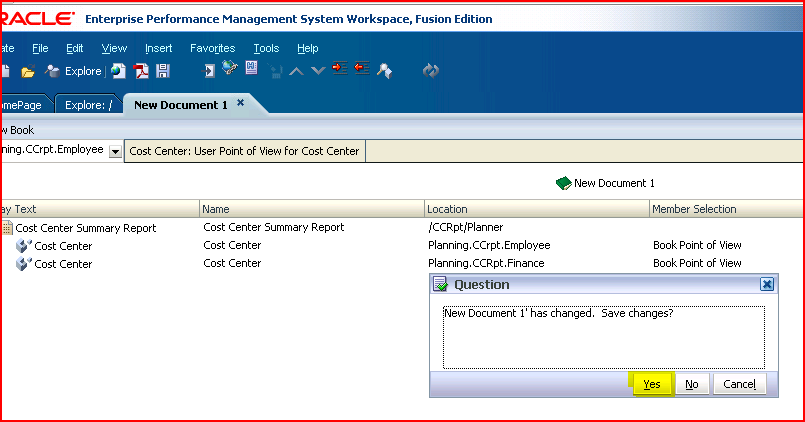
7) To force the save of the book, close the document; you will be prompted to save the book.
8) Save the book to whatever name and location you desire.
9) This book will be used in the batch.
Creating a batch
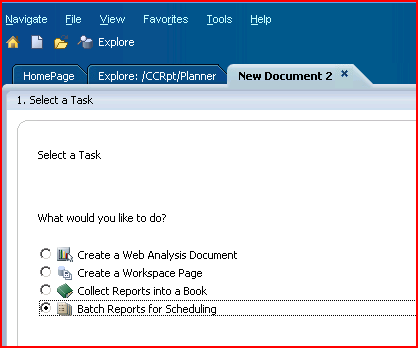
10) Go to File->New->Document again, but this time select “Batch Reports for Scheduling”.
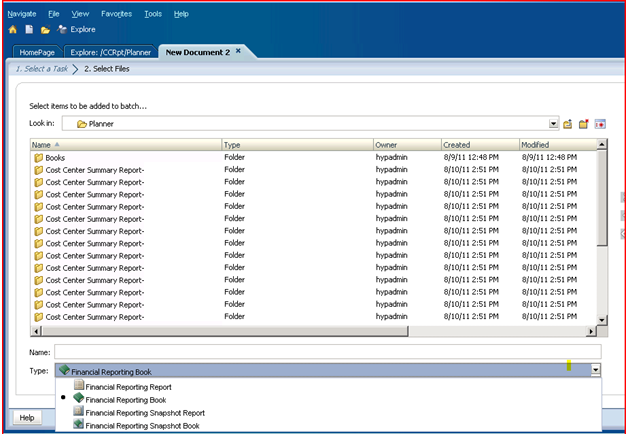
11) Batches can be just a single or multiple books and reports. To see them in the file selector, use the dropdown at the bottom to toggle between the different kinds of base documents.
12) Move the object you want to put into the batch over to the right.
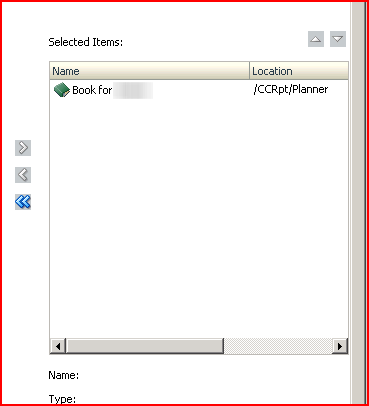
13) Again, close the document to force a save action.

14) Save the batch.

Scheduling a batch
Creating the scheduled batch
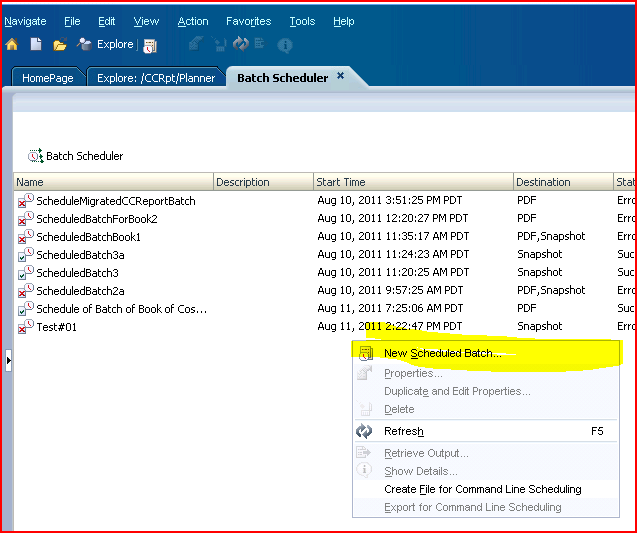
15) Schedule the batch by going to the Navigate->Batch Scheduler menu.
16) In the Batch Scheduler screen, right click and select “New Scheduled Batch”. This will launch the scheduled batch wizard.
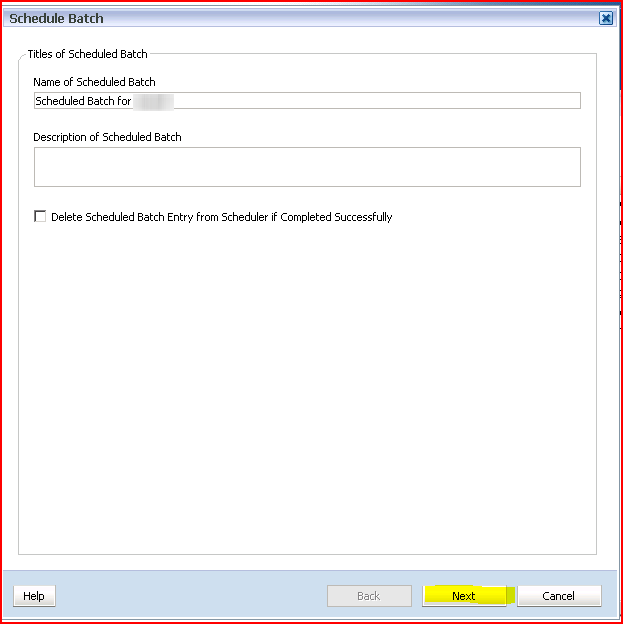
17) Name the batch. You can make the batch a one-tme affair by selecting “Delete Scheduled Batch Entry from Scheduler if Completed Successfully”. Do not do this as creating a batch is fairly painful, as you may have noticed. Click on Next to move to the next step.
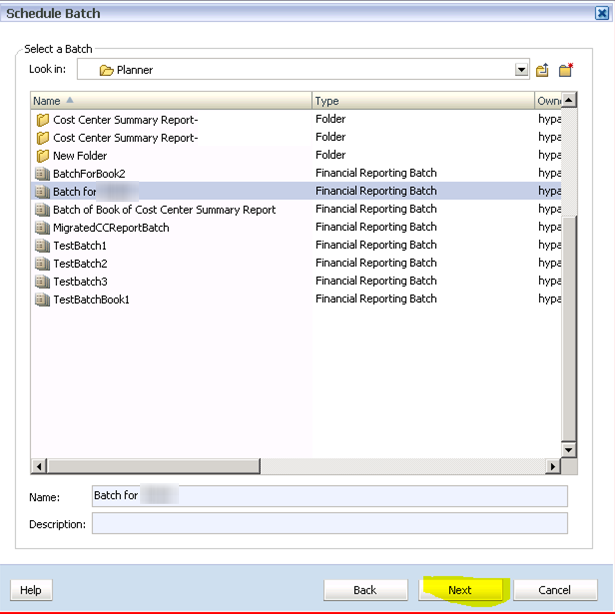
18) Select the batch you want. In this example, it’s “Batch for XXXXXXXXXXX”. After entering the name, click on Next to move to the next step.
19) You will be prompted to log in to both FR and Essbase with an administrator id. I do not recommend a specific userid like CameronTheConsultant as these ids get terminated.
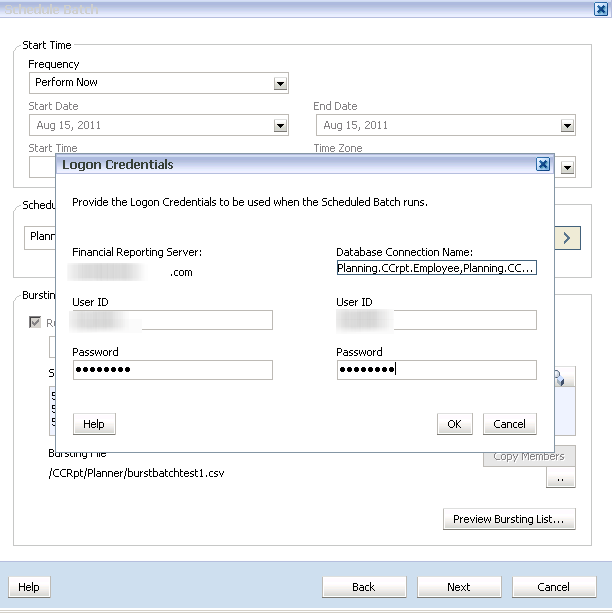
Selecting members for data connections
20) Individually select the connections (the All option doesn’t work, see Oracle Support ID 1097787.1) and select (usually) identical cost centers for each data source.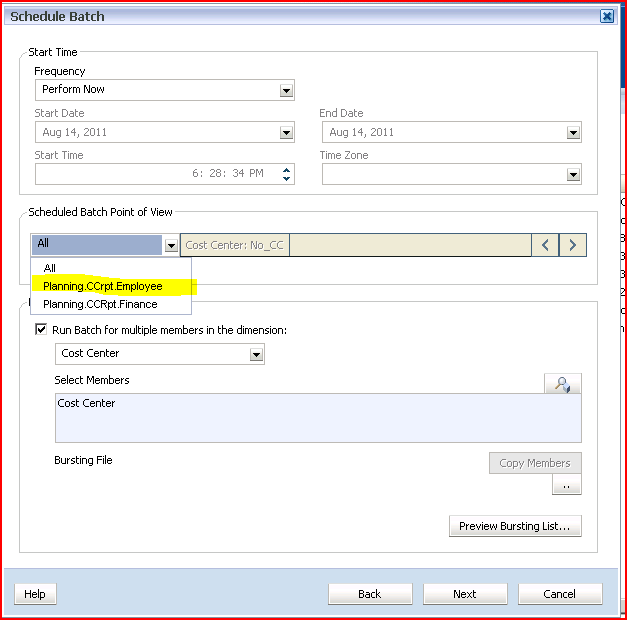
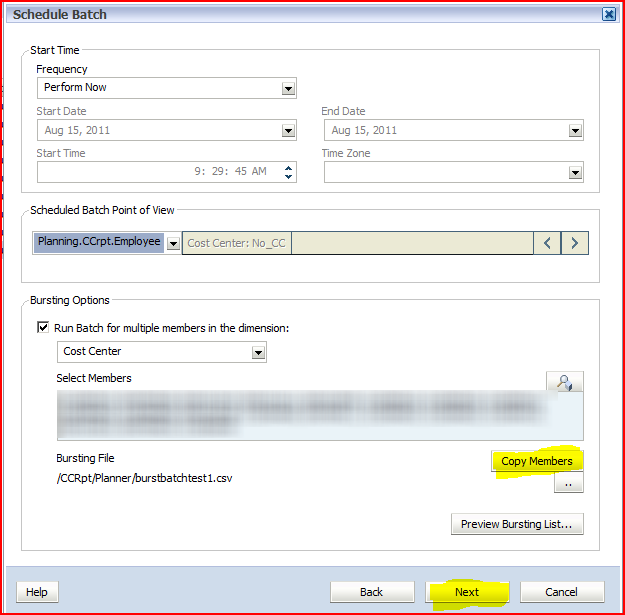
21) There’s a big bug in FR batches – as far as I can observe, when the scheduled batch is edited the Selected Members appear to be defined (and are shown in the Select Members text box) but are not. The only way around this bug is to select the individual data connections and click on the Copy Members button to reapply the Cost Center members.
I have also found that clicking on the Preview Bursting List button for a given data source will deselect the selected members for the other data source. To make sure both data sources are selected, click on the Copy Members button for both data sources and do not use the Preview Bursting List.
Click on Next to move to the next screen.
Defining where the batch output goes
22) Select “Export as PDF” and “Export to an external directory”. Click on Next to run the batch.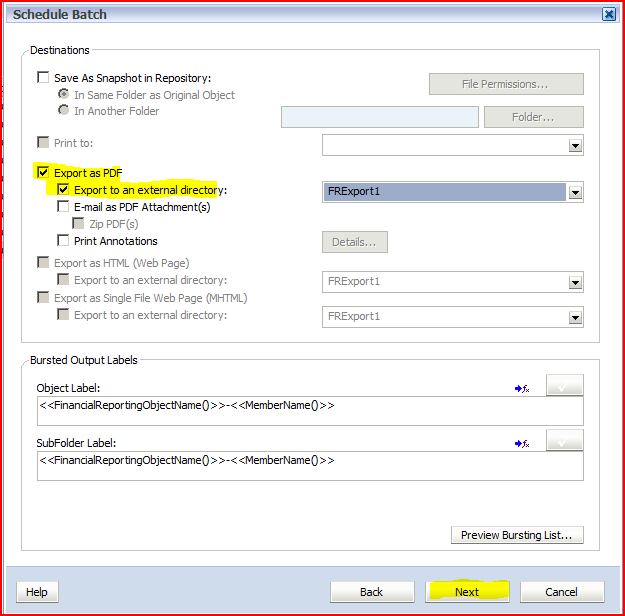
23) A confirmation dialog box will appear.
Reviewing the output
24) The external directory FRExport1, as defined through the FRConfig.cmd utility on the Financial Reports server, corresponds to \\yourservername\f$\FRExport1. The output structure is as below.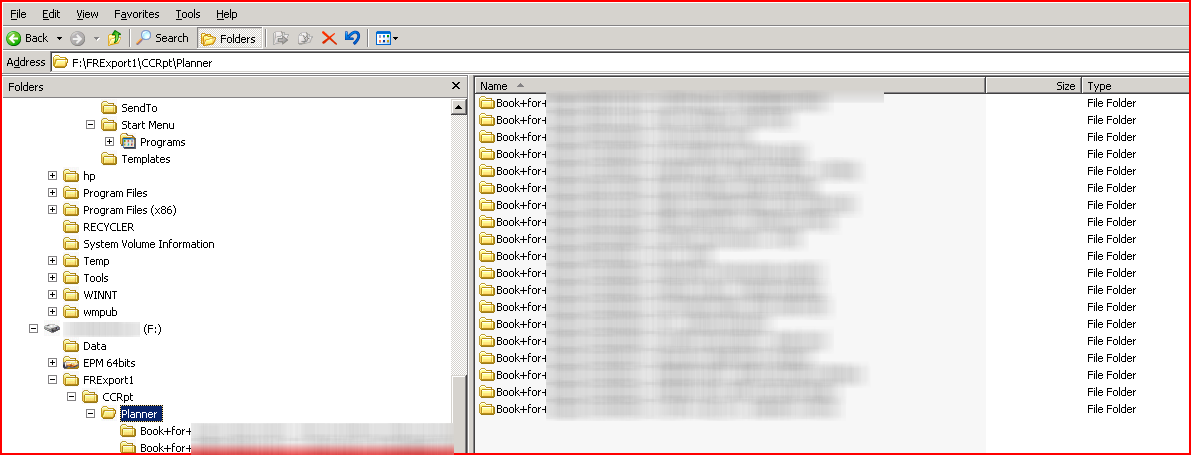
Bursting files in scheduled batches
Bursting files are comma delimited files used to externally drive batch bursting member selections. Given the bugs in FR batch scheduling, bursting files also provide a way to quickly and consistently select members in the Bursting Options.For Oracle’s take on the bursting file parameters see: http://download.oracle.com/docs/cd/E17236_01/epm.1112/fr_webuser/scheduler_wizard_fr.html
Bursting file fields
dimension_dimensionname
In the CCRpt example, the column name is dimension_Cost Center. Within the field, the member values are the cost center numbers. Per the documentation, member names must match on case. Only one dimension per burst batching file can be defined.subfolder_name
The name of the folders underneath the main one defined in the batch schedule. The CCRpt example uses <<FinancialReportingObjectName()>>-<<MemberAlias()>> which passes the name of the book and the member alias from the dimension_dimensionname column into the sub folder name. Other valid tags are <<MemberName()>>, <<BatchPovMember(DataSrcName,DimName)>>, <<BatchPovAlias(DataSrcName, DimName)>>, <<FinancialreportingObjectDescription()>>, and <<Date(“format”)>>.financial_reporting_object_name
The name of the pdf files. The same parameters as subfolder_name apply.group_names
The Shared Services group that runs the batch, by row. Not used in the CCRpt example.role_names
The Shared Services role that runs the batch, by row. Not used in the CCRpt example.user_names
The Shared Services user name that runs the batch, by row. Not used in the CCRpt example.email_list
The SMTP email address that receives the batch pdf output. Although this is set in the CCRpt example, it does not work because the SMTP configuration was not done during installation.external_pdf_root
The root of the file output. This overrides the output from the scheduled batch.Importing the bursting file to Workspace
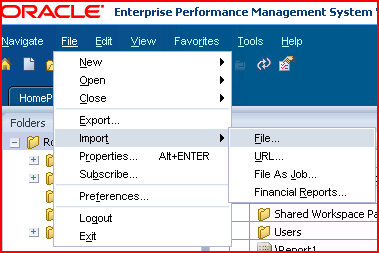
For the scheduled batch to read the burst batching file, it must be imported into Workspace.1) After creating the batch bursting file in Excel and saving the output as a comma delimited file, import the file into Workspace by clicking on the Explore button, navigate to the target folder, and then the menu File->Import->File and then select the file.
2) Click on Browse and select the file.

3) After confirming the file in the File textbox, click on the Next button to move to the Advanced screen.

4) Click on the Next button to move to the Permissions screen.

5) Click on Finish to finish the import process.

6) The file will appear in the target folder.

For your amusement, I have stuck a copy of the file here. It’s in (as noted) comma-delimited format.
Applying the bursting file into the batch scheduler
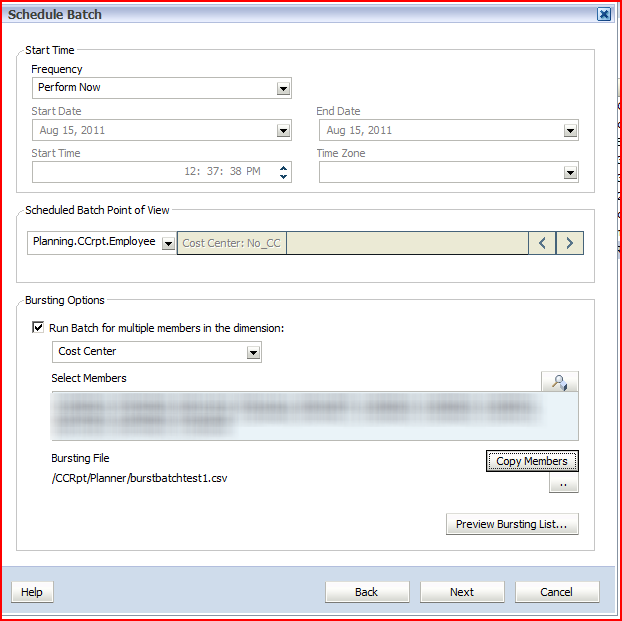
1) In the batch scheduler, select the data source, then tick the “Run Batch for multiple members in the dimension”. Then click on the ellipsis button to import the burst file.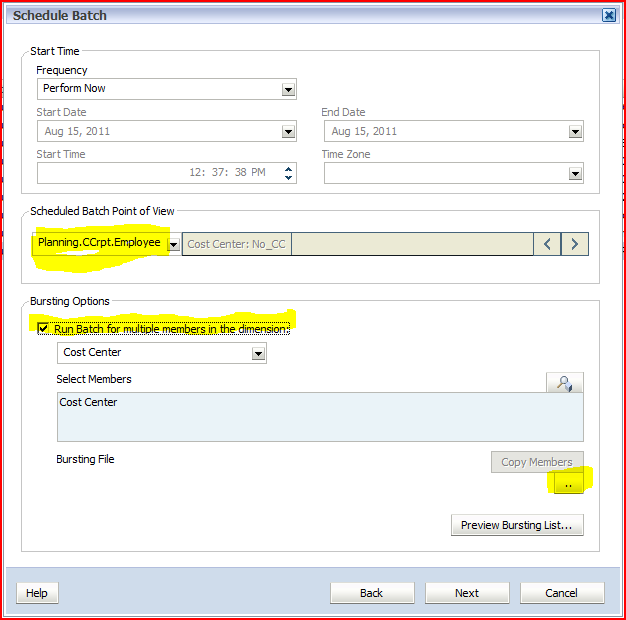
2) Select the burst file – this is the file just imported into Workspace.

3) You will see the comma delimited batch bursting file’s full path. Click on the “Copy Members” button to apply the values in the batch bursting file to the data source.

4) Once the Copy Members button has been clicked on, the members in the burst batch file will be shown in the Select Members text box. This comma delimited list of members can be modified by clicking on the magnifying glass.
5) Select the other data source and apply the members by clicking on the “Copy Members” button. It will look like the members are selected – this is not the case – never be afraid to click on that button.

6) Click on the Next button to continue defining the scheduled batch as defined above.
Conclusion
That was easy, wasn’t it? :)Okay, it wasn’t really hard at all, and it is pretty cool functionality. However, it took me FOREVER and a day to figure out how to do this and I had to reach out to multiple people (in fact an ex-client from my ex-consulting company. Hello! Lisa Abrewczynski and Rholanda Brooks) to get the answer. What, you think I figure all this stuff out by myself? If only. Oh wait, no one thinks that. Regardless, it was super nice that they both took time to help me out – I am obliged.
And that’s it! I hope you enjoyed this super short (hah! 25 pages in Word) guide to books, batches, and bursting.
10 comments:
Hi Cameron,
I followed your steps, and within Workspace it says the job ran successfully, but no emails were sent at all (even successful / unsuccessful). I'm guessing there is some email server provisioning to be done - could you point me to instructions for that? Also, if I want a book to email different users based on POV - so for example as it bursts through Markets, Store 1 POV sends email to Store 1 distro, Store 2 POV sends email to Store 2 distro, etc. Basically avoiding building out a separate report for each store. Is this possible? Thanks for the helpful post.
Hello Cameron,
This is really great. I have a quick question - I want to insert an image on "Table of Contents" page. So far, I have not seen that it can be done for FR. Do you have any work around for that? It would be great if you could share it..
Thanks,
Julian
Cameron,
Can you assist setting up the export directory in the FRConfig?
Thanks,
Dave
Hi ,
Thank you for the guidance. This was really helpful. I have one question regarding the batches, Can we run multiple batch jobs from the same cube at the same time.
Thanks,
Ramya
I run batches out of the same cube, but have found that it is better to stagger the batches as sometimes the cube will crash if too much is going on.
Lisa
Hi Cameron - In FinRpt Studio, when prompted for a member to run the report by...I want to choose multiple members & instead of combining the data for each member in 1 report, I need each member selected to have their own version of the report. HELP PLEASE :) Thanks! Lauren
Is it possible to have ToC as second item in the book? i.e. we want the below sequence in the report
1) Report a
2) Table Of Contents
3) Report b
4) Report 4....
and so on...
Is it possible. Please guide.
I have two questions with relation to FR Book.
1. In a Load Balanced Environment (four FR web Servers), when you launch the FR book, does it execut only on one server? or distribute among other FR web servers.
2. If a FR Book has 10 Reports in it, how does book run these 10 reports? in sequence or in Parallel.
3. Is there a long which capture the below information:
BOOKNAME: REPORT_NAME: SERVER_NAME: StartTIME: EndTime
Thanks
Cameron/All,
I have lost user member lists for FR reports and want to find where they are stored in the repository. I thought they would be in the V8_CONTAINER table, but I can't seem to find them. Can you please tell me if that is the correct table to look in and what the META_TYPE_UUID would be for a user member list. If you can reply to this post, I would really appreciate it.
Thanks,
T.
This article is really helpful. Thanks.
Post a Comment