Getting it onto your local machine
Still with me? You must be else you wouldn't be reading this. I think. Anyway, you’ve dutifully read part 1 of this two part series and converted an AWS EC2 instance to a VMWare Workstation (in my case, at least) instance. So now the question is – how oh how oh how do you get a BIG file off of the Cloud?This is not a hard step but it takes a long time because of the size of the files. Note that if you get rid of those media files or if you have a faster connection than my DSL line it isn’t quite so painful.
Compress it to make it fast(er)
Although I suppose you could do this without using the installed 7-Zip compression program, I can’t see why you would.Dan did a bunch of experiments with getting the best performance out of 7-Zip, and found that the Lzma2 method with 24bit word and 256mb block and 8 threads was the fastest options settings.
I am not going to show the individual steps for doing this – you can just take the defaults on the compression but it will take longer/be bigger/be slower on the download but I suggest trying Dan’s settings.
Downloading the compressed files
I’ve done this four different (What, you think I know all of this stuff before I write it down? If only. Nope, I have to blunder through the options until I get to the right answer.) ways:- Transferring the file(s) from the AWS instance to a FTP server and then download them (this got me a nastygram from my internet provider because of size and download threads which ate up the box for everyone – whoops, so firmly rejected on my part).
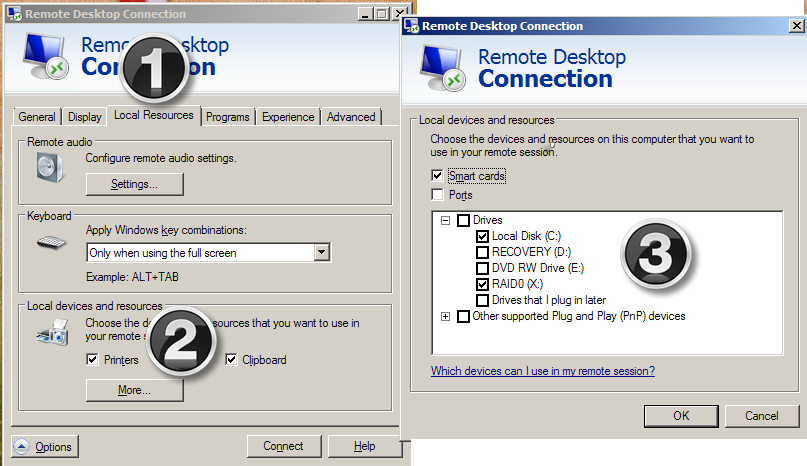
- Use Terminal Services to transfer the files. Just follow the three steps below in the TS client. You must set this before you connect to your instance. Your local drives will then look like mapped drives from AWS.
- Setting up an FTP server on your AWS instance and downloading from there. Note that you will need to open up the default port of 21 in your AWS Security Group/firewall.
- Use AWS’ S3 – This is the way I did it. It’s a little confusing at first, but Cloudberry Explorer makes it dead simple.
Using Simple Storage Service (S3)
Given the other three (two really, I would avoid the first approach of sending the file (or files if you split them up) to an external ftp source) approaches, why use S3?I used 7-Zip to both compress the VMWare files and to split it up into DVD sized (4.7 gigabyte) files. I have had (Oracle e-delivery is where I’ve experienced this before) issues with my wonderful (can you tell it annoys me?) DSL connection. What happens is that the files get downloaded, look like they’re valid, but in fact are corrupt.
S3 allows me to redownload parts of my VM that fail. It’s a pain to do that, and slow, and it costs (S3 charges you for downloads – pray that you have a better internet connection than me) but it is better than downloading everything over and over again. Also, it gives me (and you, too) a chance to learn a new technology. I should mention that John Booth mentioned S3 as an approach – as always, he has some really great ideas and I am at least smart enough to listen to them. :)
I am not going to provide a detailed tutorial on S3 but suggest that you read here. I essentially treat S3 as a super easy to set up FTP Cloud server that does not require me to configure the AWS instance’s IIS settings. Note that most Cloud-based services such as OpenDrive or Box limit the size of uploaded files. My provider, OpenDrive, has a file limit of 100 megabytes per file, so with my 4.7 gigabyte files, I really had to come up with another approach.
If you are interested in other tools other than Cloudberry, have a read of this thread.
If you are interested in using Cloudberry, read this very nice tutorial.
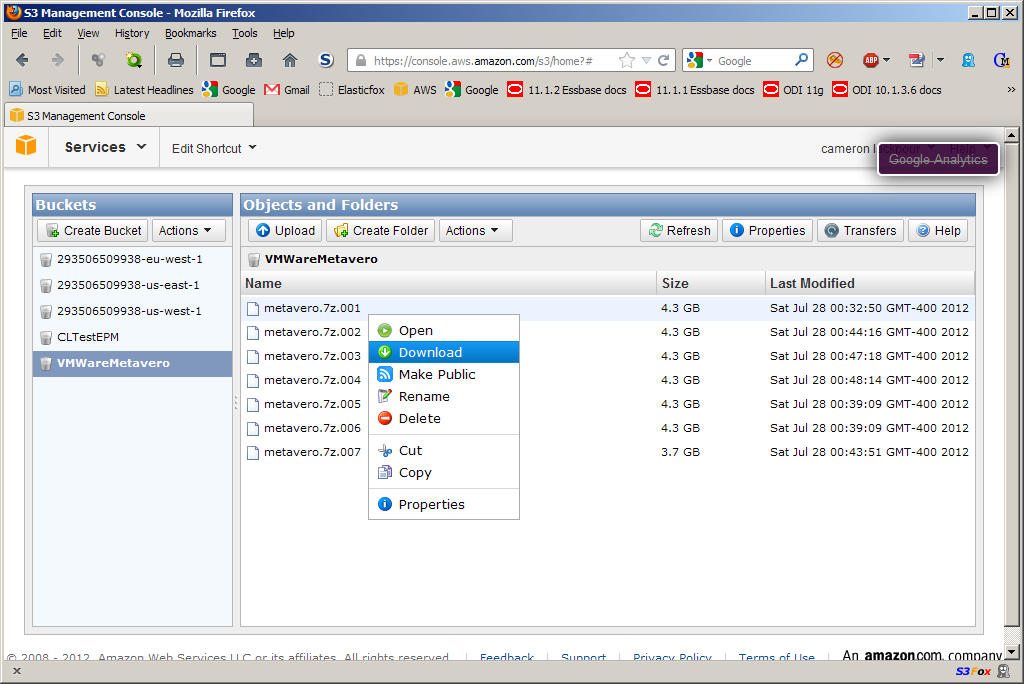
NB – You can also use the AWS console’s S3 component to move the data around – that’s what Dan did. It is as simple as opening up the AWS console on your AWS instance (sort of like a mirror facing a mirror) and then right clicking inside your bucket like the below:

I did the same thing via Cloudberry to a S3 bucket I called VMWareMetavero.
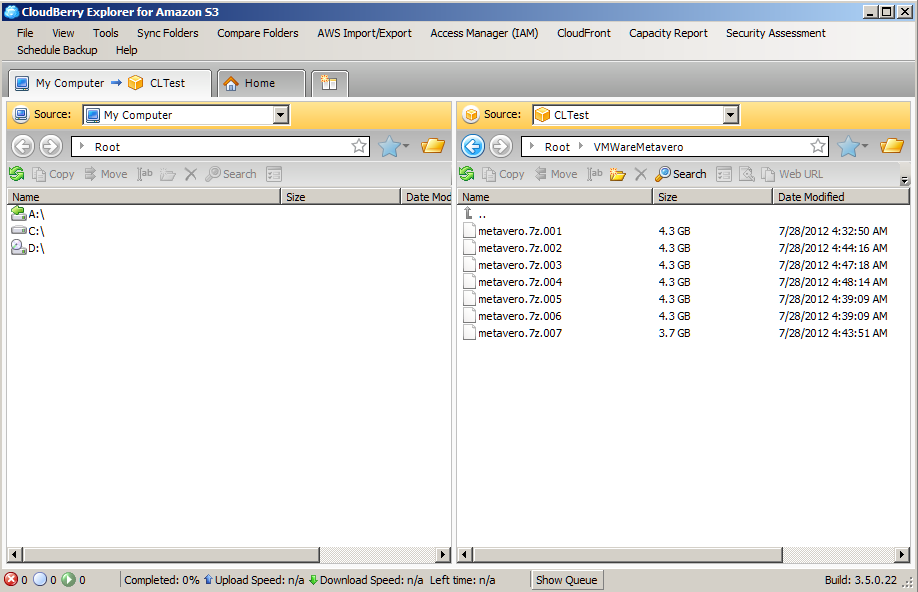
To get it onto my laptop, I installed Cloudberry again and then downloaded it to my external hard drive.
Alternatively, I could have just gone into S3 via the AWS console and done this:
Cloudberry made it a little less painful so I went that way.
That’s it.
Unzipping the files (or even combining them)
Once you have the download to the Ground completed, 7-Zip needs to be installed on your laptop if not already done. And once that is done, decompress. Again, this takes a while.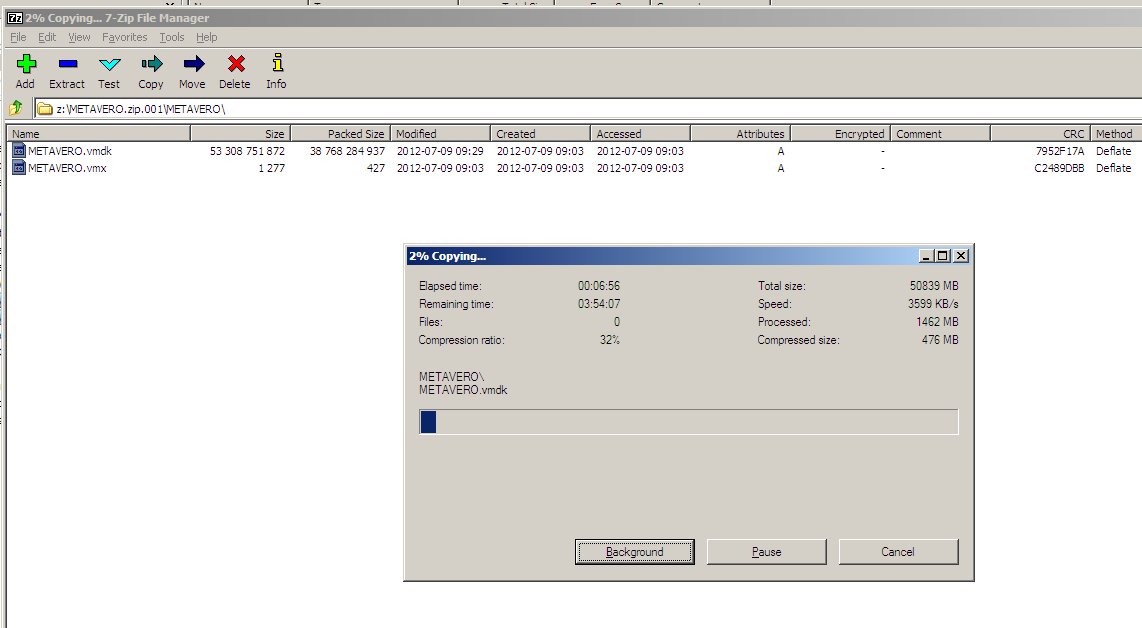
Avoiding the Blue Screen of Death (BSOD)
At this point you have:- Removed the media files from c:\media unless you really, really, really want them. You might, but probably not.
- Converted the 11.1.2.2 AMI to a VM Workstation VM
- Compressed that VM on a using 7-Zip’s Lzma2 method with 24bit word and 256mb block and 8 threads.
- Downloaded that through S3 (or whatever method you prefer but that’s the easiest) to your laptop
So you’re all ready to go, right? Uh, no, because here’s what happens when you try to fire up that VM in Workstation. Auuuuuuuuugggggggghhhhhhhh!!!!!!!!!! It’s the Blue Screen of Death!!!!!!!!!!!
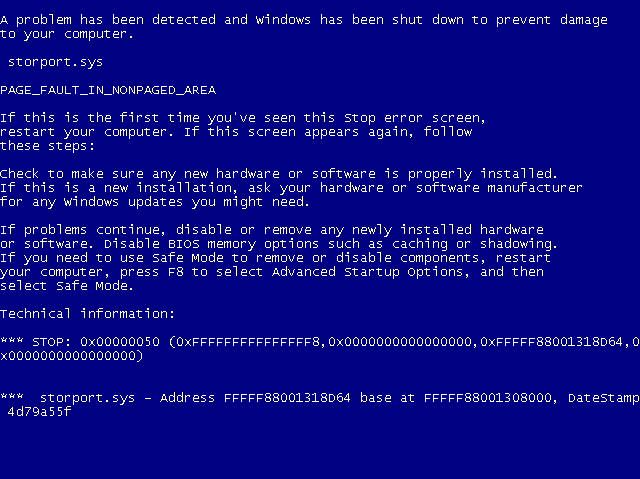
And not just the BSOD, but a BSOD that will immediately reboot Windows so that you have a lovely endless loop of BSODs. Fun times, fun times.
At least it’s fast – it took me about five tries (so we are talking 30 minutes of reboots) to get that screenshot with Snagit. It will flash very, very, very quickly on your screen. Is there a cure? You betcha.
The cure for the Blues
If you want it all in one succinct (but not terribly well explained or at least I couldn’t follow the directions until I did it three times) thread, read this on the VMware support forum. I’m going to show it to you step by step and will make it a tiny bit less painful.Just to be completely up front, I am taking everything I read in that thread and putting pictures to it – the brains behind figuring this out belong solely to ivivanov and leonardw who figured all of this out.
The issue is the RedHat SCSI Bus Driver (really all of the Red Hat services, all of which start with “rhel”) despite the storport.sys message in the BSOD. Who would believe that an error message is misleading or doesn’t give all of the information you need? Why I would, and so should you. The RedHat services are part of the EC2 Amazon offering and simply don’t work (why I know not as I am no hardware expert, but I can certainly attest to their super-duper not working). It blows up Windows 2008 R2 on VMWare real good.
Richard Philipson tried out part 1 and pointed out (yep, some people actually read this blog, thankfully otherwise this is the most involved echo chamber ever) that the ec2config service is superfluous (and causes a wallpaper error on startup) and that those RedHat services are “a set of drivers to permit access to the Xen virtualized hardware presented by Amazon EC2 to the guest operating system.” It makes sense that without Xen under the covers, there is no Xen virtualized hardware.
NB -- There is a separate intermittent error in VMWare if you have more than two cores to your laptop. If you are on a machine with more than two cores, you may get a multiple processor error (a different BSOD). If that is the case, you should set the number of processors to 1 and the number of cores to 2 in VMWare.
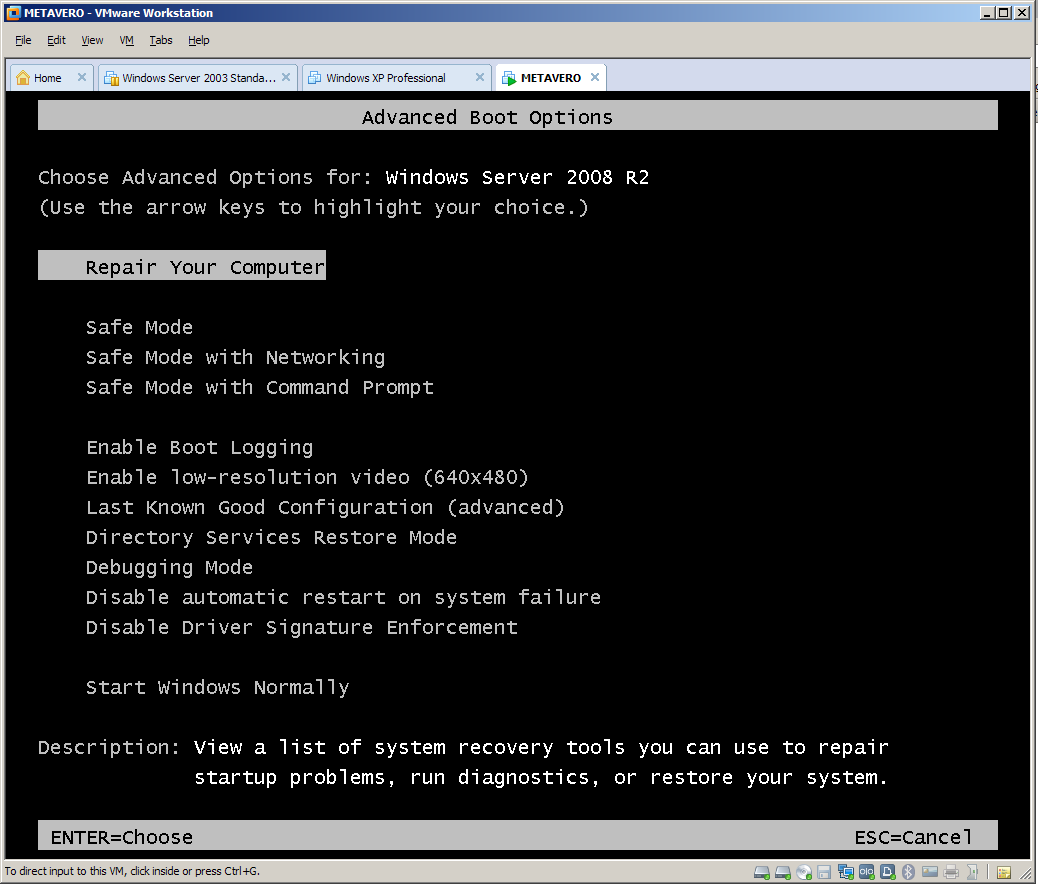
Step 1 – Getting into Boot Options
Open up your nifty new VM in VMWorkstation and start it.As it starts up hover your mouse over the VMWorkstation window and press Ctrl+G. You need the VM to get control of the keyboard/mouse as you are going to be holding down the F8 key. If your Windows host has control, F8 will toggle a selector bar in the VMWorkstation application and you will not be able to get into Advanced Boot Options. It’s a total Pain In The You Know What.
No worries if you don’t get it the first time as the Metavero VM will crash very quickly indeed. :)
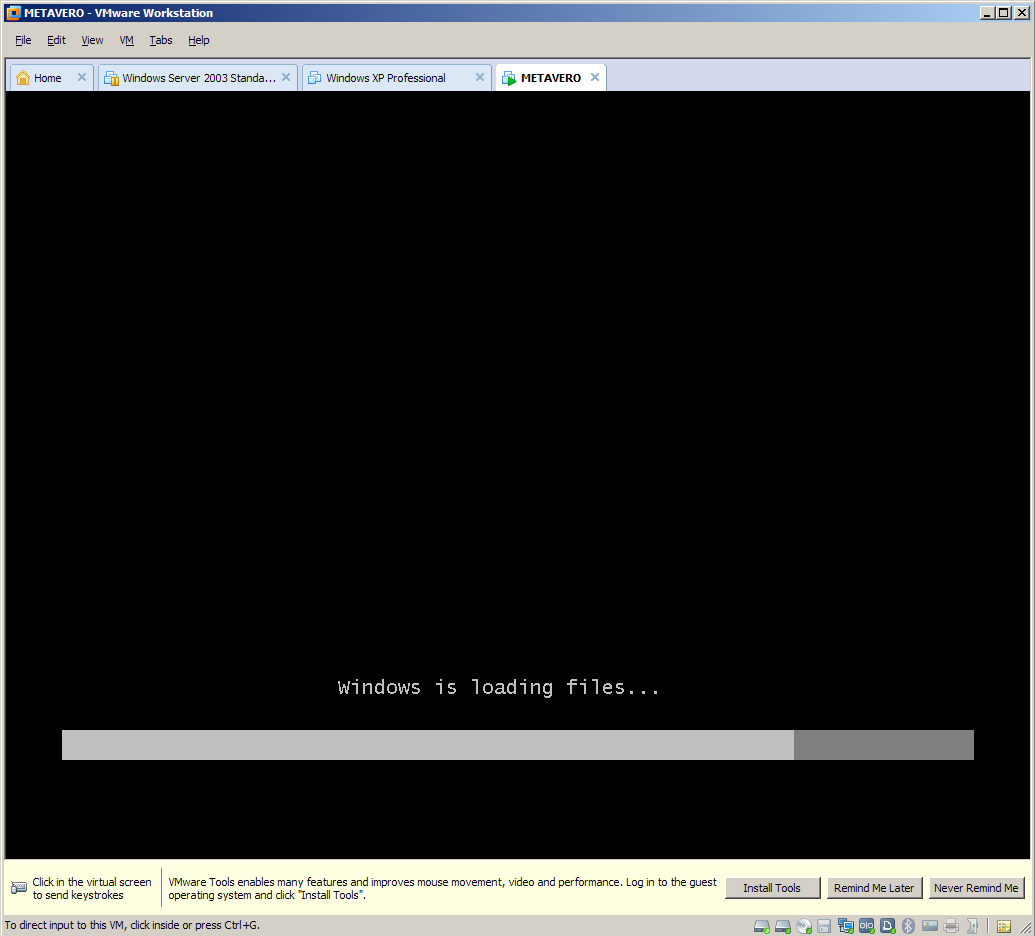
A VMWorkstation bar will pop up telling you to install VMWare Tools. Ignore that for now but you will need to install this.
Step 2 – Go through the System Recover Options
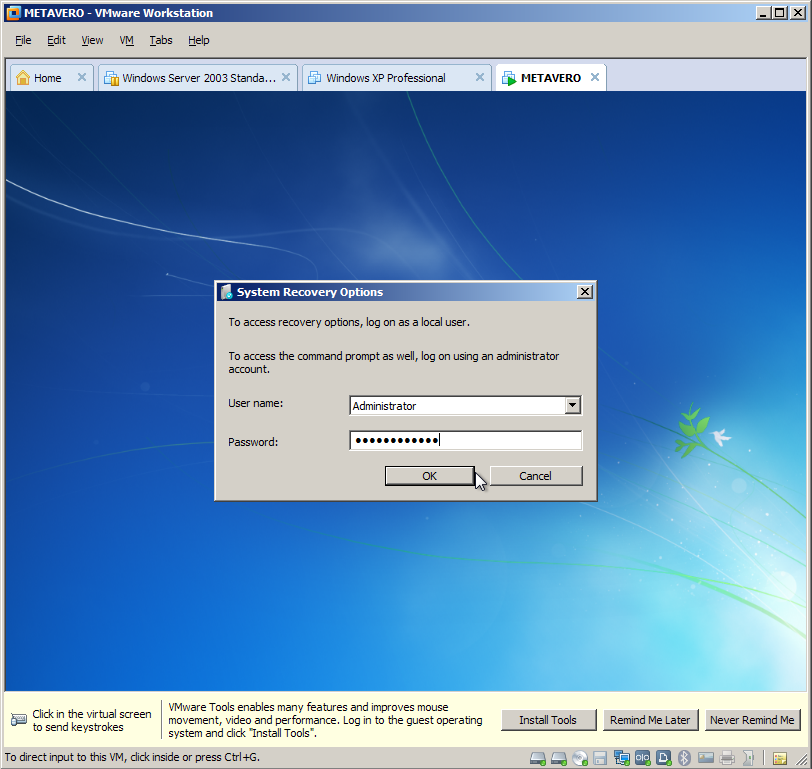
First select a keyboard.
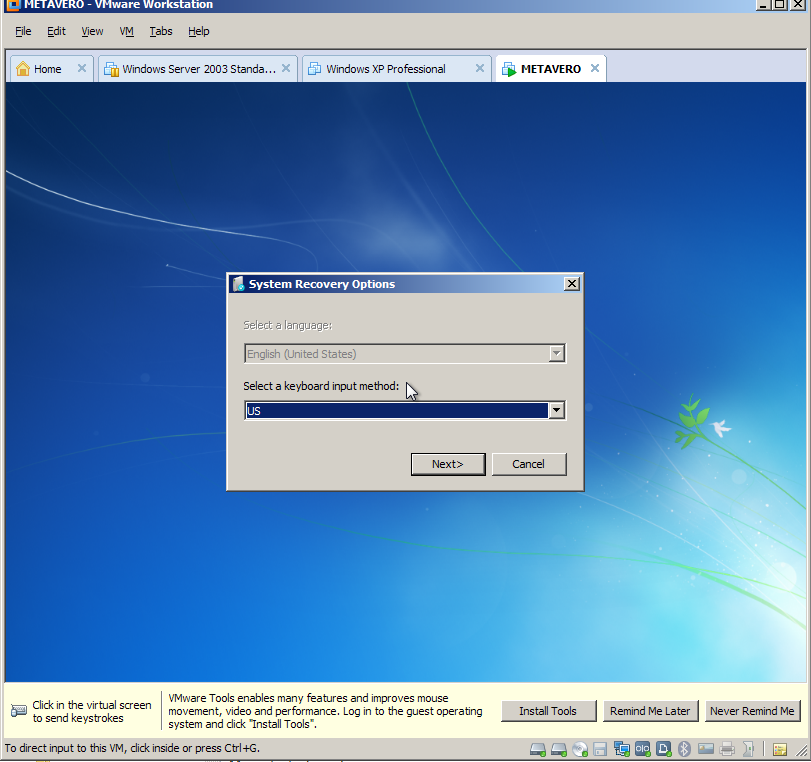
Then log in. The cool thing is this is just like the AMI – username Administrator, password epmtestdrive.
Step 2 – Run a Command Prompt and then Regedit
Select Command Prompt.
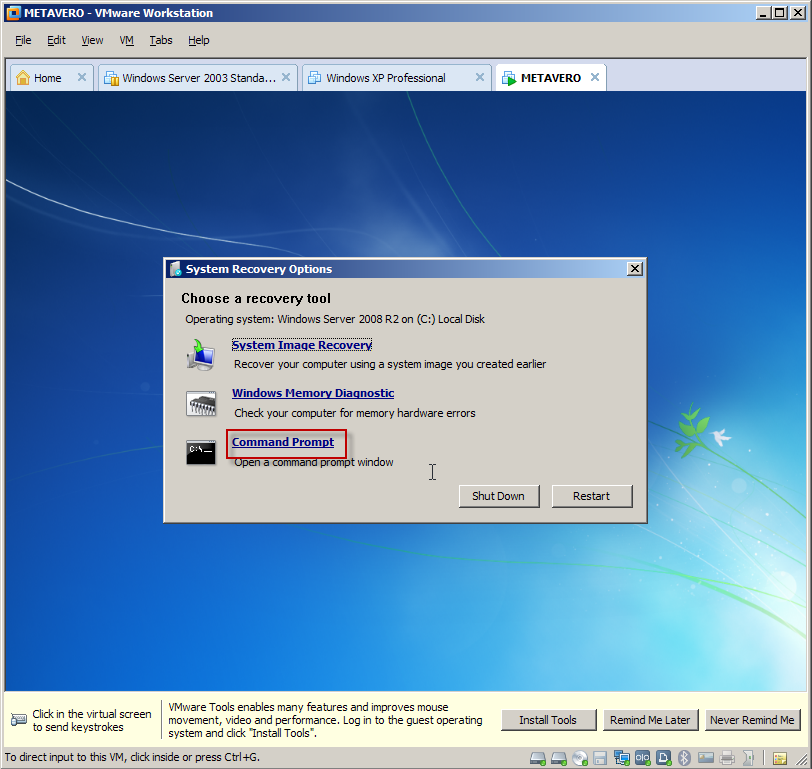
You will then run Regedit from x:\windows\system32.
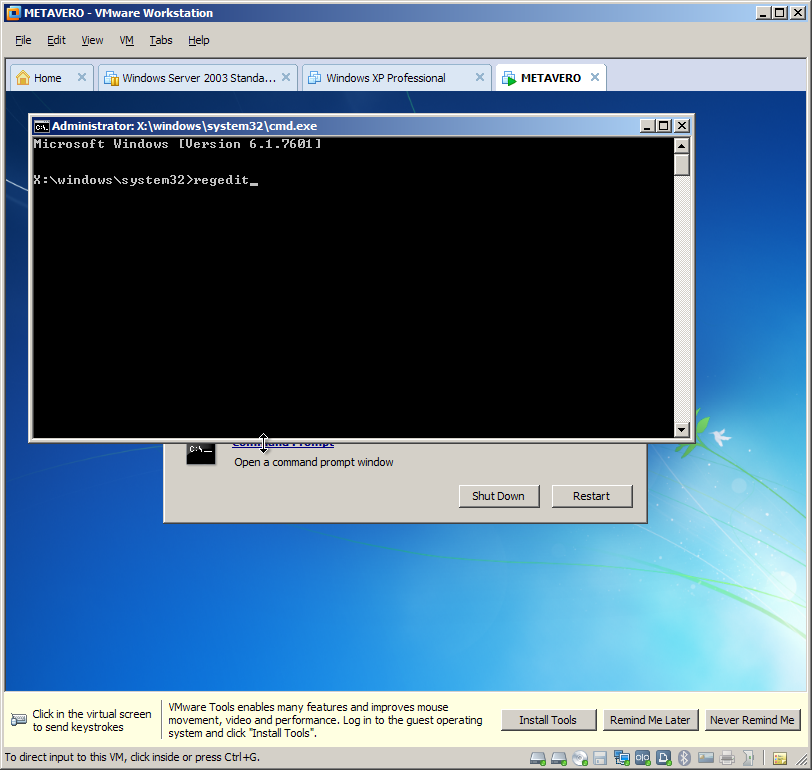
Here it is:
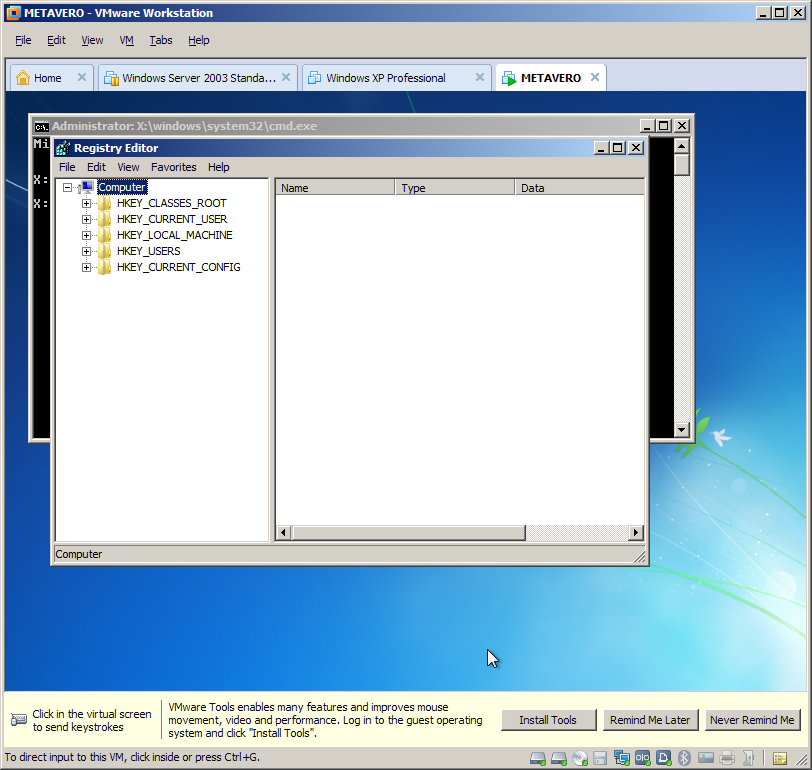
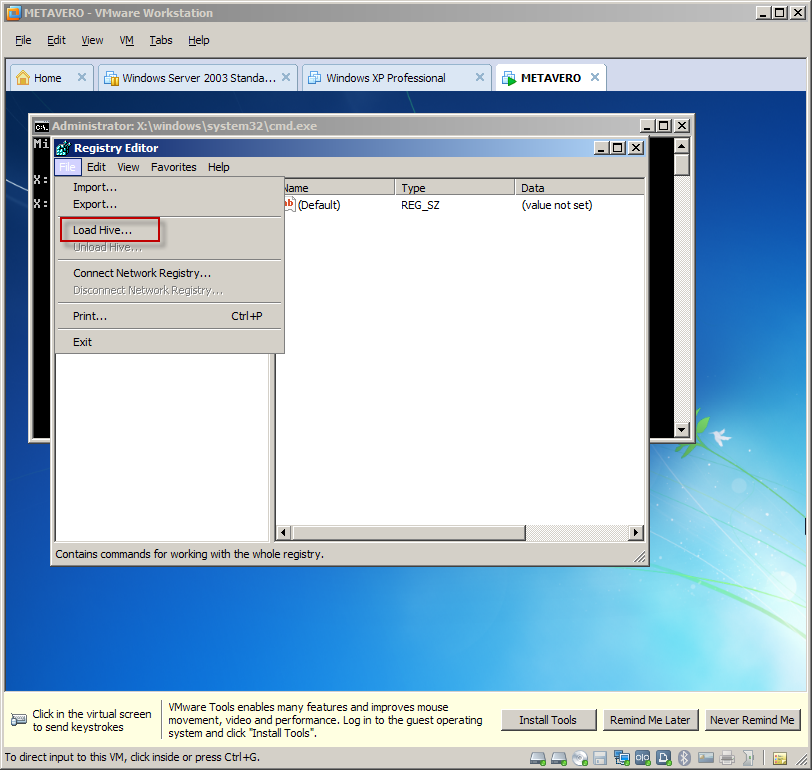
Click on HKEY_LOCAL_MACHINE and then File->Load Hive.
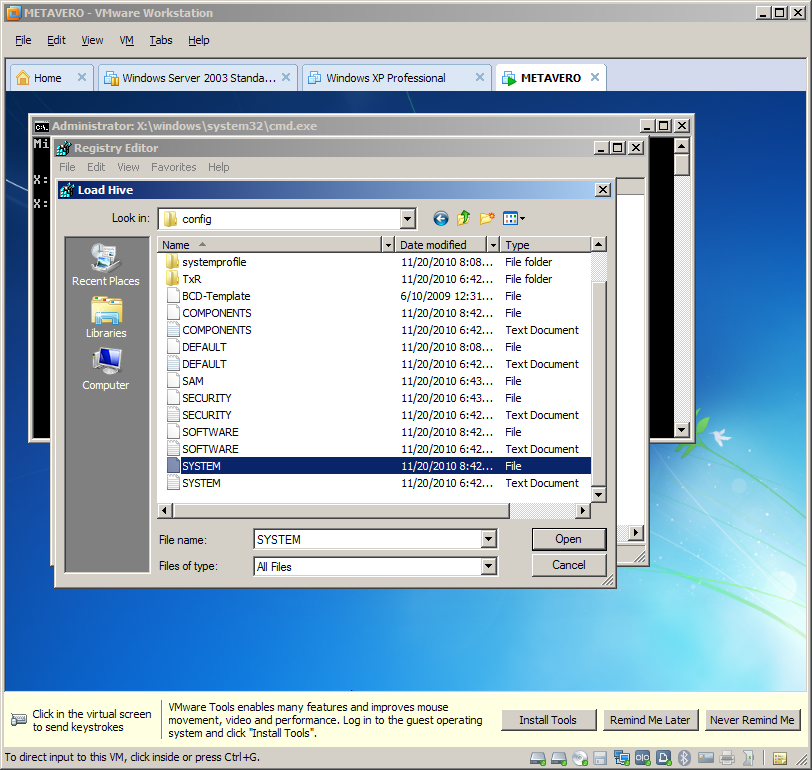
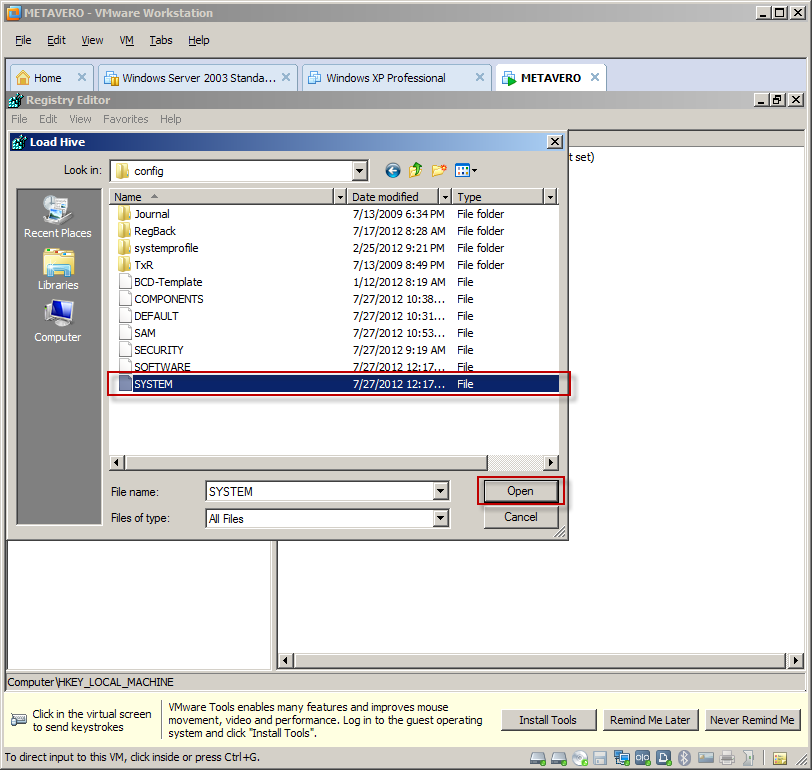
Navigate to c:\windows\system32\config and select the SYSTEM file and click on Open.
NB – This must be on the C: drive, not the X (that’s the repair drive). Here’s what x:\windows\system32\config looks like. Note the two SYSTEM files. You do NOT want this as it does not contain the services.
What you do want to see is this and it’s only available off of the C drive:
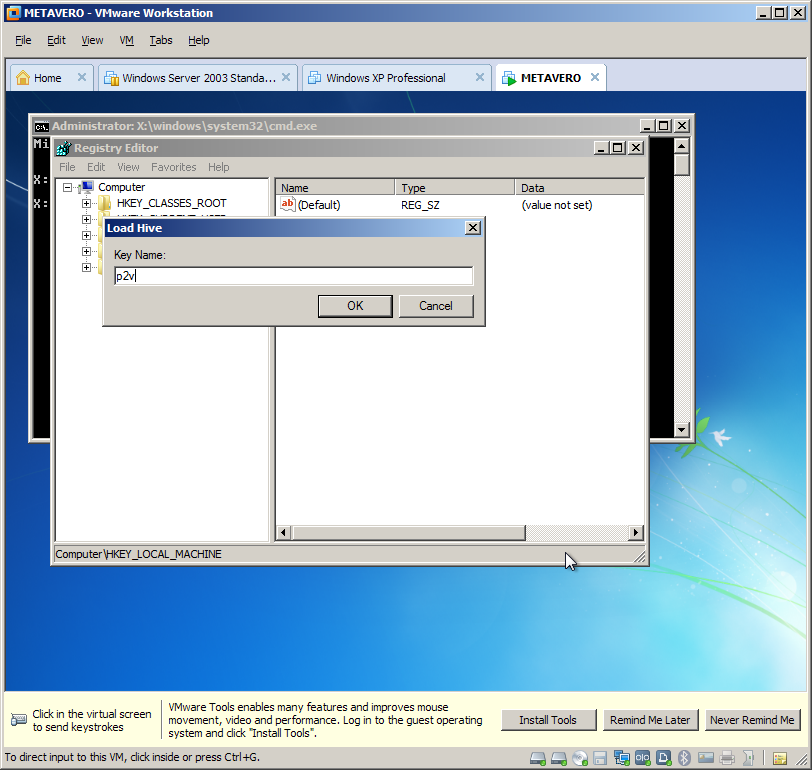
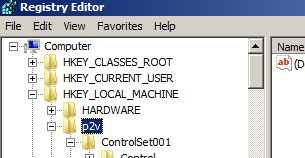
Type in “p2v” into the Key Name field and click OK.
Navigate to HKEY_LOCAL_MACHINE\p2v\ControlSet001\services.
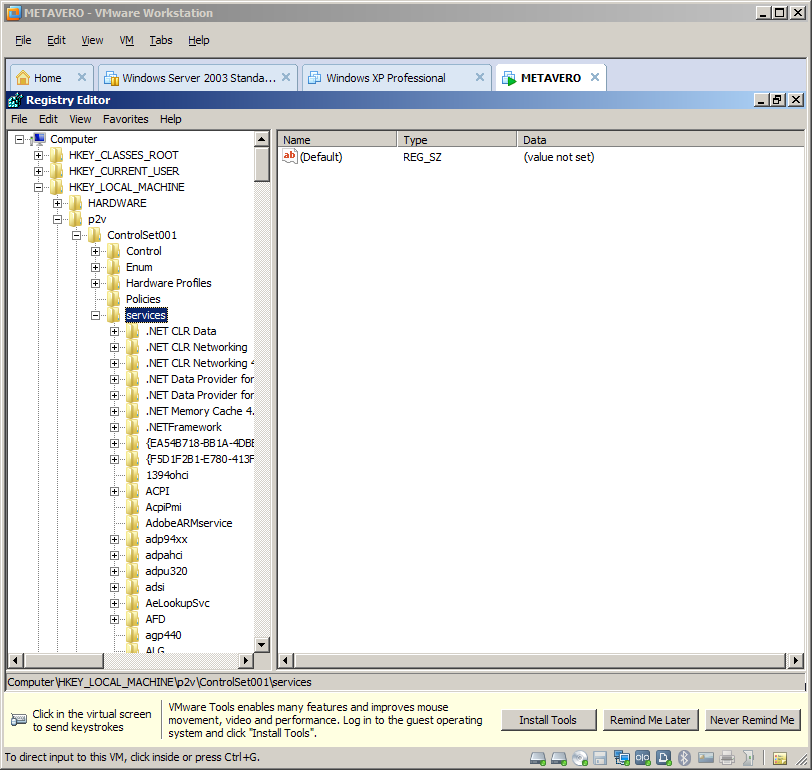
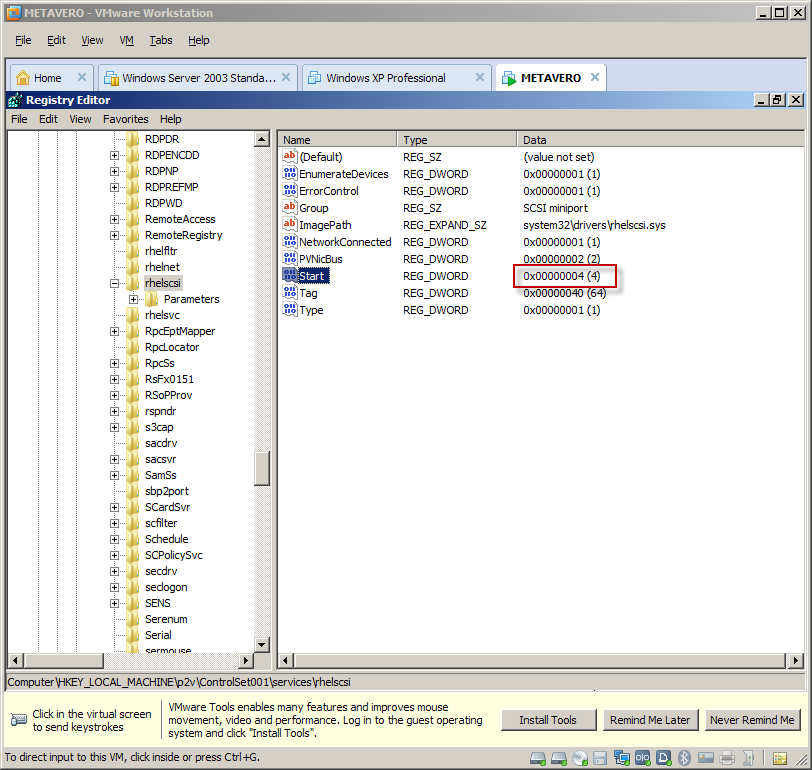
For each of the rhelfltr, rhelnet, rhelscsi, amd rhelsvc services, click on the service in question and select the Start parameter.

In the below screenshot I have selected rhelscsi. Note that there is some discussion on that VMWare thread that only rhelscsi needs to be disabled. I’ve tried that and sometimes it works and sometimes it doesn’t. Mu suggestion is to disable all four.
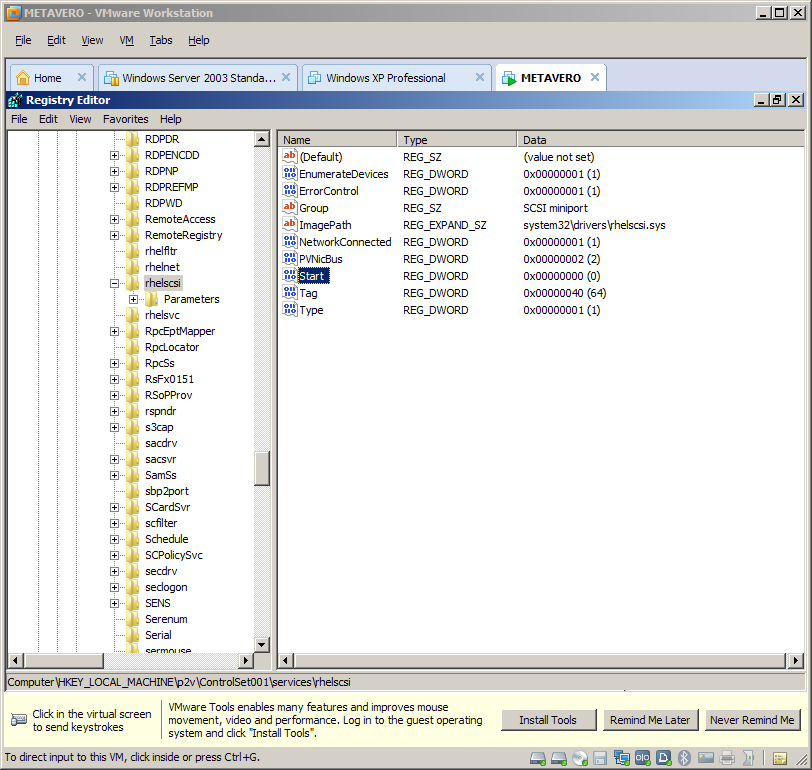
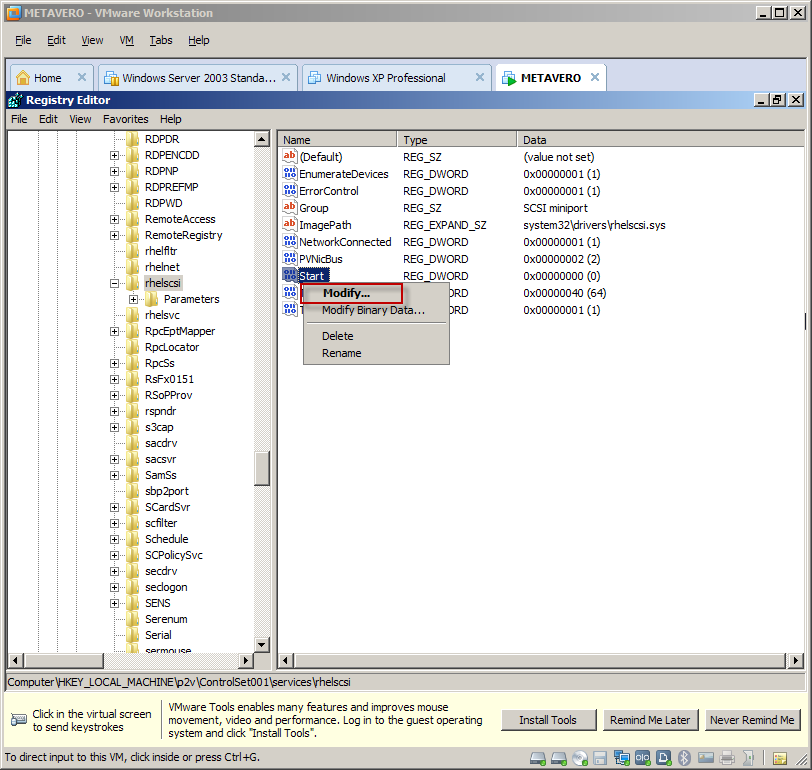
Right click on Start, select Modify, and change the value from 0 (or whatever) to 4 which disables the service.
From this:
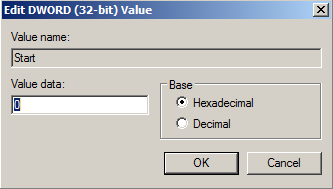
To this and click OK:
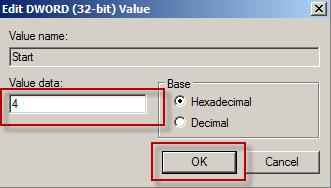
Note the value of 4:
Do it again for rhelfltr, rhelnet, and rhelsvc. All of these services need to be stopped.
With all four services disabled, select the key again.
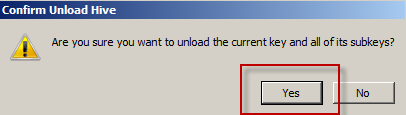
Then select Unload Hive.
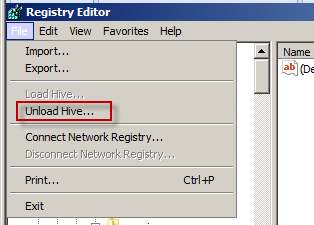
Select Yes in the confirmation dialog box.
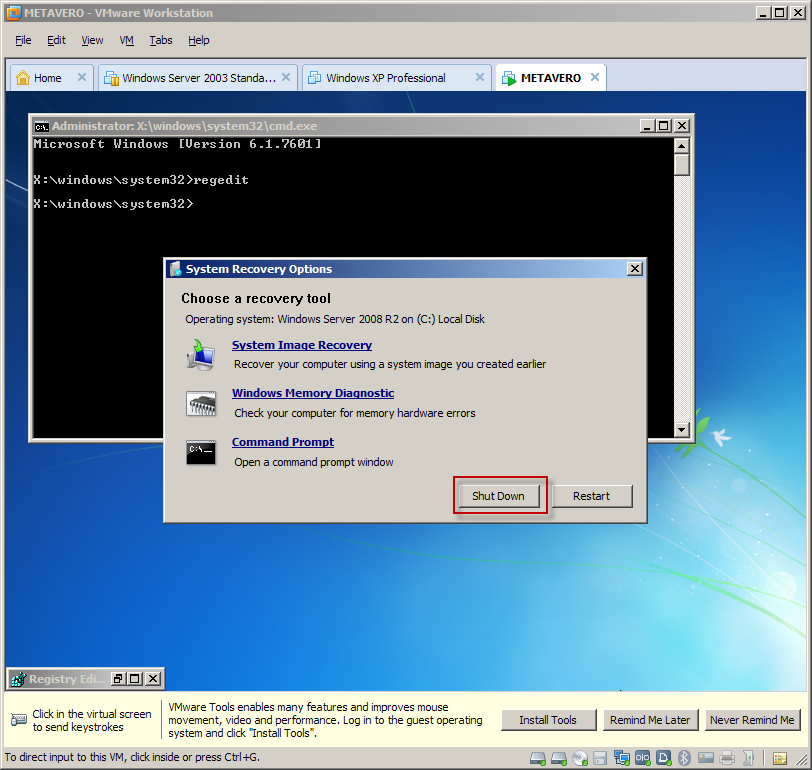
Minimize Regedit, and then select Shut Down. You will then restart the VM.
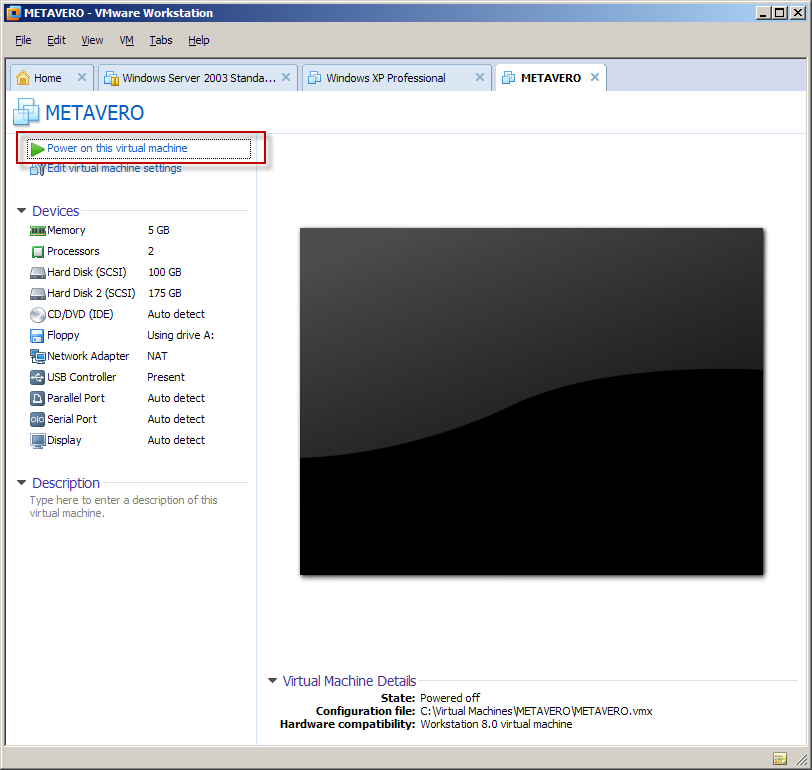
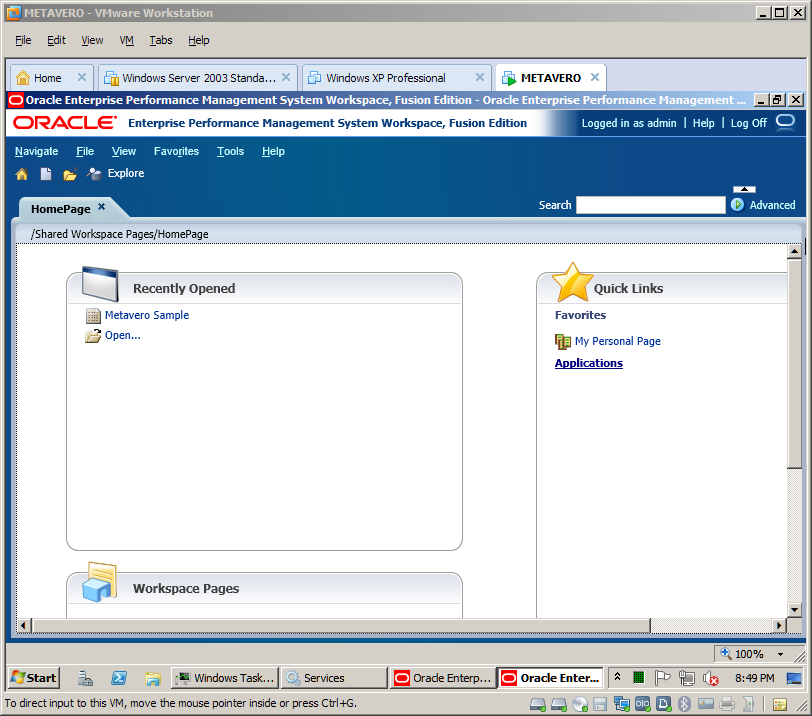
Start the Metavero (that’s what I named it) VM back up.
Ta da, you are now running (and not BSODing) Windows 2008 R2:
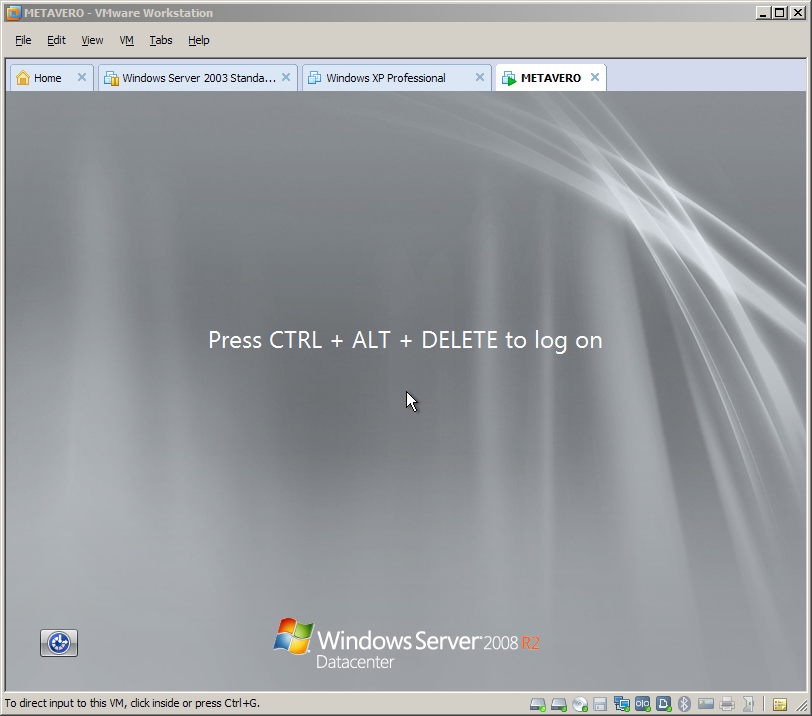
In VMWorkstation, VM->Send Ctrl+Alt+Del to get the login.
NB – You can also hit Ctrl+Alt+Insert to get the same thing.

And there you are:

And finally (at least on my laptop, there is a fair amount of time before this all boots up):
Don’t forget to activate Windows
You have three days to apply that valid key for Windows 2008 R2 Datacenter.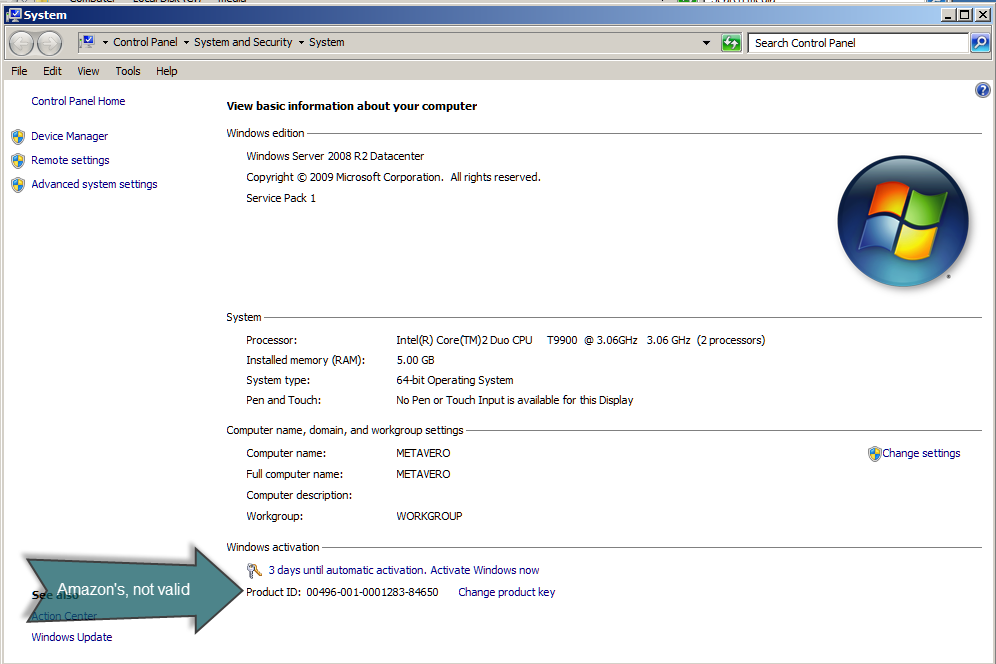
No, I am not going to give you a valid license key. But I have given you a lot of ways to get one, all of them legal.
Interestingly, Microsoft Action Pack (to which both Dan and I belong) does not support 2008 R2 Datacenter (bummer for those of us with a MAPS subscription), but with MAPS you get TechNet (after signing up for it), which does allow you to sign up for Technet for free, and then one can get a valid 2008 R2 Datacenter key. Whew. Thanks to Dan for figuring this out as it was not exactly straightforward.
If you are on the fence between MAPS and Technet, note that Technet Professional only costs $349 for the first year but MAPS (you do have to qualify as a partner) gives mulitple internal use licenses. You decide.
So what do we have?
Well, in the case both the case of Dan and me, slightly different outcomes.In Dan’s environment, running on a 24 gigabyte laptop, he has a pretty awesome EPM installation.
In my world, running on an 8 gigbyte laptop, I pretty much have an unusable EPM installation because my host laptop simply doesn’t have enough horsepower. Although I do have a nice blog post. :)
Based on our tests, you simply must have a 16 gigabyte laptop to make this work acceptably.
What’s the right choice – the Cloud or the Ground?
As I wrote above, if you don’t have a multiprocessor, 16+ gigabyte laptop, with plenty of disk space, you can pretty much forget this approach. A valid Windows 2008 R2 Datacenter key would be nice as well.Assuming that you do have the above, is the Ground worth it? I think the answer, despite the pain, effort, and time (I’m pretty sure this must be a world record for me for the length of a single blog post) is, “Yes, absolutely!”
You get a professionally installed EPM instance that is right there on your laptop/PC without the AWS charges. That’s pretty cool. And you (and Dan and I) got to perform, and learn, a whole bunch of tools that are pretty darn useful. All I can say is that I will be getting a Dell Precision 4600 or 4700 in the near future. That’s putting money where my mouth is.
I hope you enjoyed the multiple hacks.
And a big thanks to Dan Pressman and Richard Philipson for helping out with this monster of a post.
3 comments:
Thanks for the writeup, Cameron. Just to note, I had issues trying to us the VM Player with the image (64 bit problem). I ended up using VirtualBox as my virtual host (using the .vmdk created using the conversion software), and except for some initial setup problems related to the default VirtualBox settings, my migrated environment seems to be working fine. Just mentioning this for those that don't have VM Workstation. --Matt
Matt,
Did you have the same BSOD issues? I am guessing that the issue is those Xen drivers but I wondered if somehow VirtualBox handled it better.
Whoops, one other question -- did you by any chance notice if you could get away with less memory with VBox? I am just trying to *not* buy a new laptop although I know in my heart of hearts that I will end up making Dell that little bit richer.
Thanks,
Cameron Lackpour
P.S. I'm glad you liked it -- it was really painful/it took forever to put together.
I must confess, my company laptop has 16 gigs o' ram, so it is pretty robust. I've set the virtual up to use about 10 gigs or so and 2 processors. Works surprisingly well so far (and I can still do other things on my laptop at the same time), though mostly I've been self flagellating with some EPMA stuff I'm testing . That is to say, I haven't really stressed the virtual yet.
I did initially get the BSOD. I installed the virtual image to my computer last week so I unfortunately didn't get to take advantage of your 'Part 2' wisdom regarding the migration. I ended up, after trial and error, just disabling the rhelscsi--disabling the other rhel*'s caused errors.
For VirtualBox, the default settings for pointing to the vdmk is to set the storage to be a sata controller. I had to remove that and set the vmdk to go on the IDE Controller. Works like a charm. Took a while to get those kinks worked out, but hey, that's part of the fun, right?
--Matt Halso
Post a Comment